Azure Infrastructure Deployment with Terraform (IaC) and automated with Azure DevOps
At this tutorial we’ll build an automated pipeline that allows to create infrastructure in Azure cloud using IaC concept with tools such as Terraform and Azure DevOps.
We will be able to create a PaaS Azure Resource called App Service. This Azure resource allows to deploy a web app, for this sample a .net web app.
For this tutorial you can use the files from this repo, you can fork it to your account if you want. Within those files is a folder called Terraform and a file called appService.tf that contains infrastructure’s definition that will be deployed on Azure. The file contains the definition for the following Azure resources:
- Resource Group
- App Service Plan
- App Service
Each resource has its required configurations such as the name and other parameters. If you use the terraform file from this repo you should change the name for your App Service resource since this should be a unique name within azure cloud.
Requirements
- Install Azure CLI (if you want to test from your computer)
- Install Terraform (if you want to test from your computer)
- Create an Azure account.
- Create an Azure DevOps account.
To be honest with you for this tutorial you don’t even need Azure cli or Terraform installed on your machine since Azure DevOps will do the magic.
Create Azure DevOps Project
If you already have an account you can skip this section. In order to create an Azure Pipeline you must create your Azure DevOps project that will contain the automated pipelines that deploy the infraestructure to the cloud.
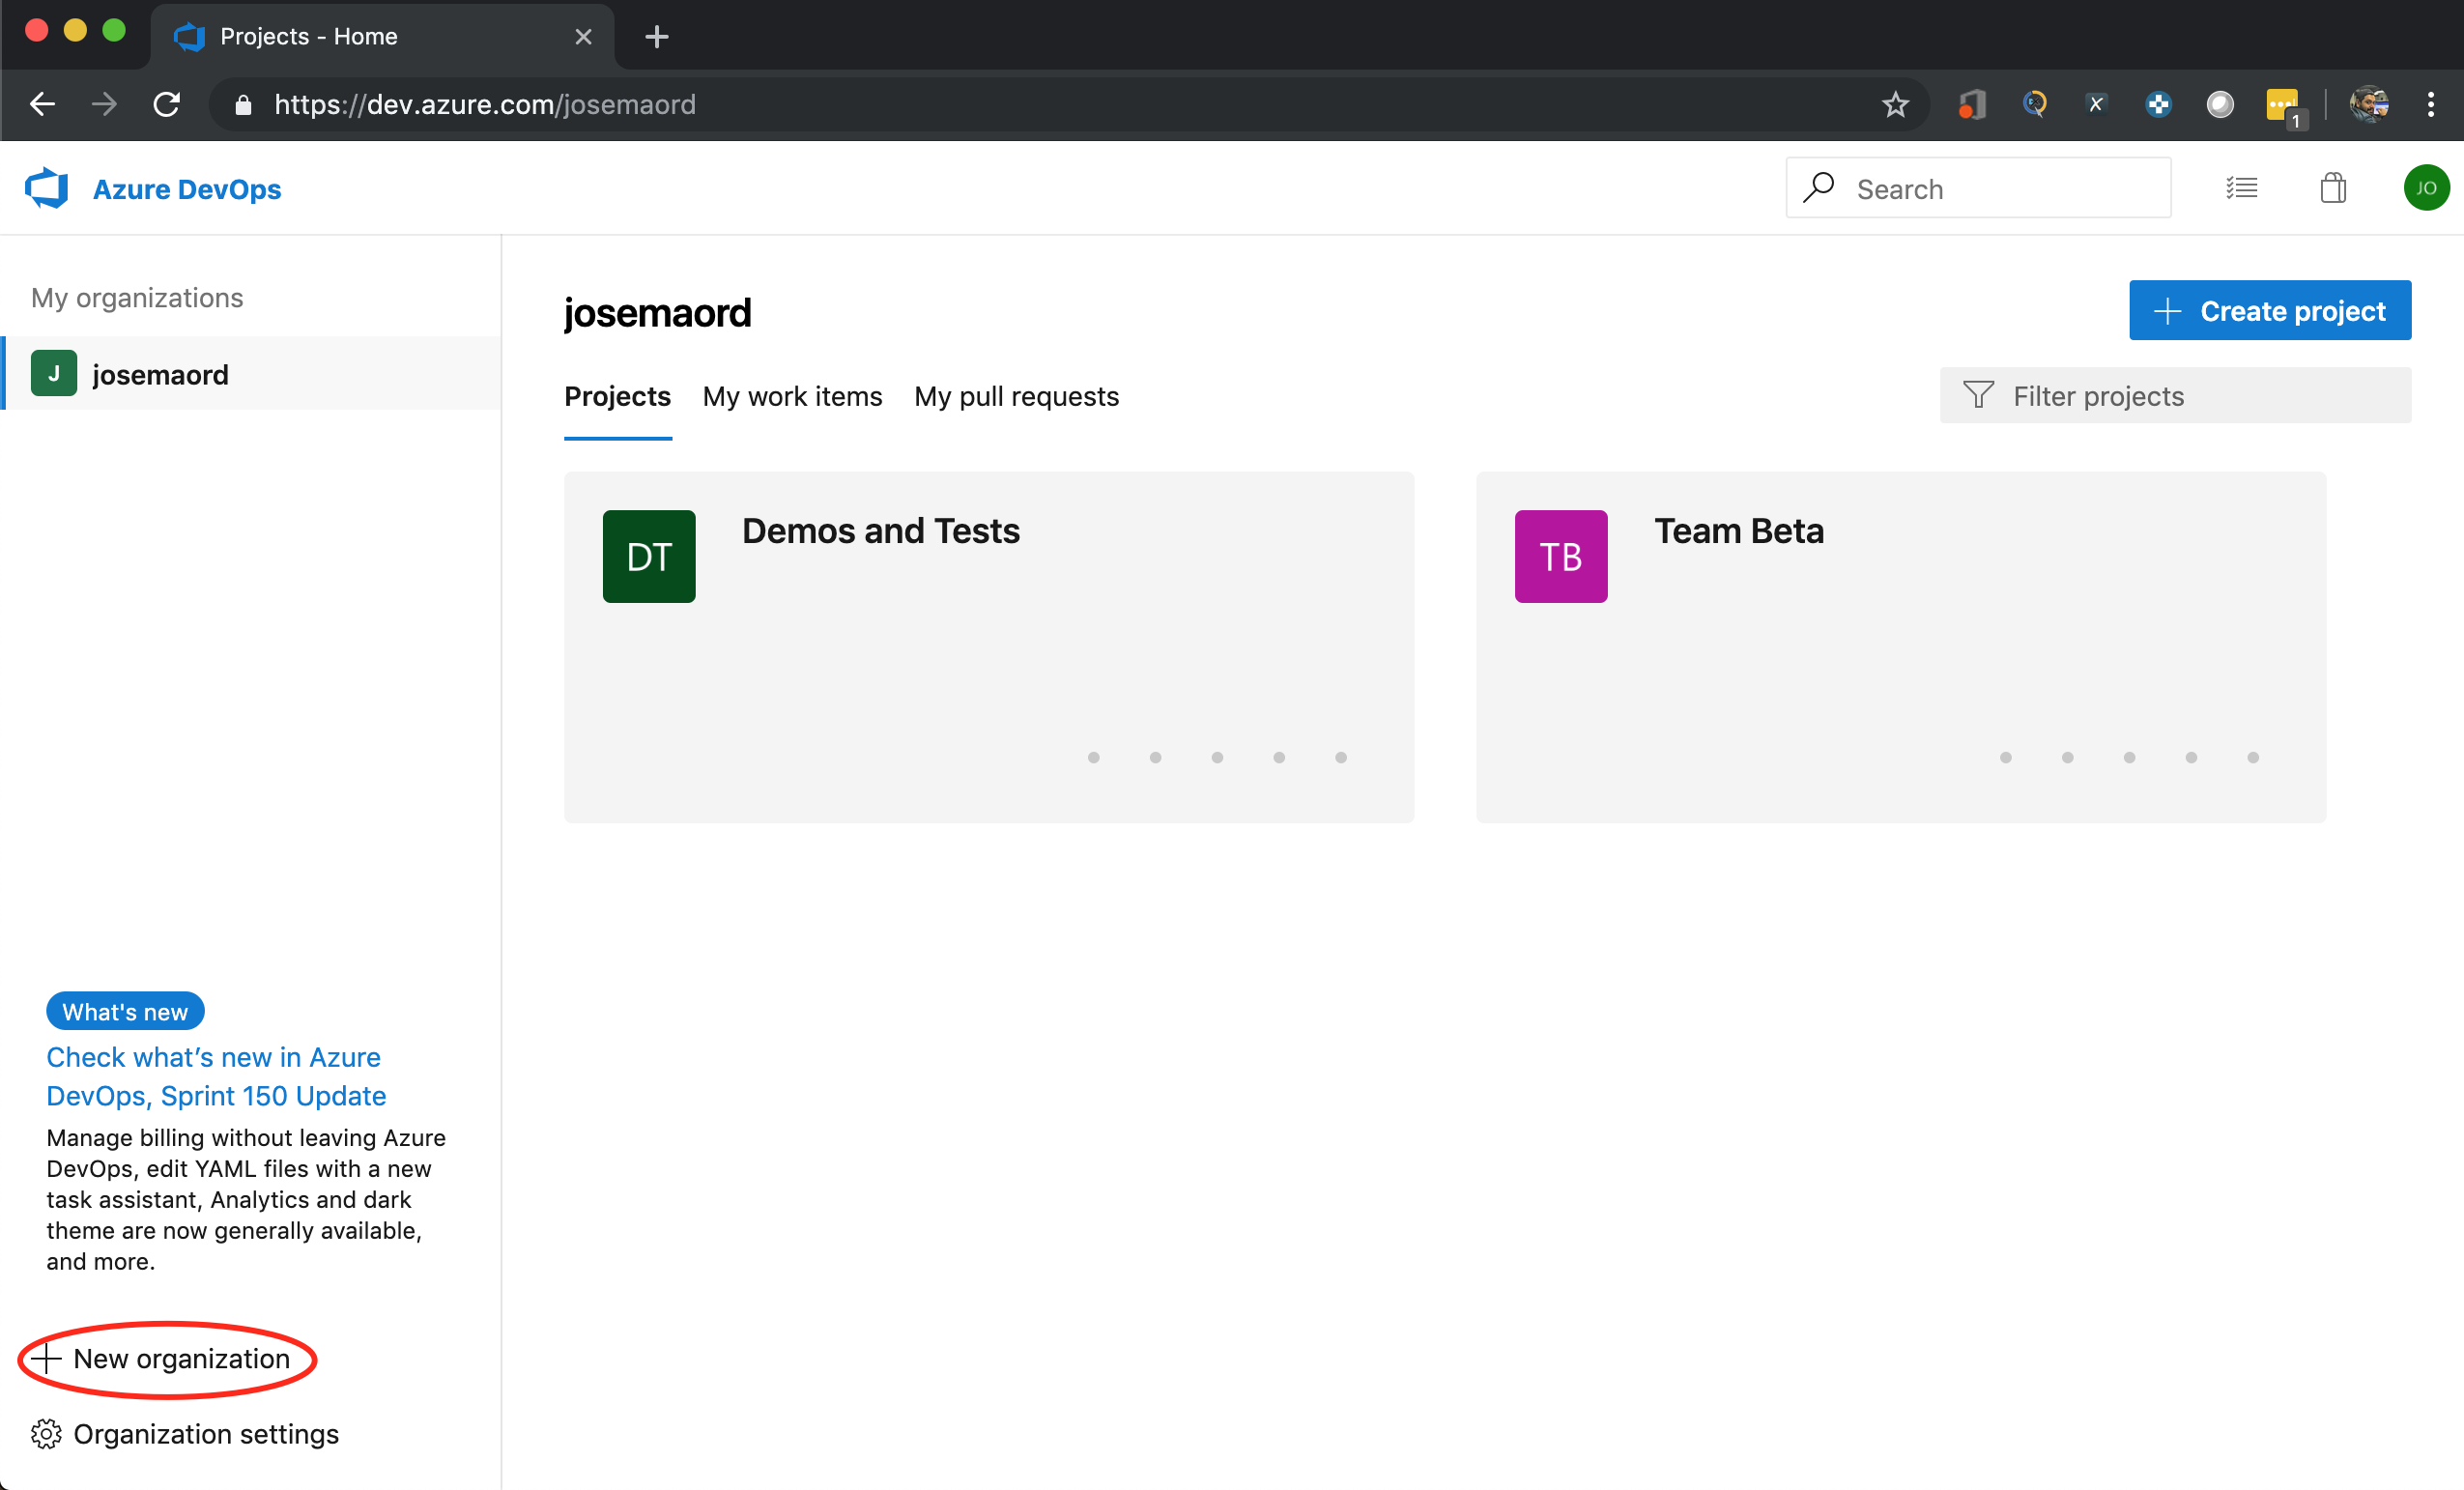
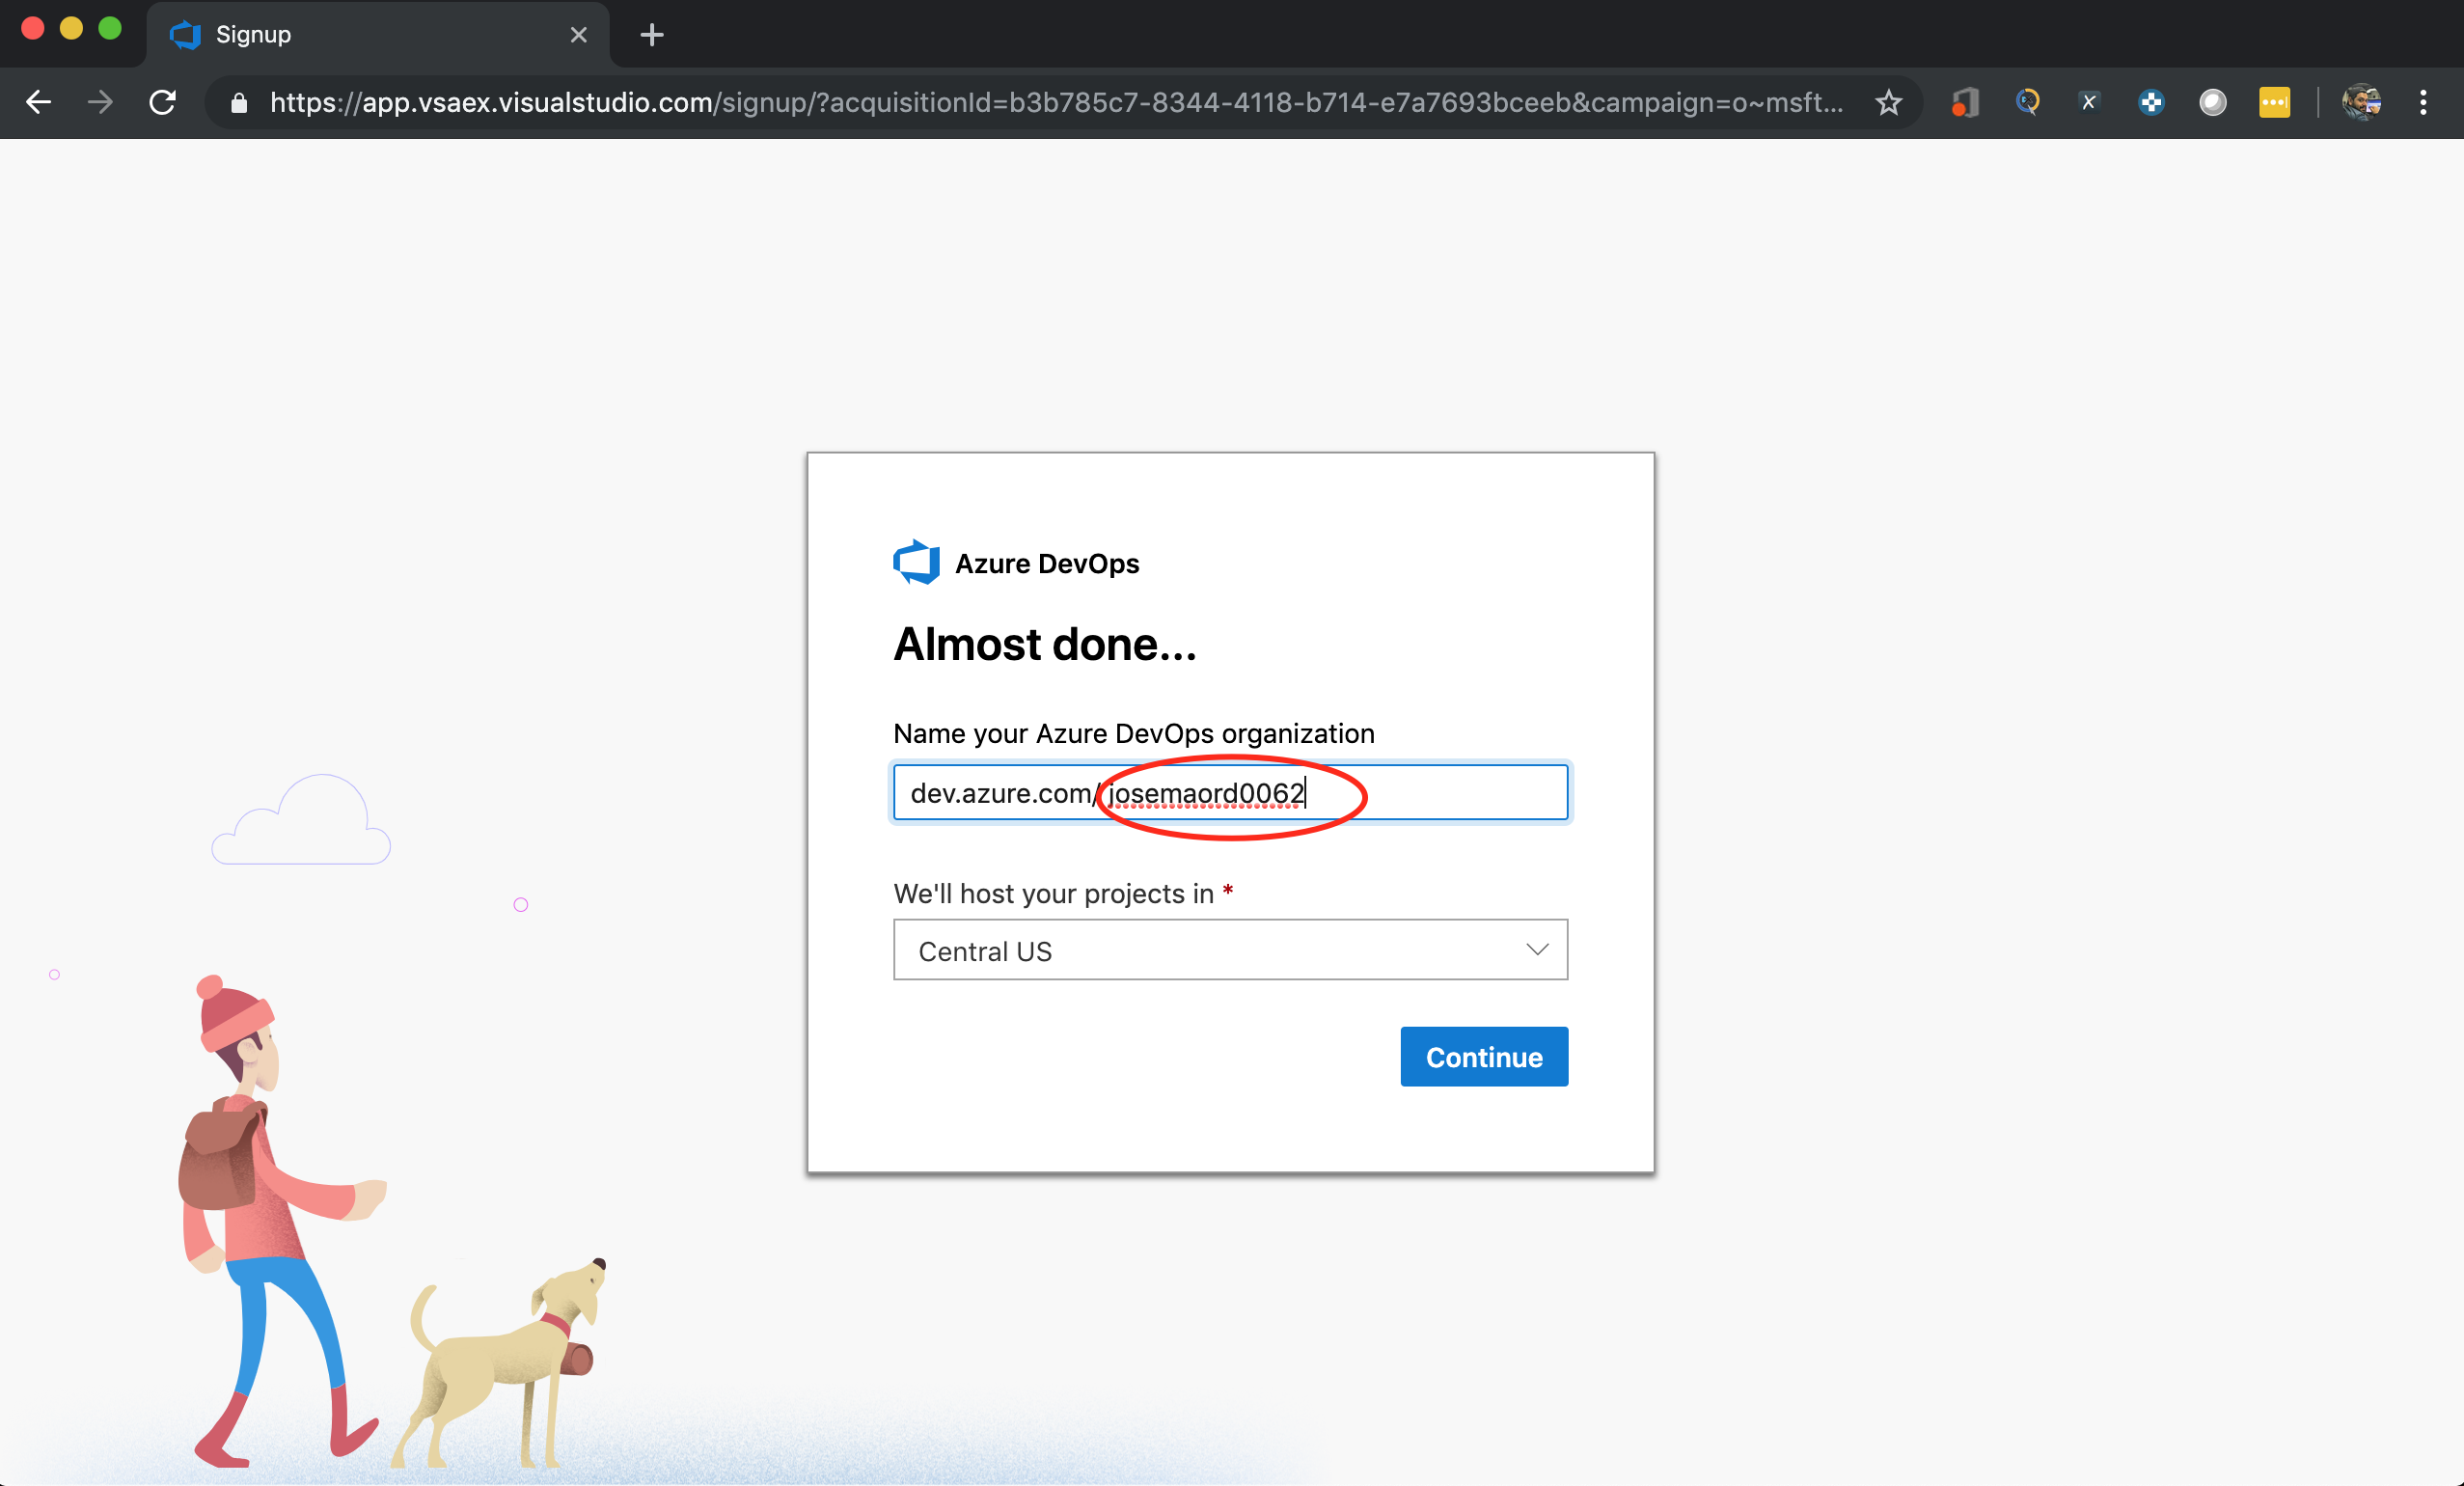
Create New Organization
- Open https://dev.azure.com
- Create a new organization
Create Project
- Create the first project - name it
AzBootCamp2019
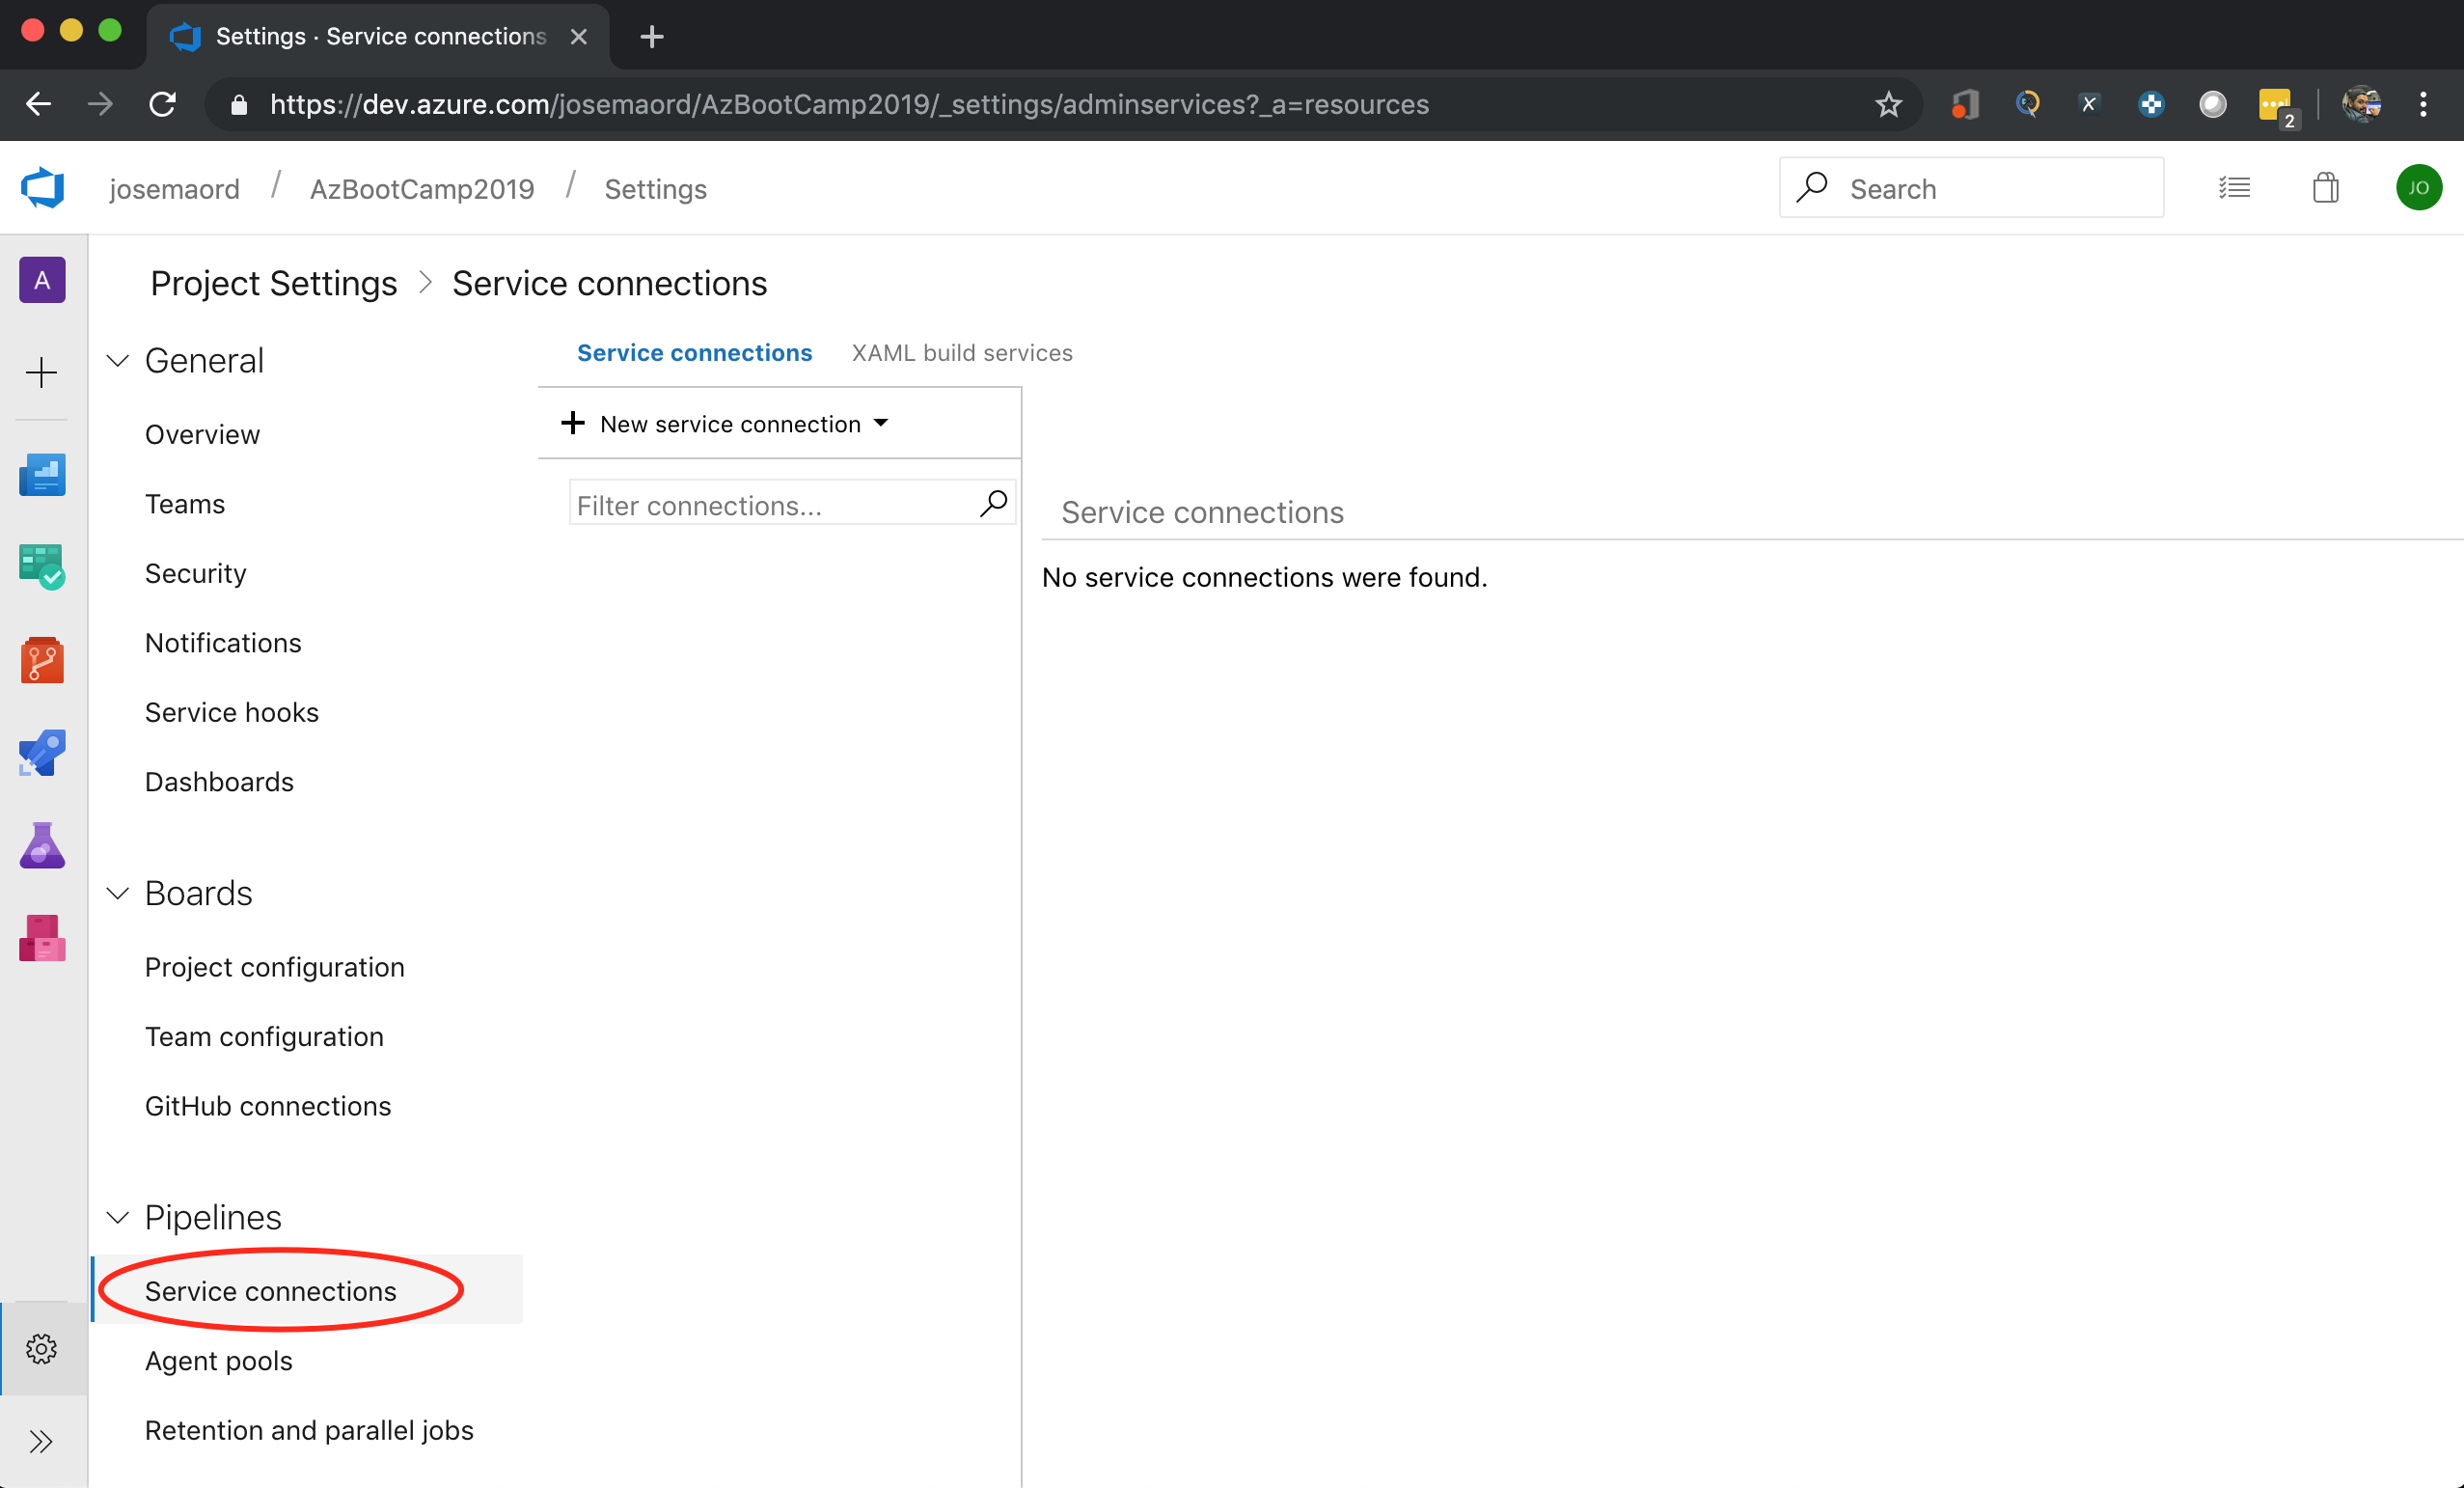
Authorize your Azure Cloud subscription
- Add a service connection for your Azure Subscription
Create Automated Pipeline
After you create your organization and project within Azure Devops you can proceed now to create your automated pipeline.
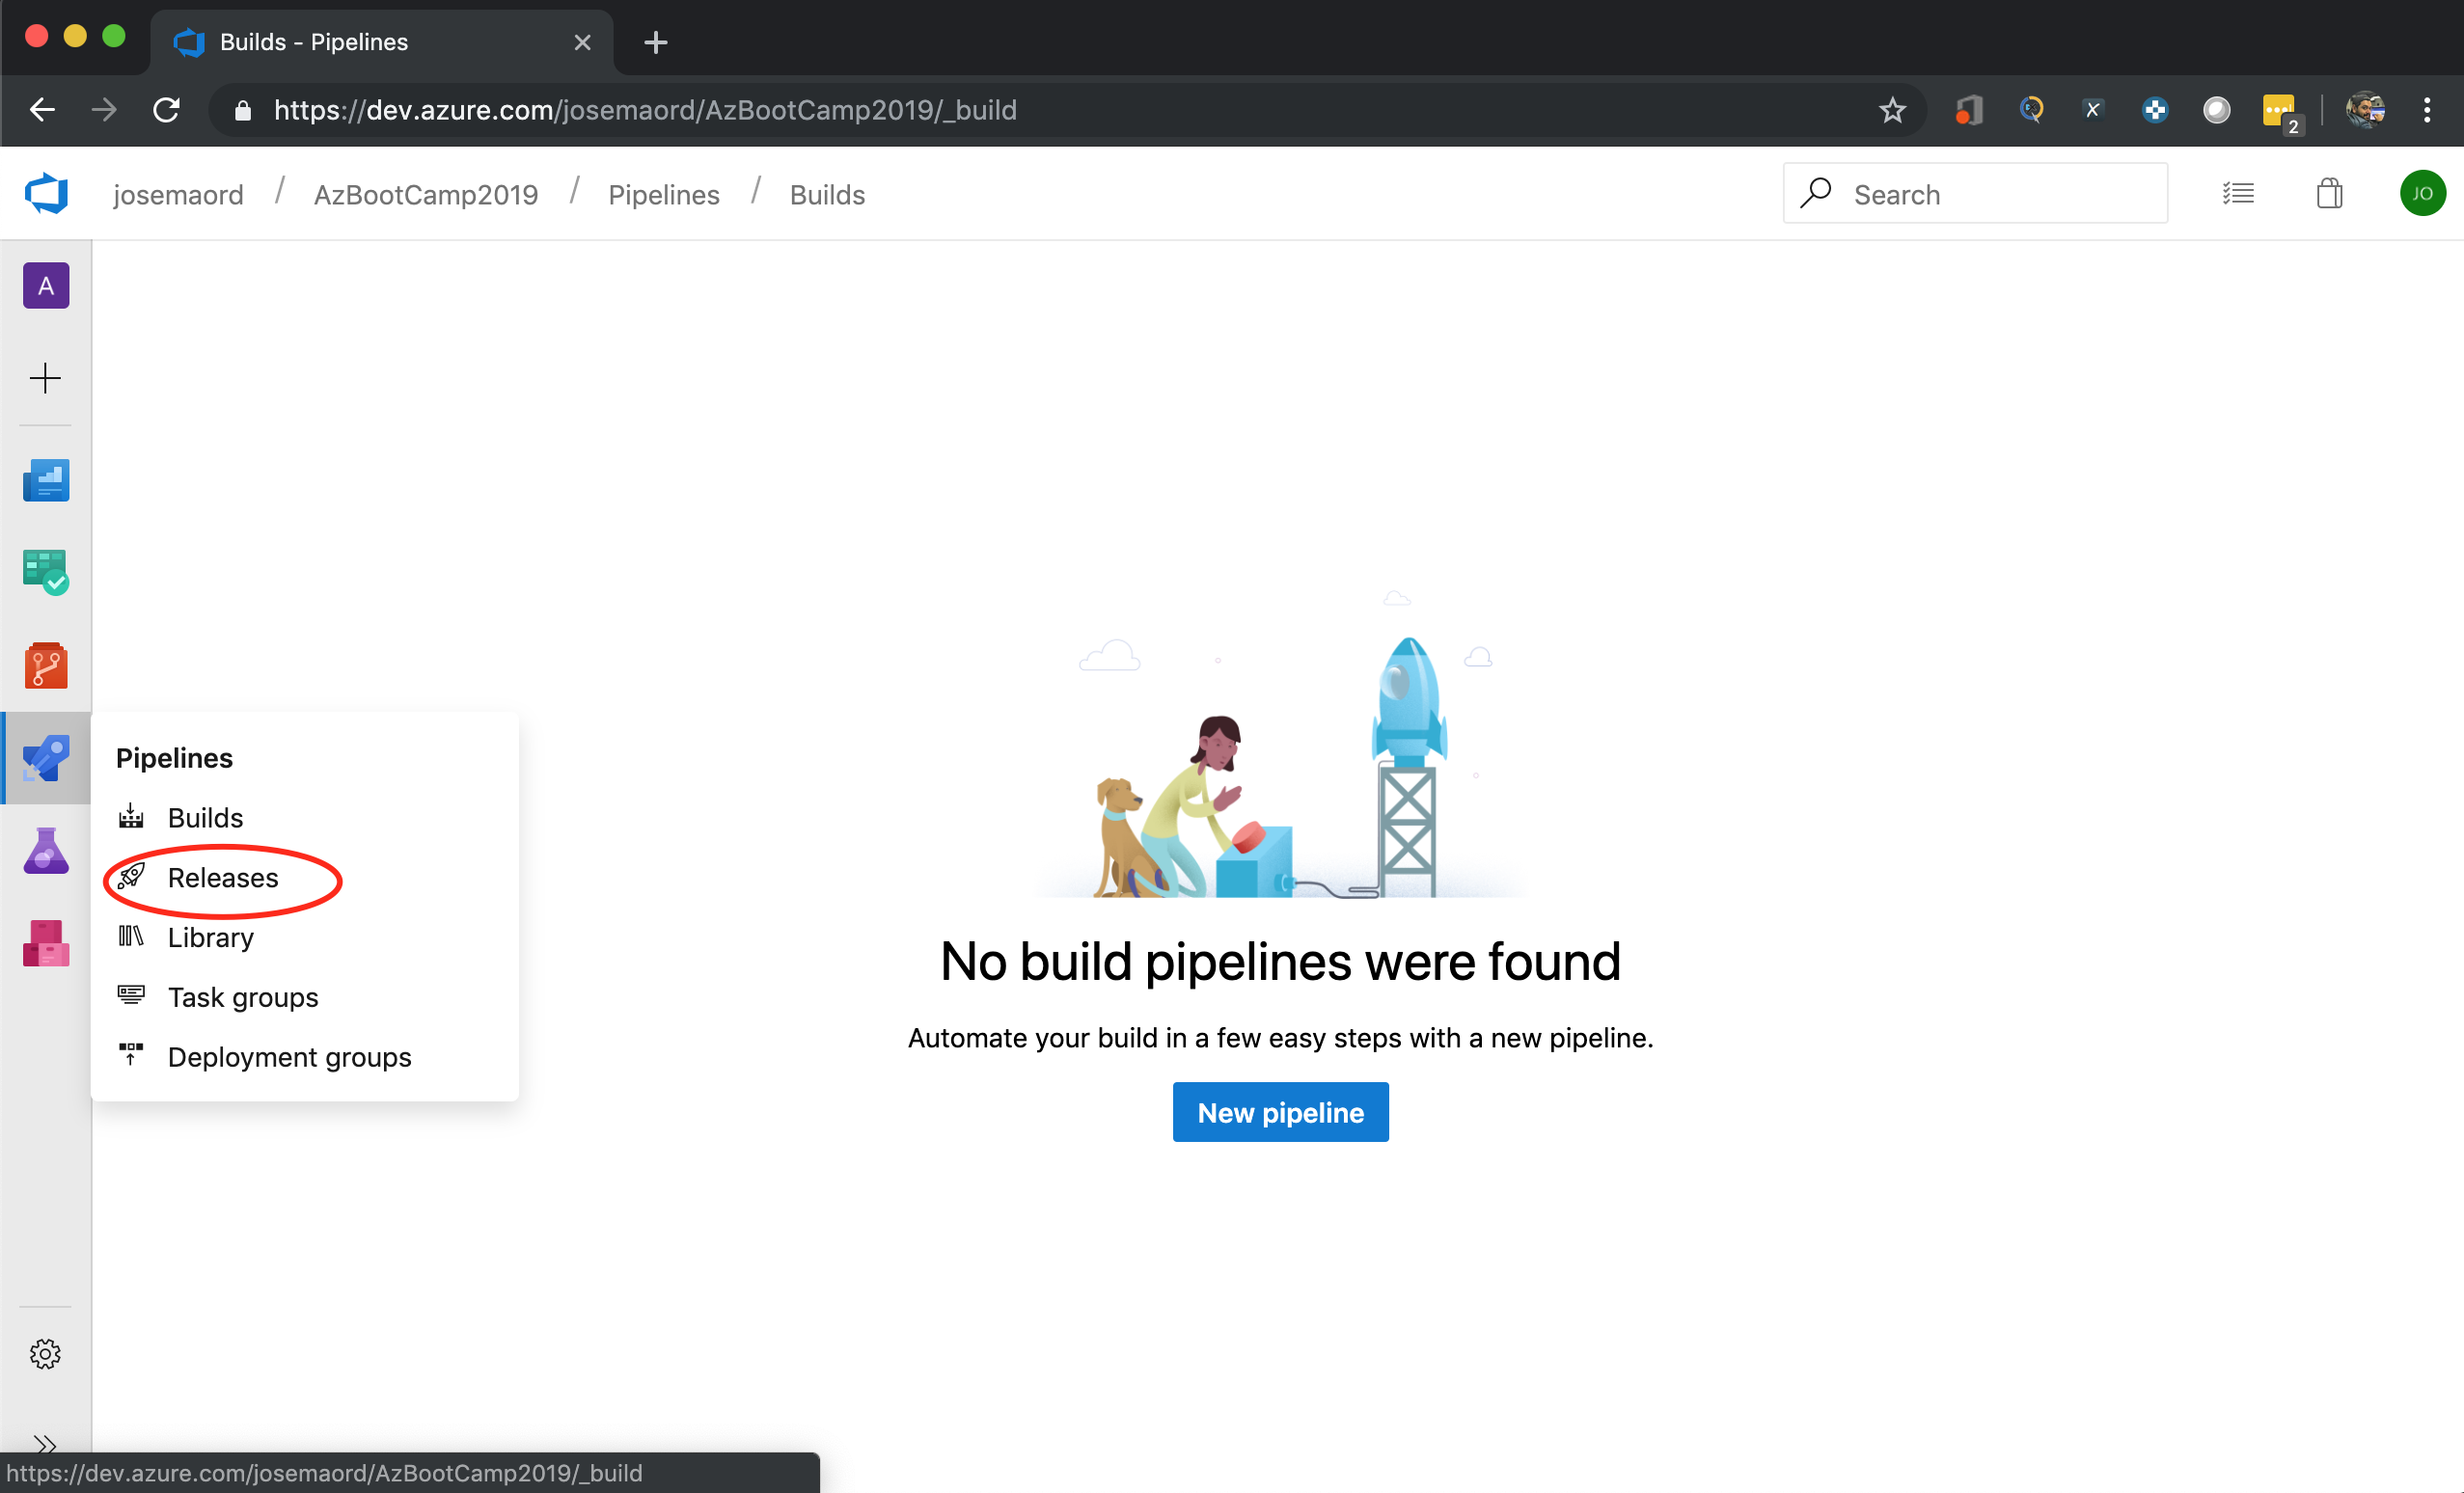
Create a Release Pipeline
This pipeline will allow us to set different required steps that execute our different tasks to deploy the infrastrucuture to the cloud.
- Create a new Release Pipeline
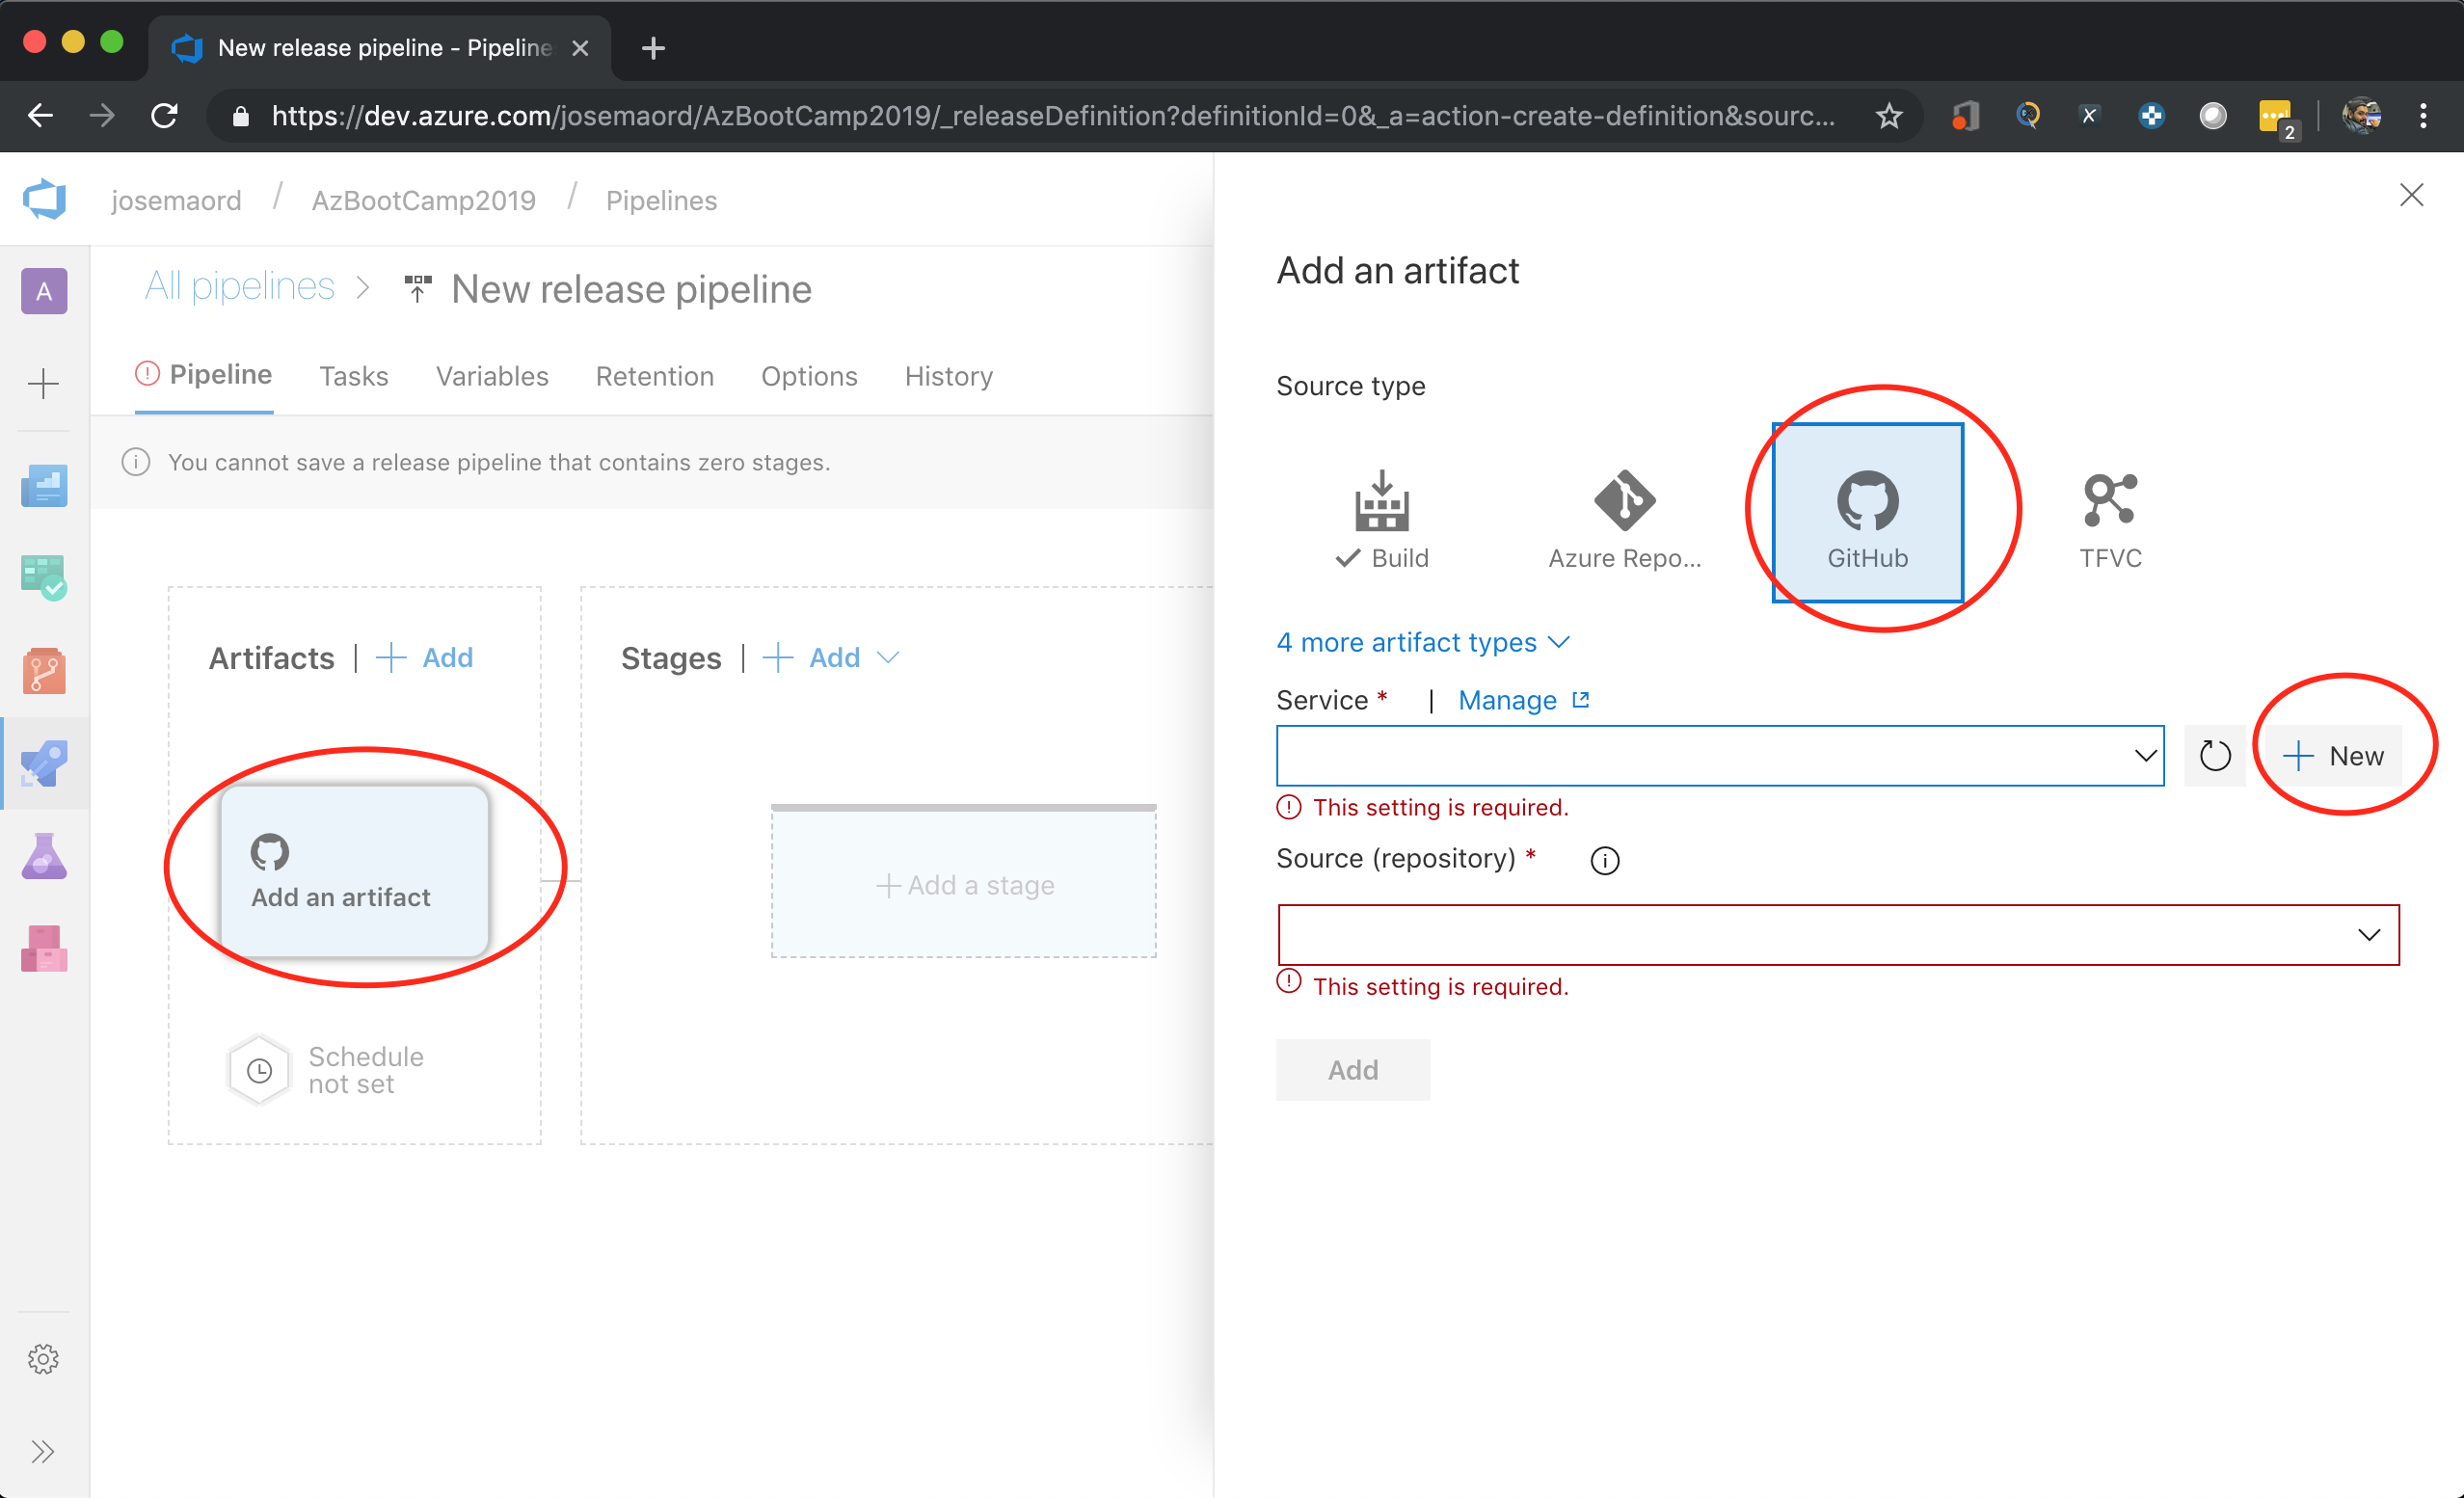
- Add an artifact, in this case your Github repo where your terraform code is hosted. You should add a new connection to your github in services management.
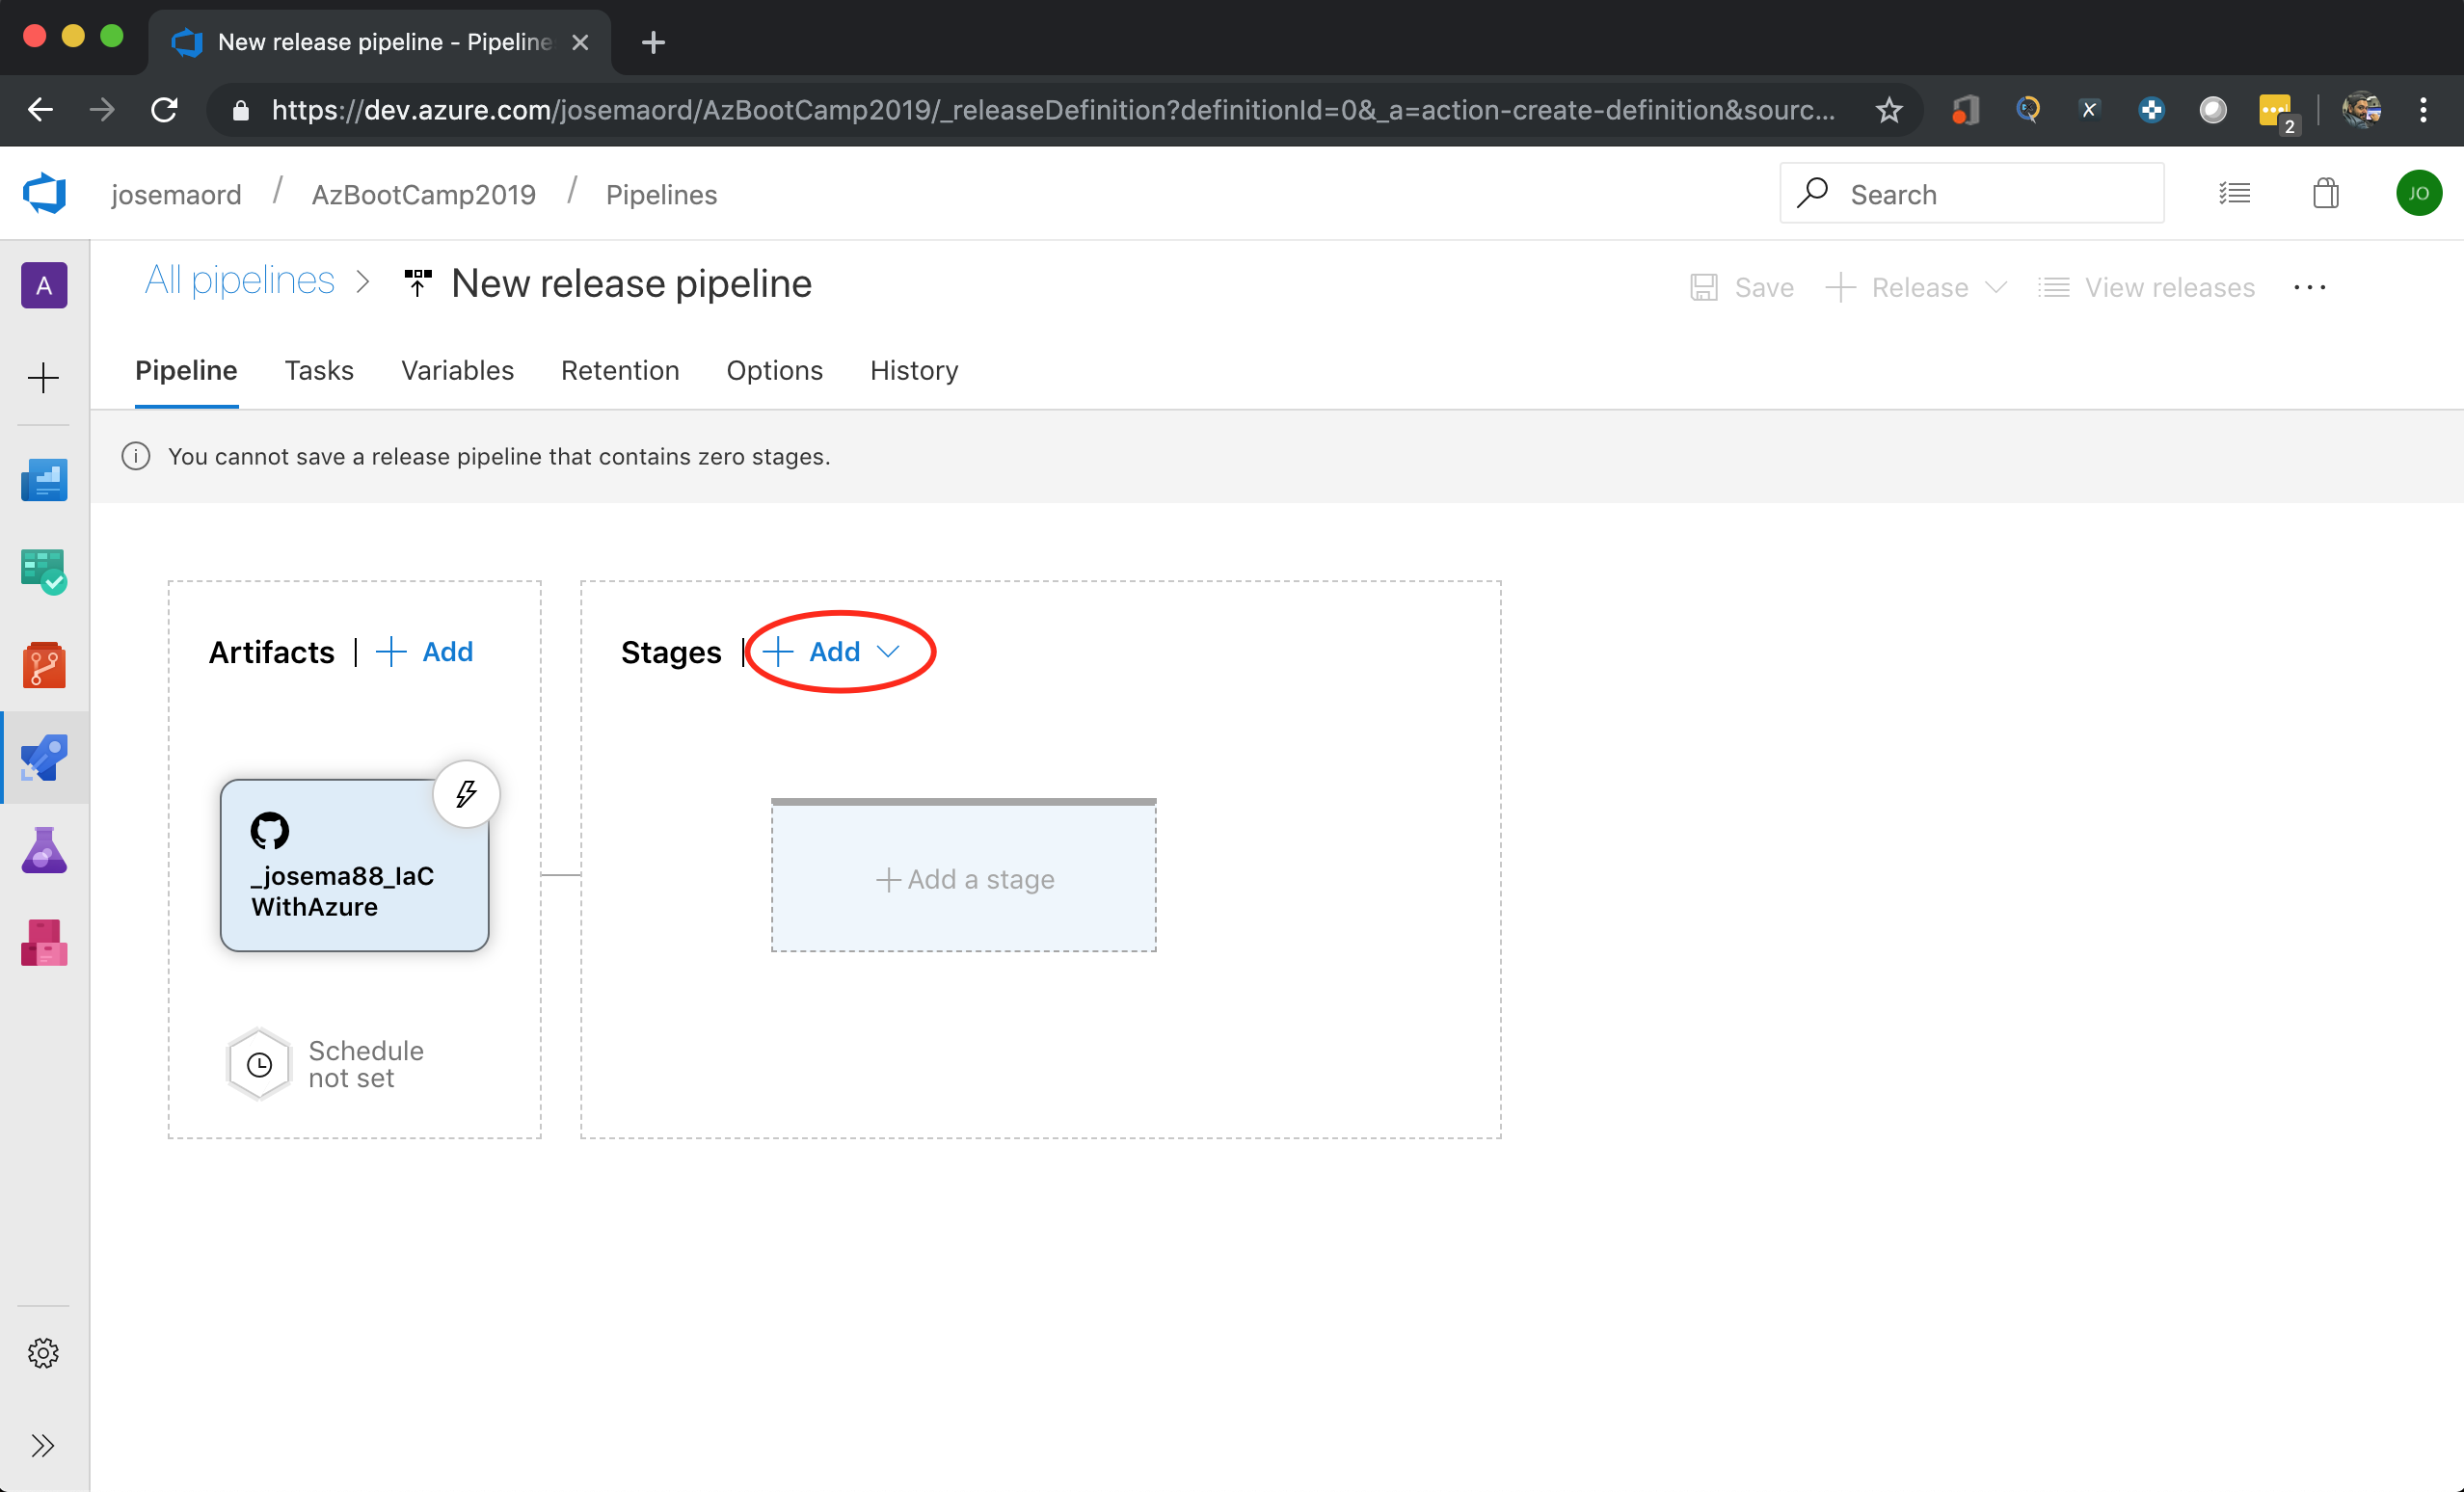
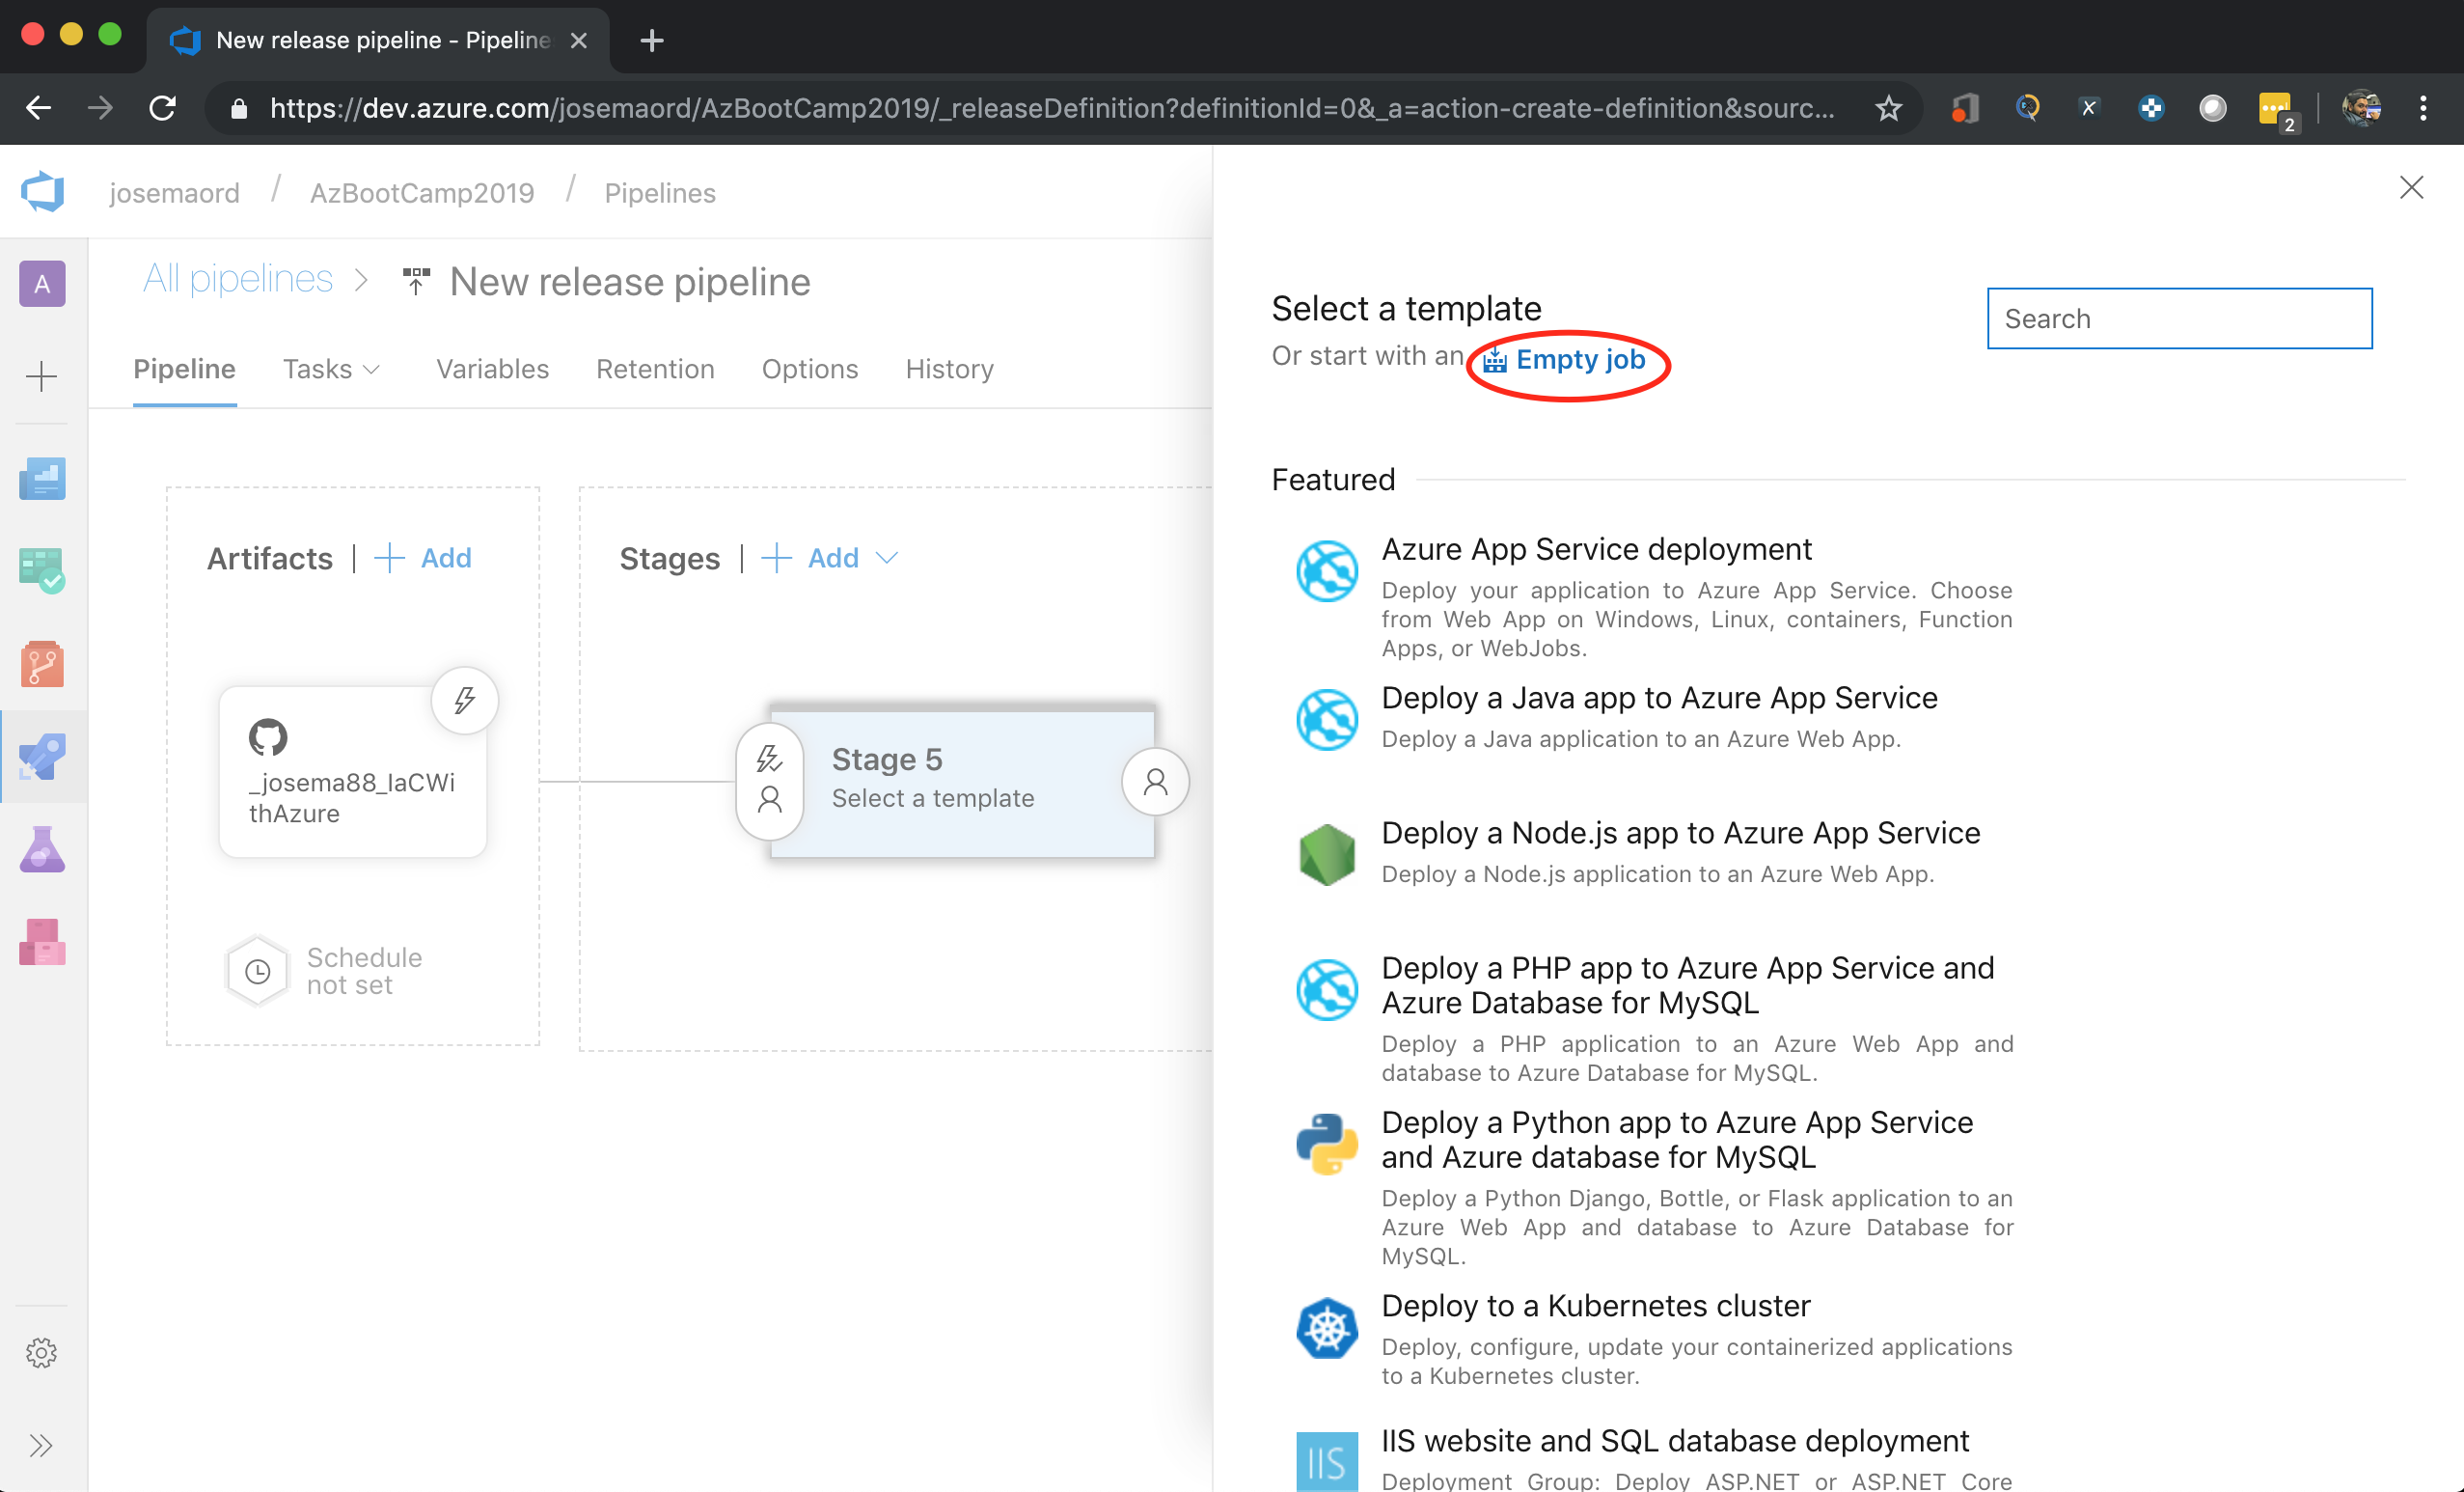
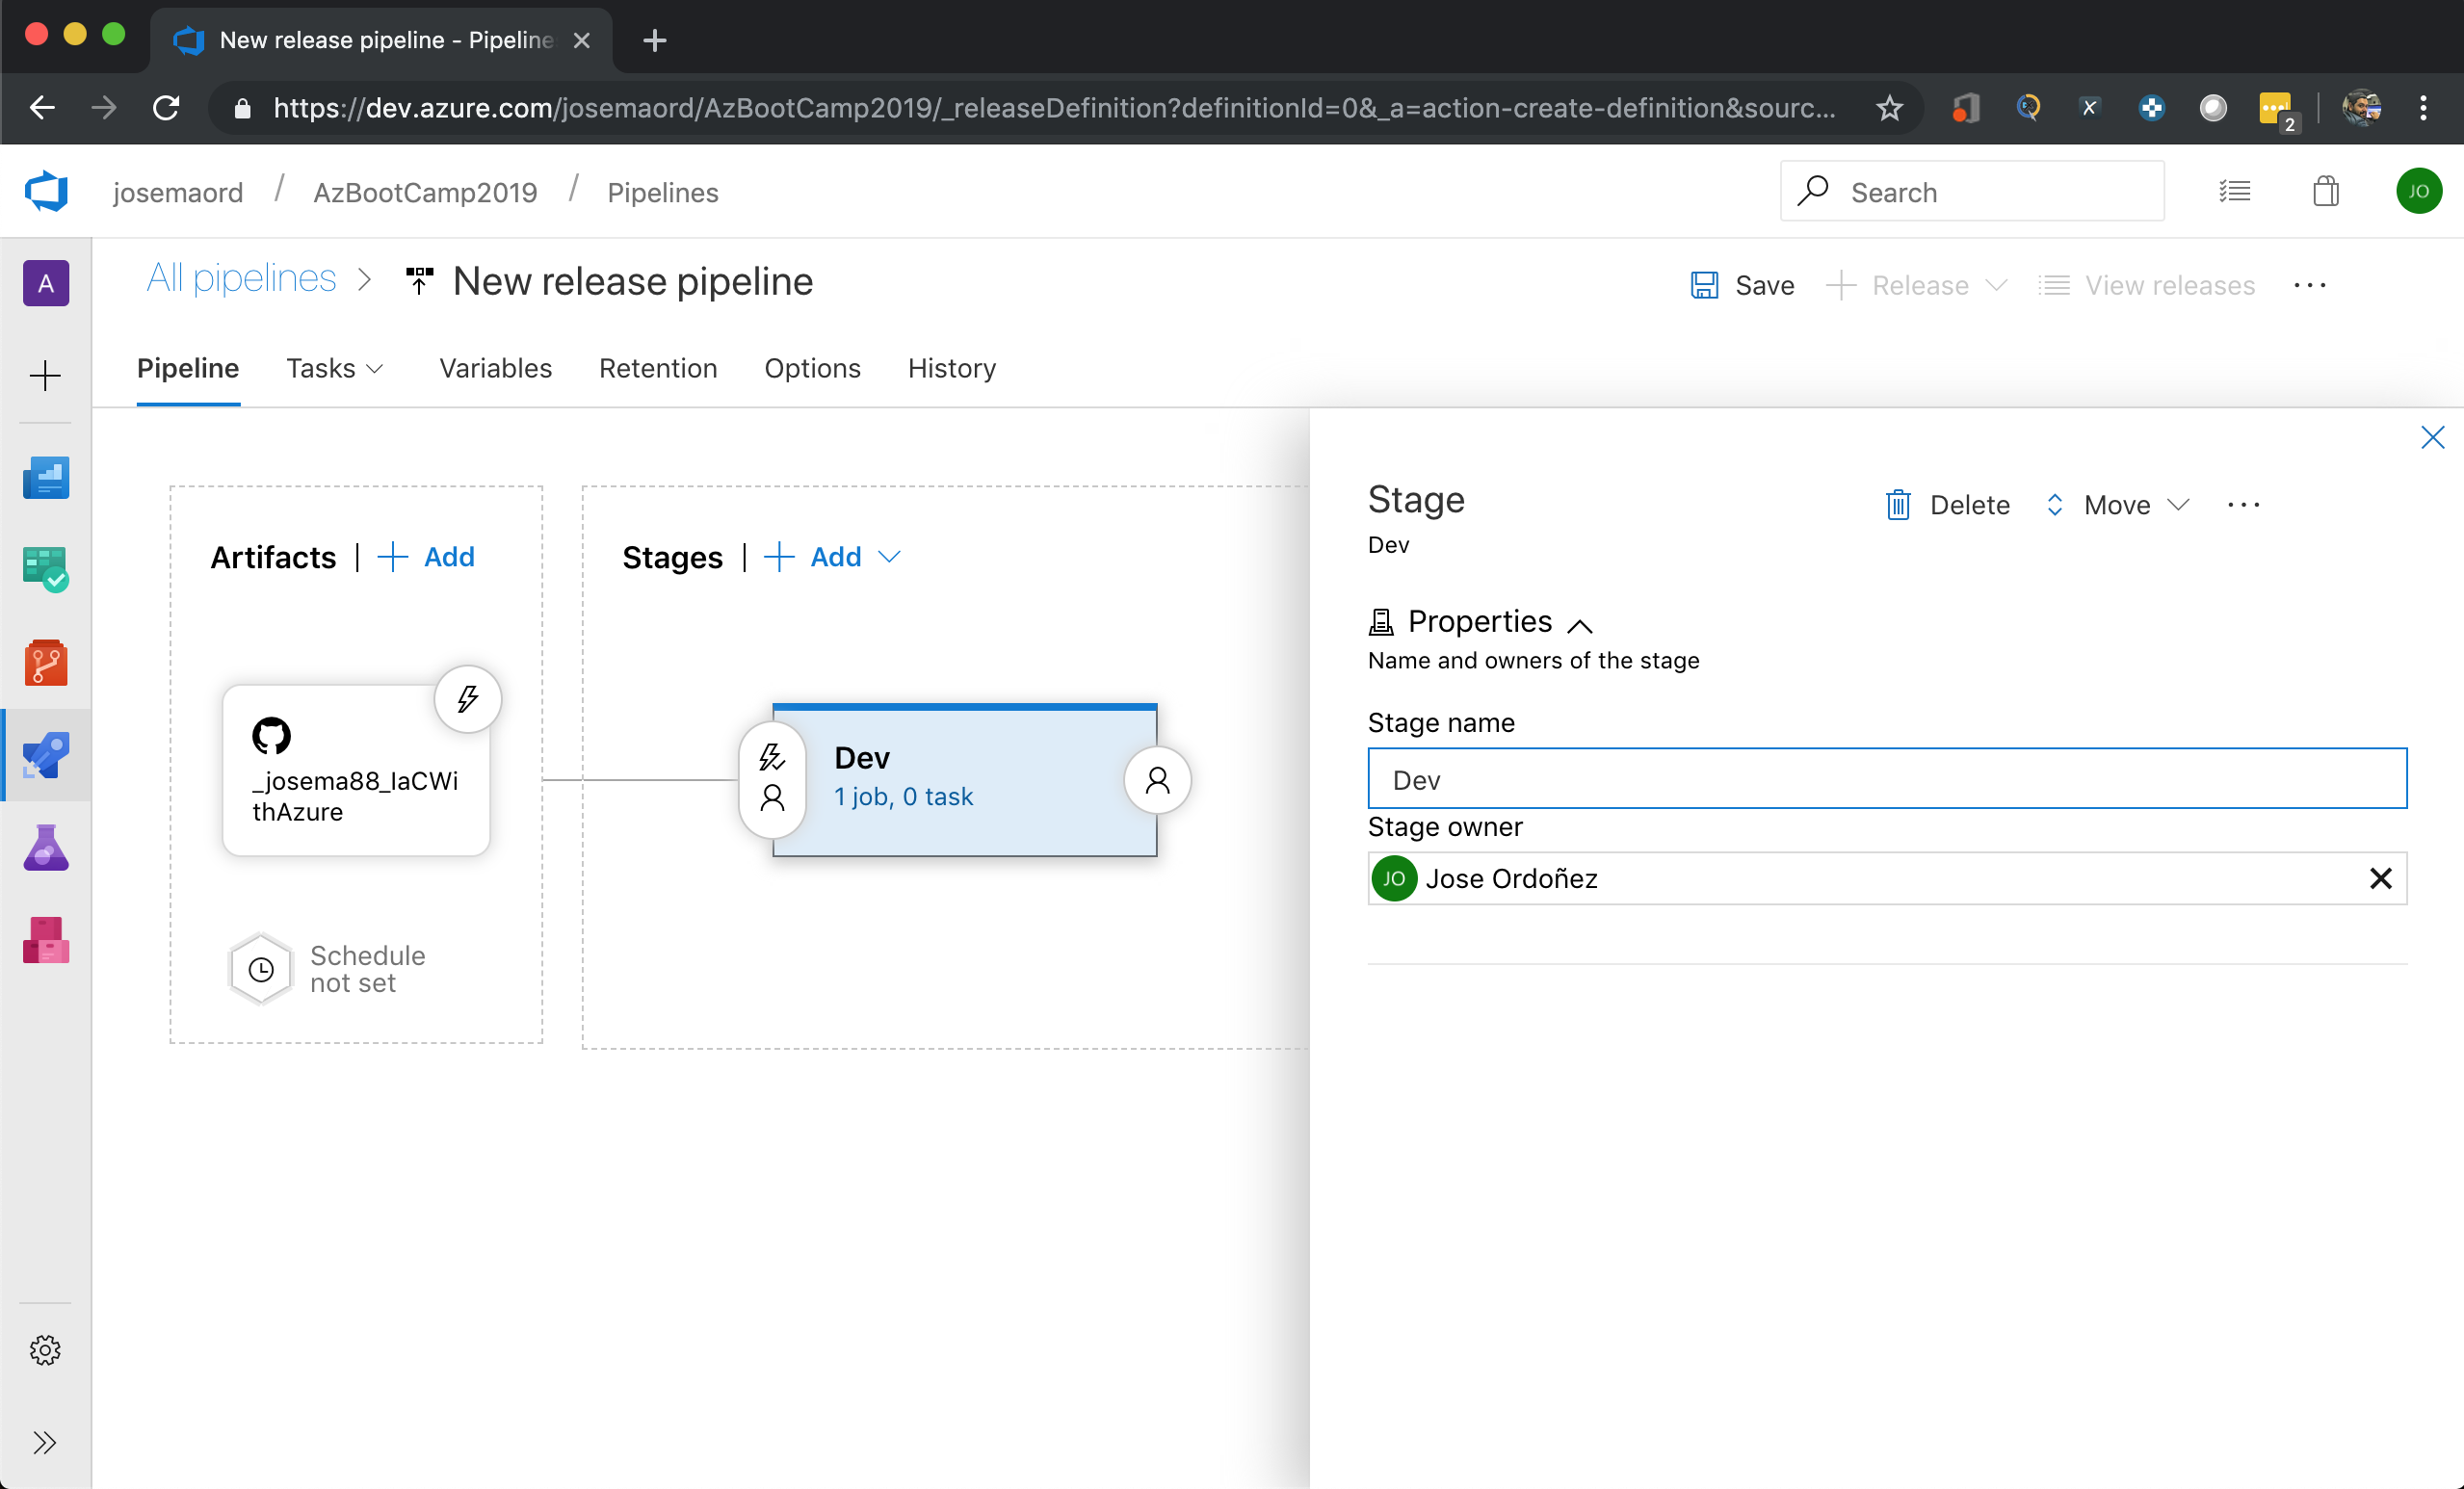
- Add a stage, e.g.: Dev or Prod. This stage should be an empty job.
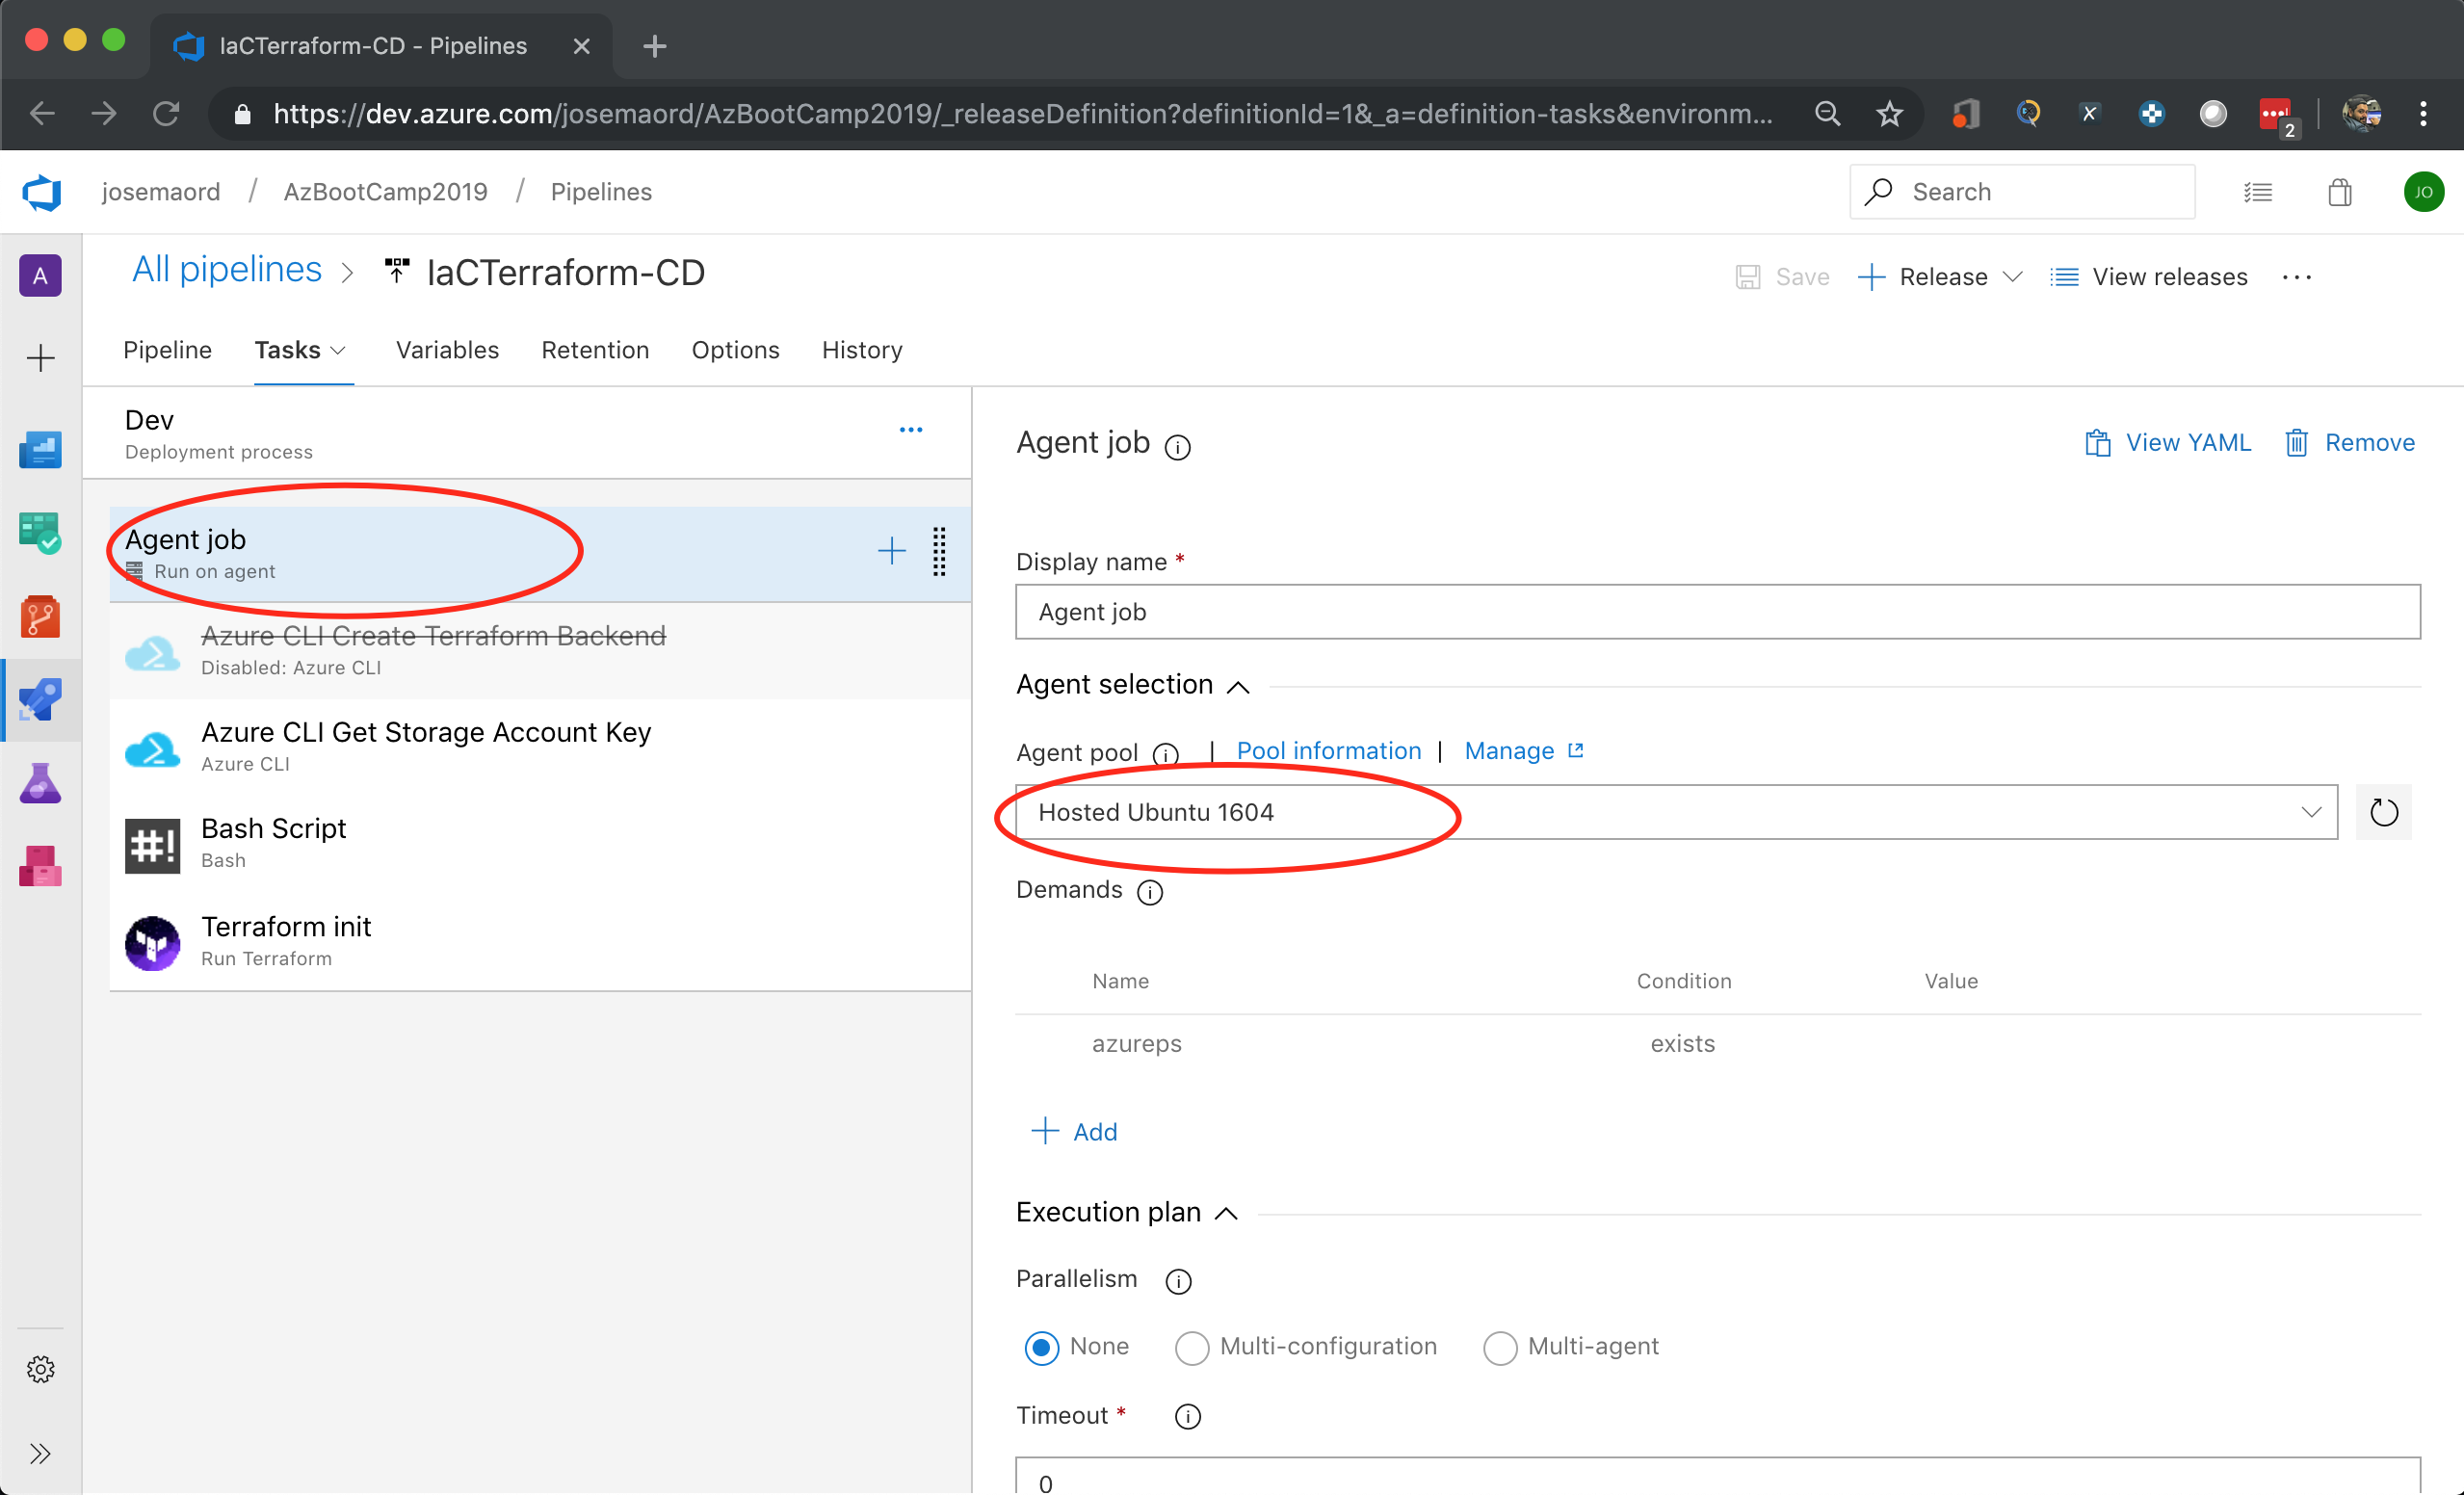
Select an Ubuntu OS Agent
For this sample you should use an agent that runs with Ubuntu OS since the scripts are written in bash.
Create Pipeline variables
These pipeline variables will be used in order to parametrize names for some resources and avoid the hardcoding within the scripts. These variables will be used to create the Azure resources that will store the Terraform Backend. The variable “TerraformStorageAccount” refers to the name that you will set to the storage account in Azure that will stores the Terraform Backend, this variable should be different for any implementation since this should be a unique name within Azure Cloud. 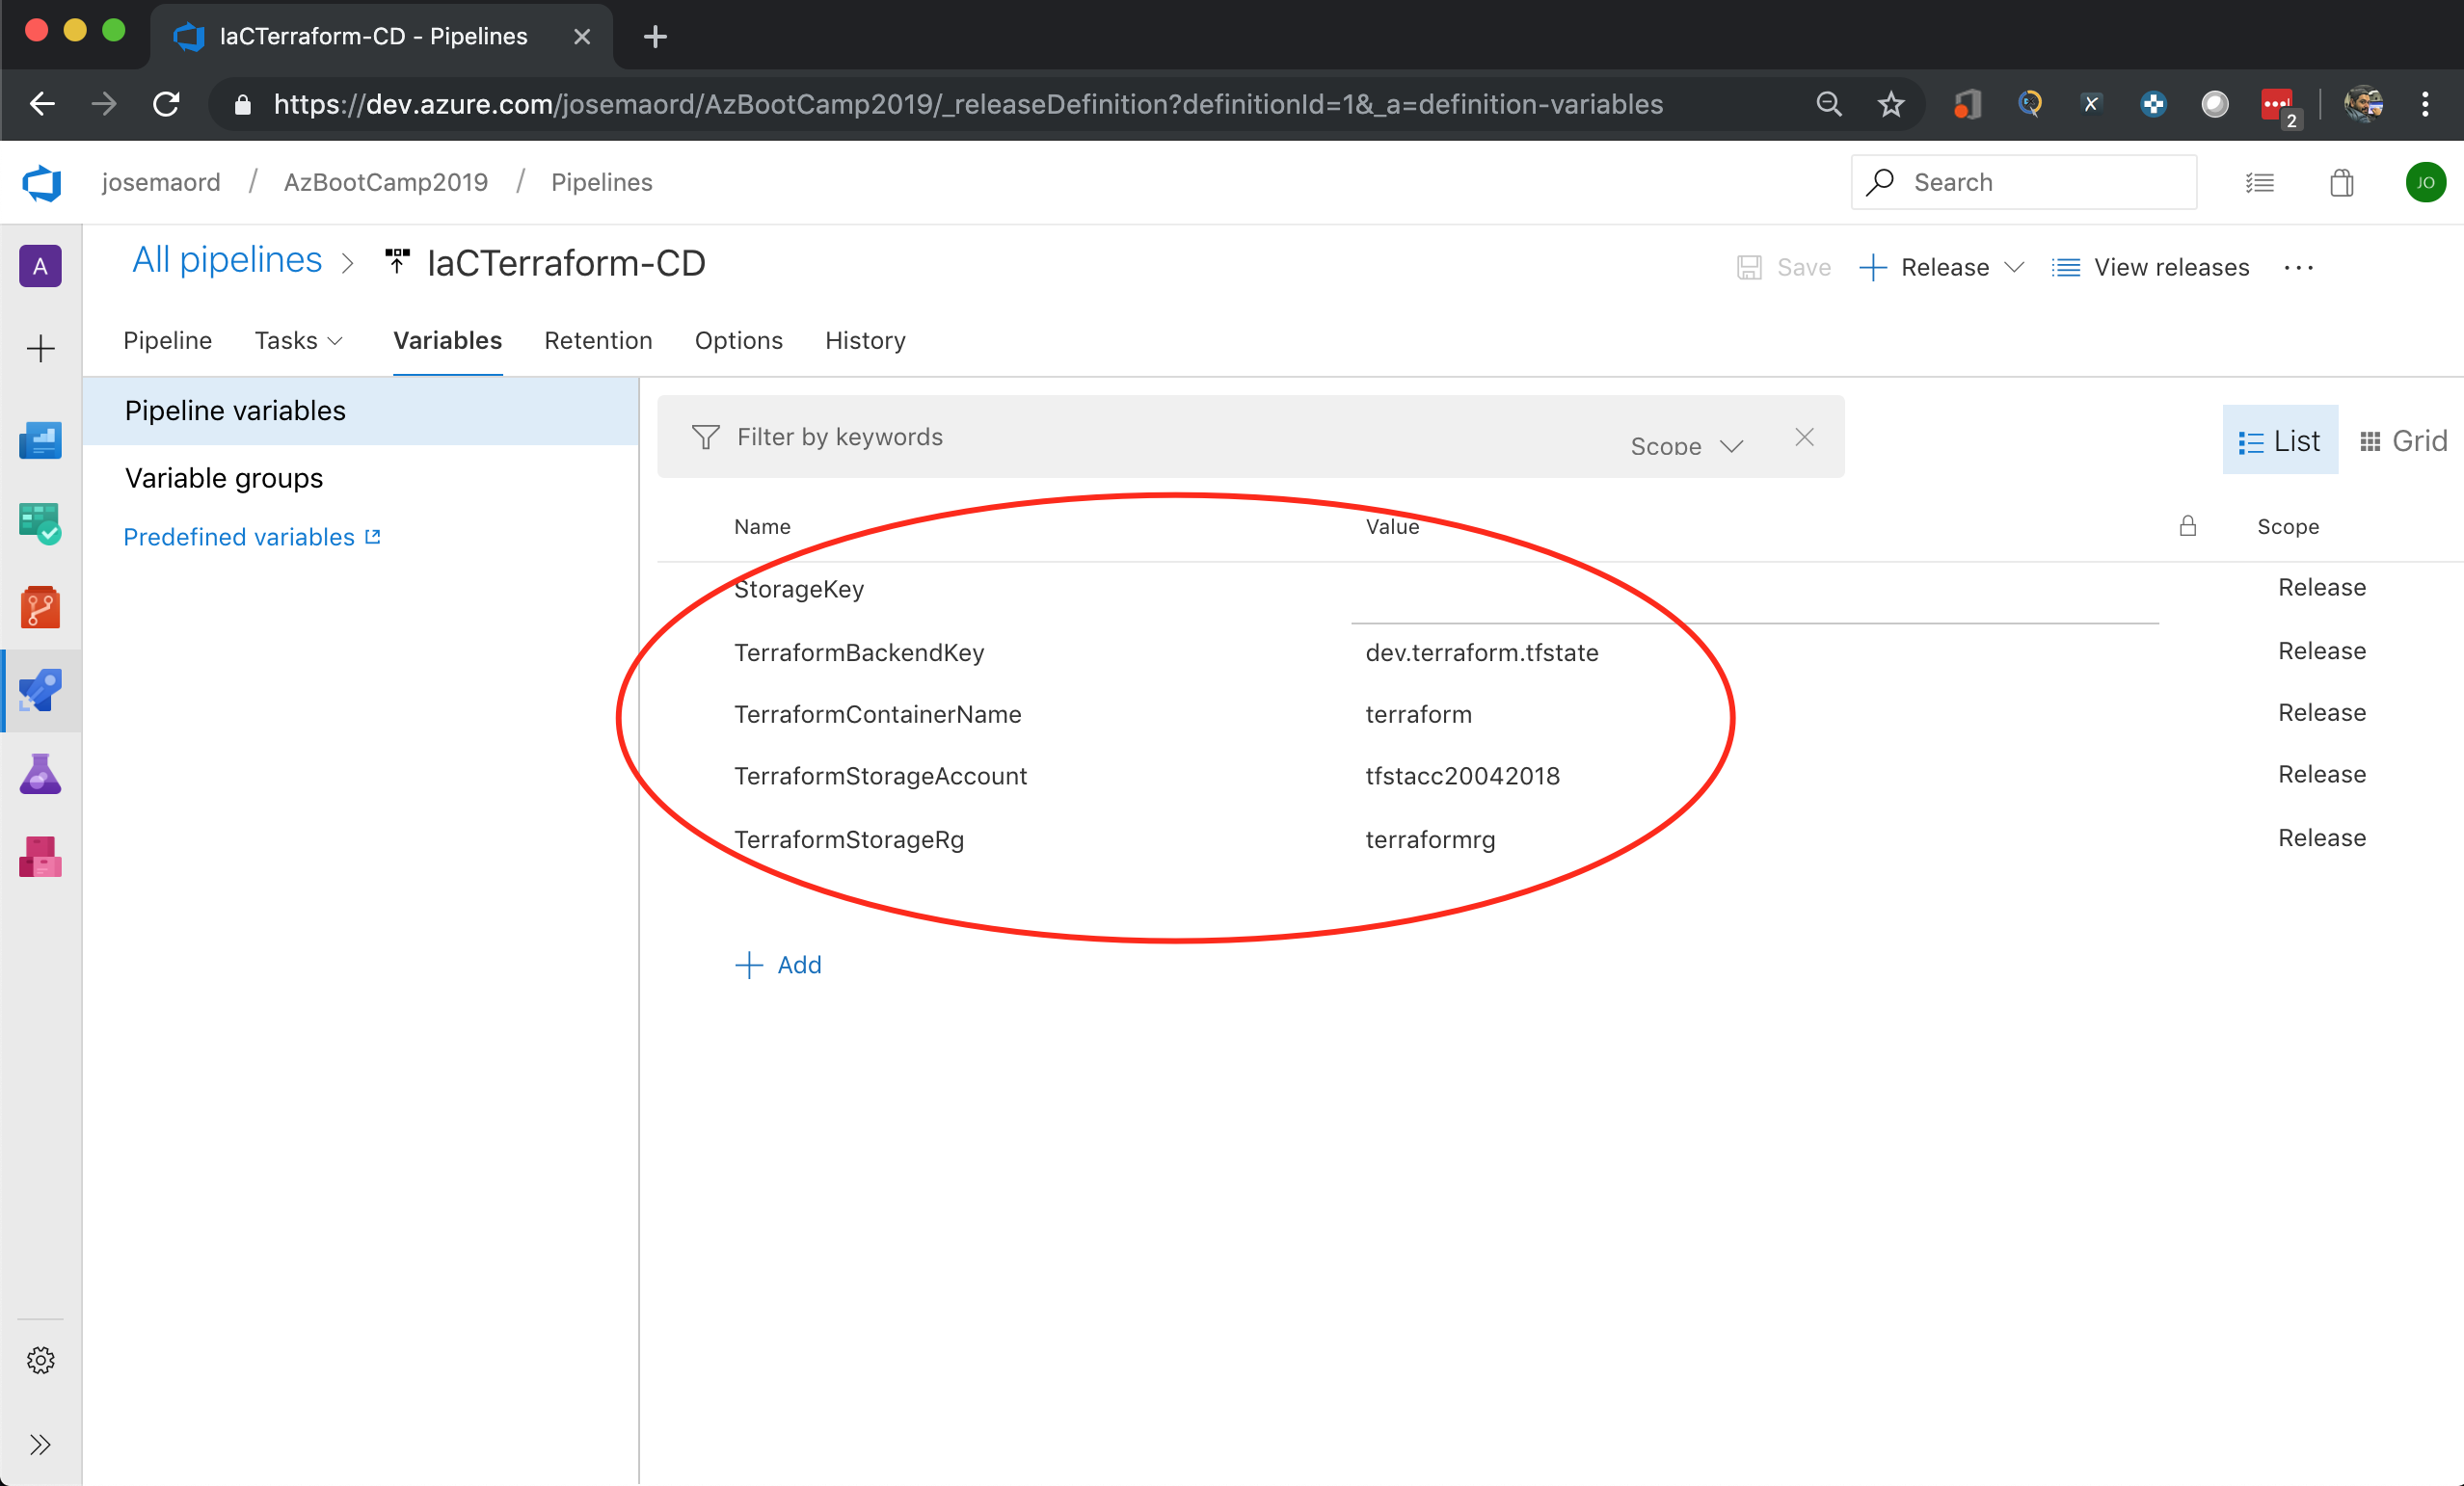
Terraform Backend
By default, Terraform stores state locally in a file named terraform.tfstate. When working with Terraform in a team, use of a local file Isn’t a great idea. You can use the remote state that allows Terraform to writes the state data in a remote data store that you can specify. For this sample we will use a Terraform CLI task that allows to create an Azure storage account and storage container to store Terraform state if this not exists yet. For more information on Terraform remote state click here
Terraform Cycle
When running Terraform in automation, the focus is usually on the core plan/apply cycle. The main Terraform workflow is the following:

i. Initialize the Terraform working directory.
ii. Produce a plan for changing resources to match the current configuration.
iii. Apply the changes described by the plan.
The following tasks will allow you to implement the terraform cycle.
Add Task - Terraform Init
First you should install the extension in order to use the terraform task, for this tutorial we use an specific extension, select the extension created by Charles Zipp. 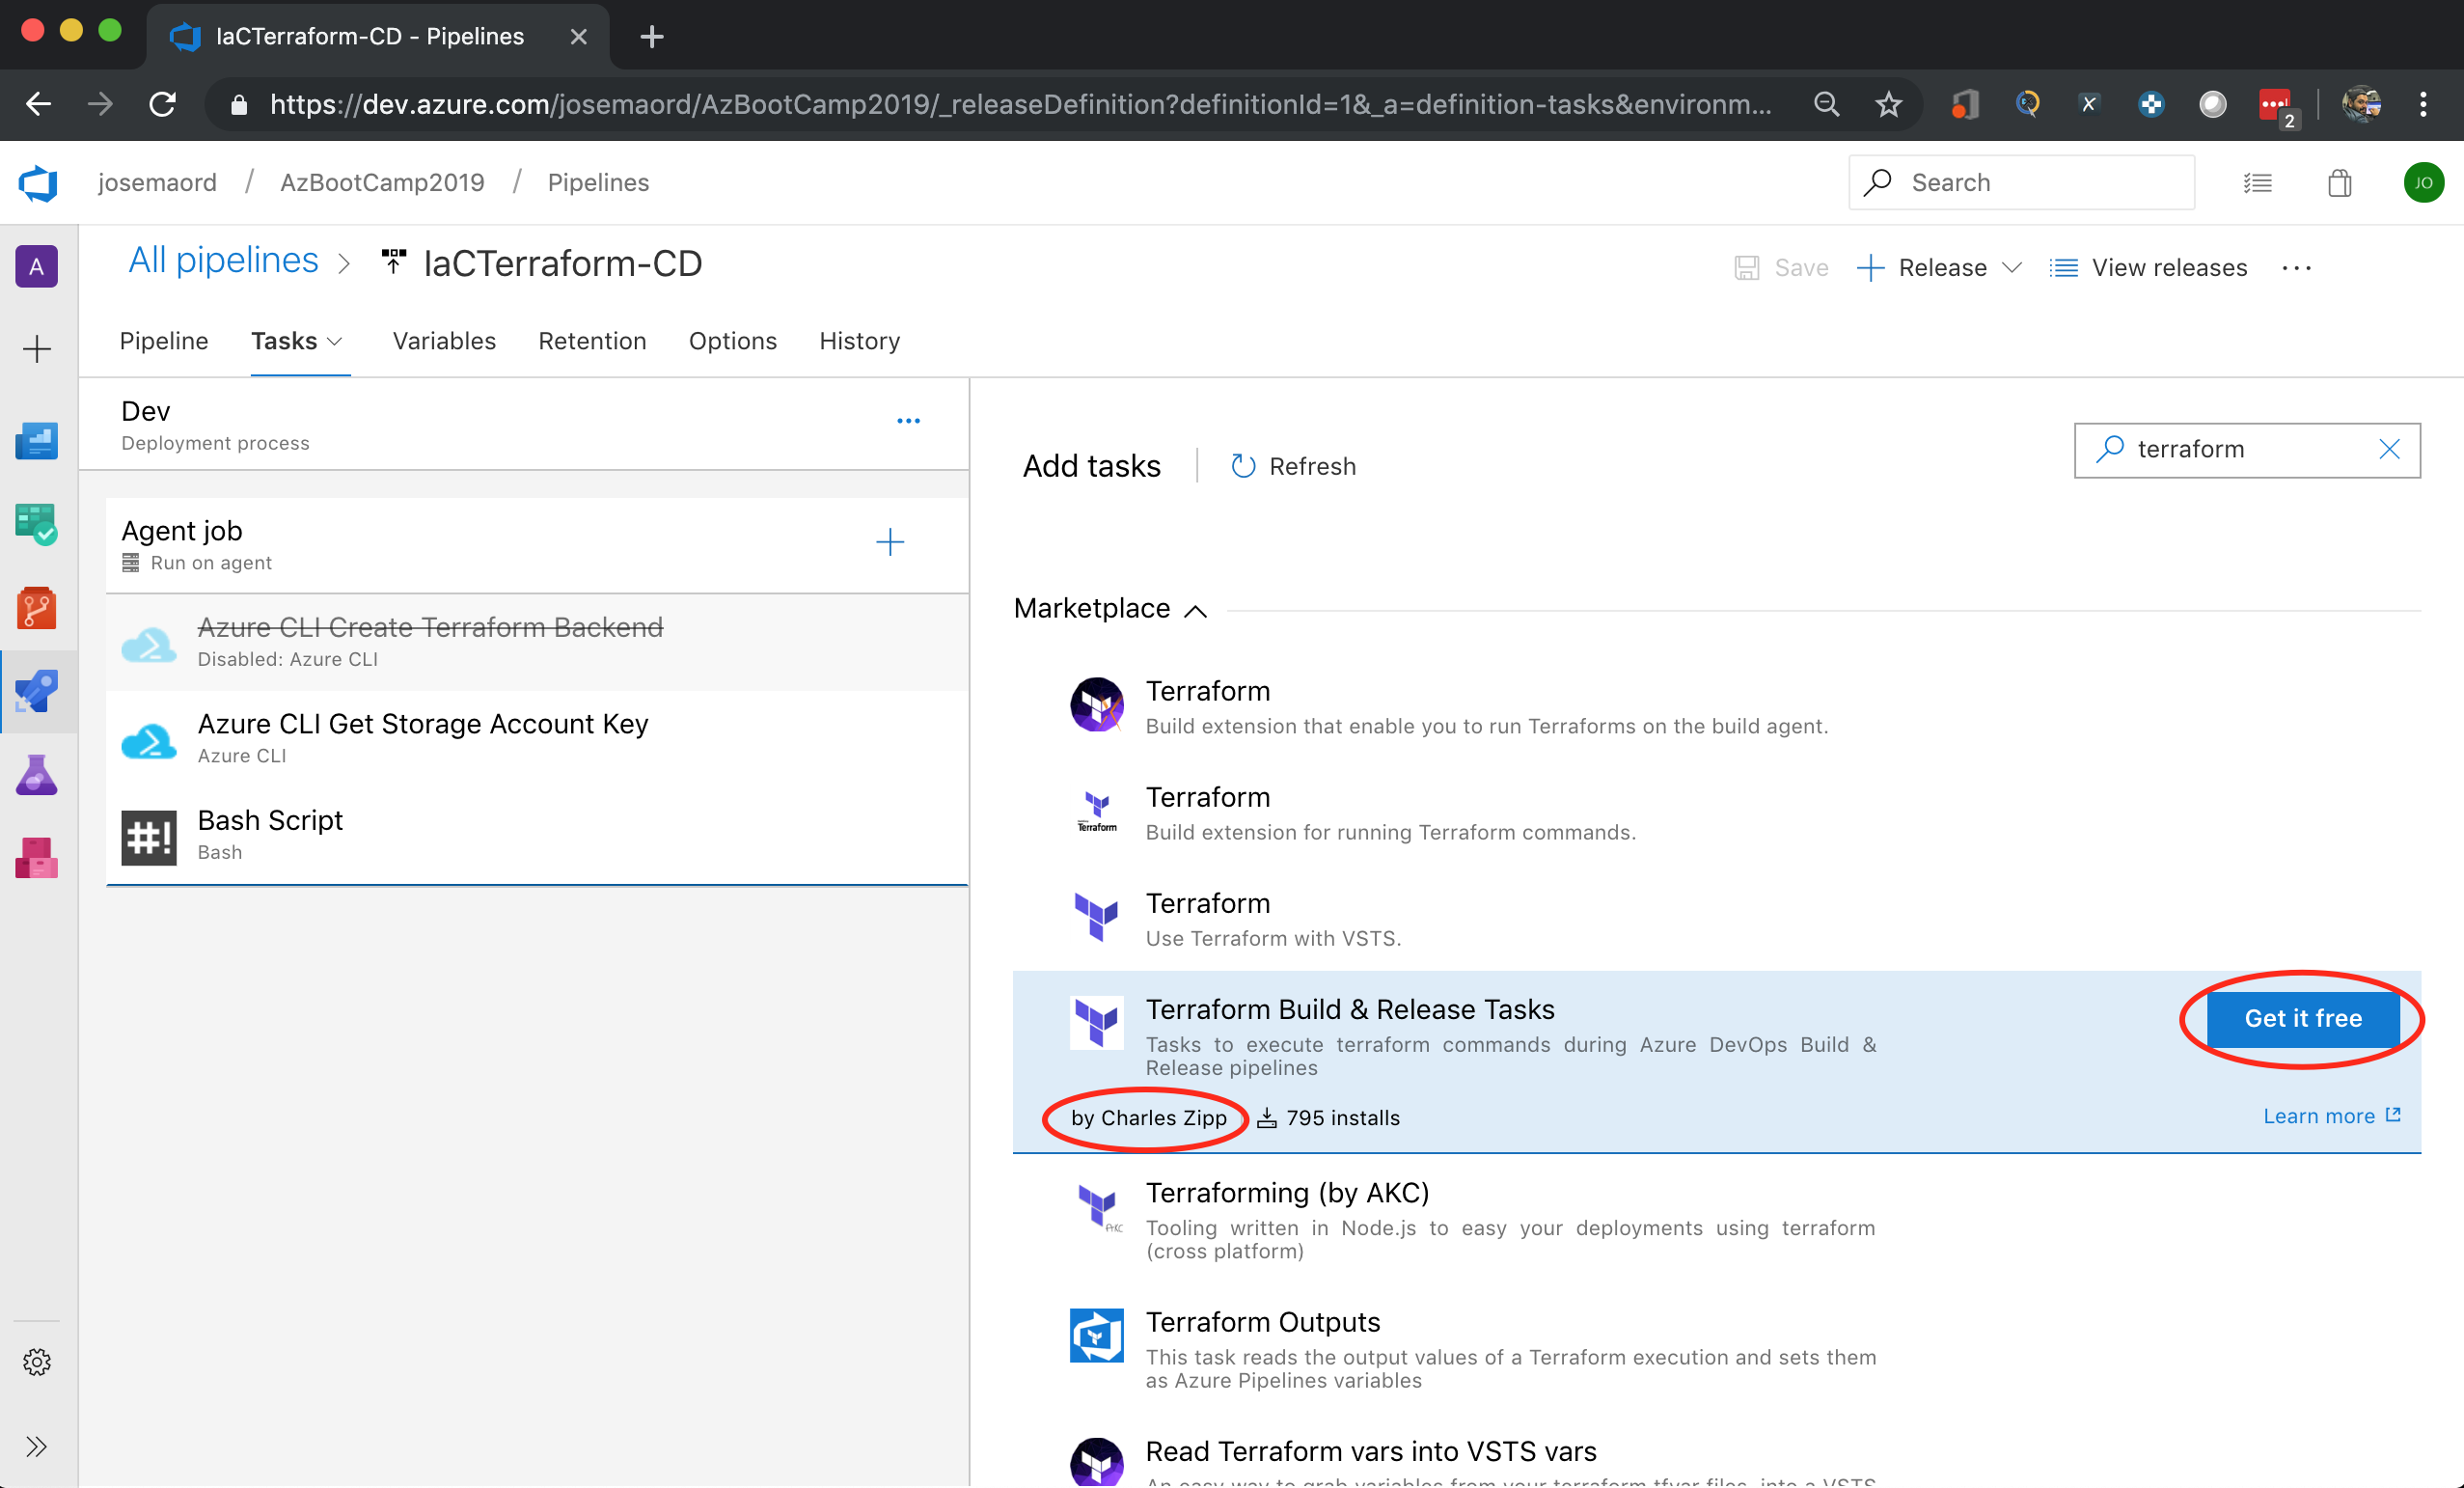
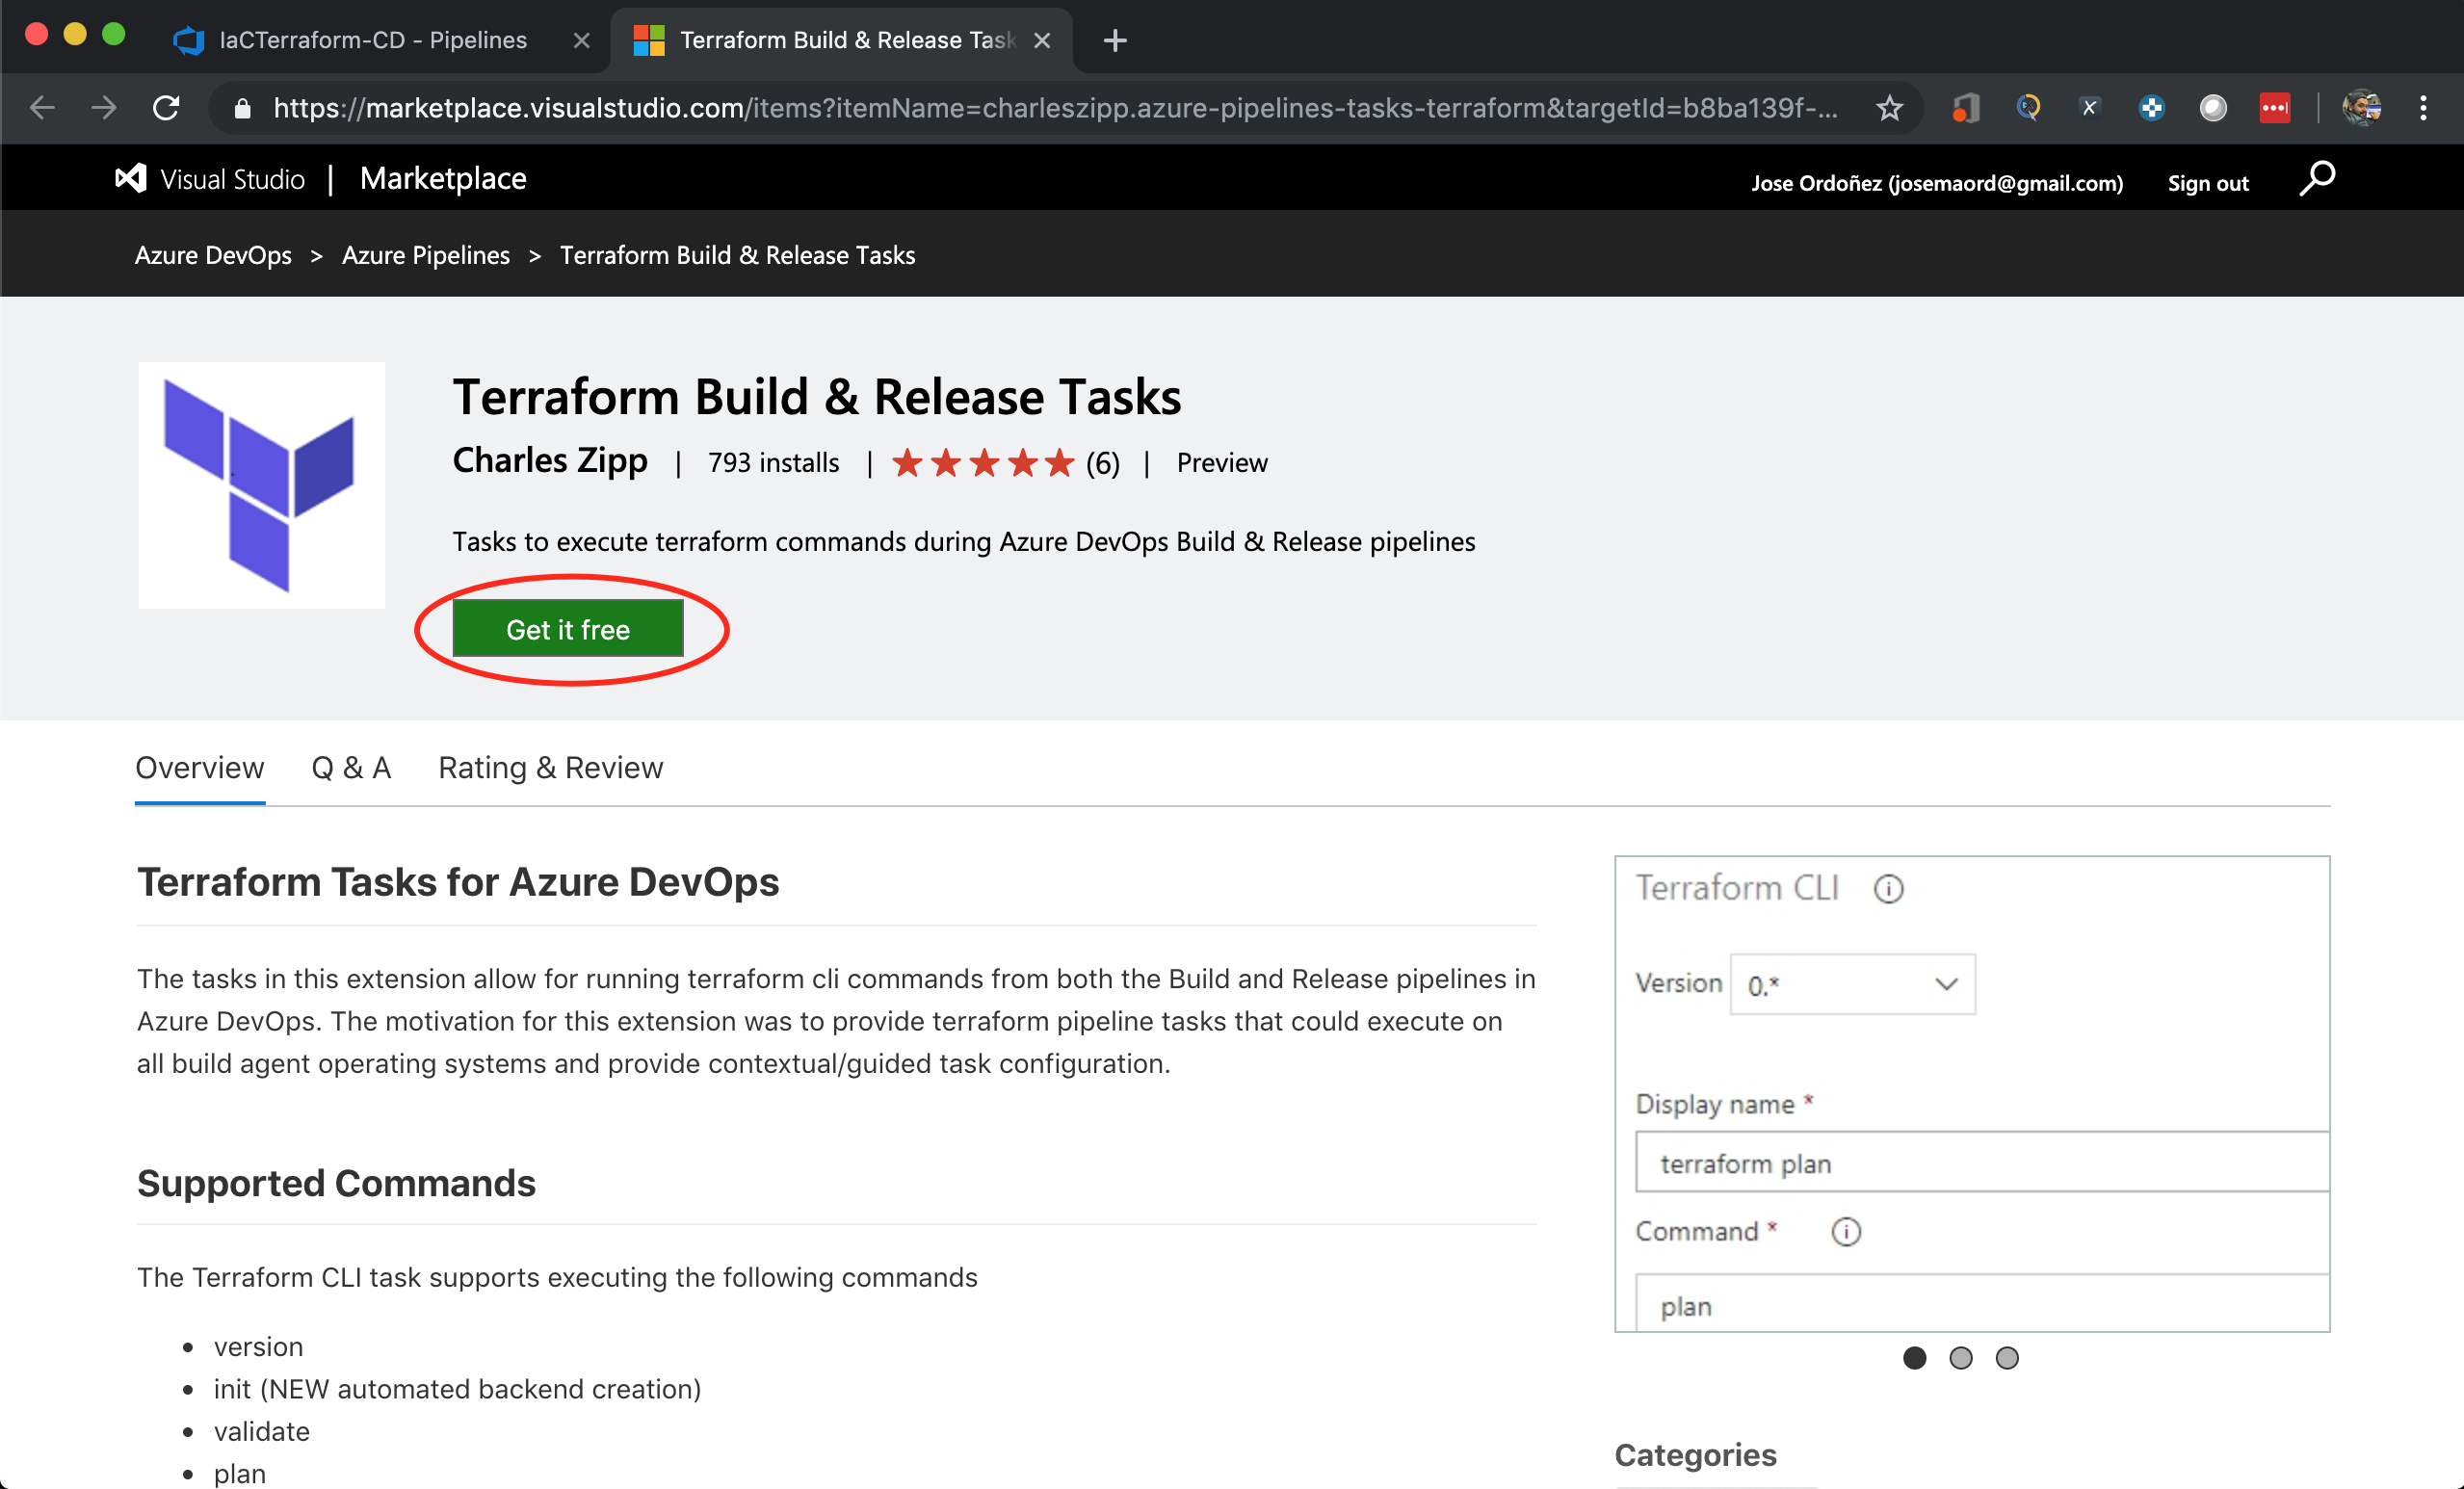
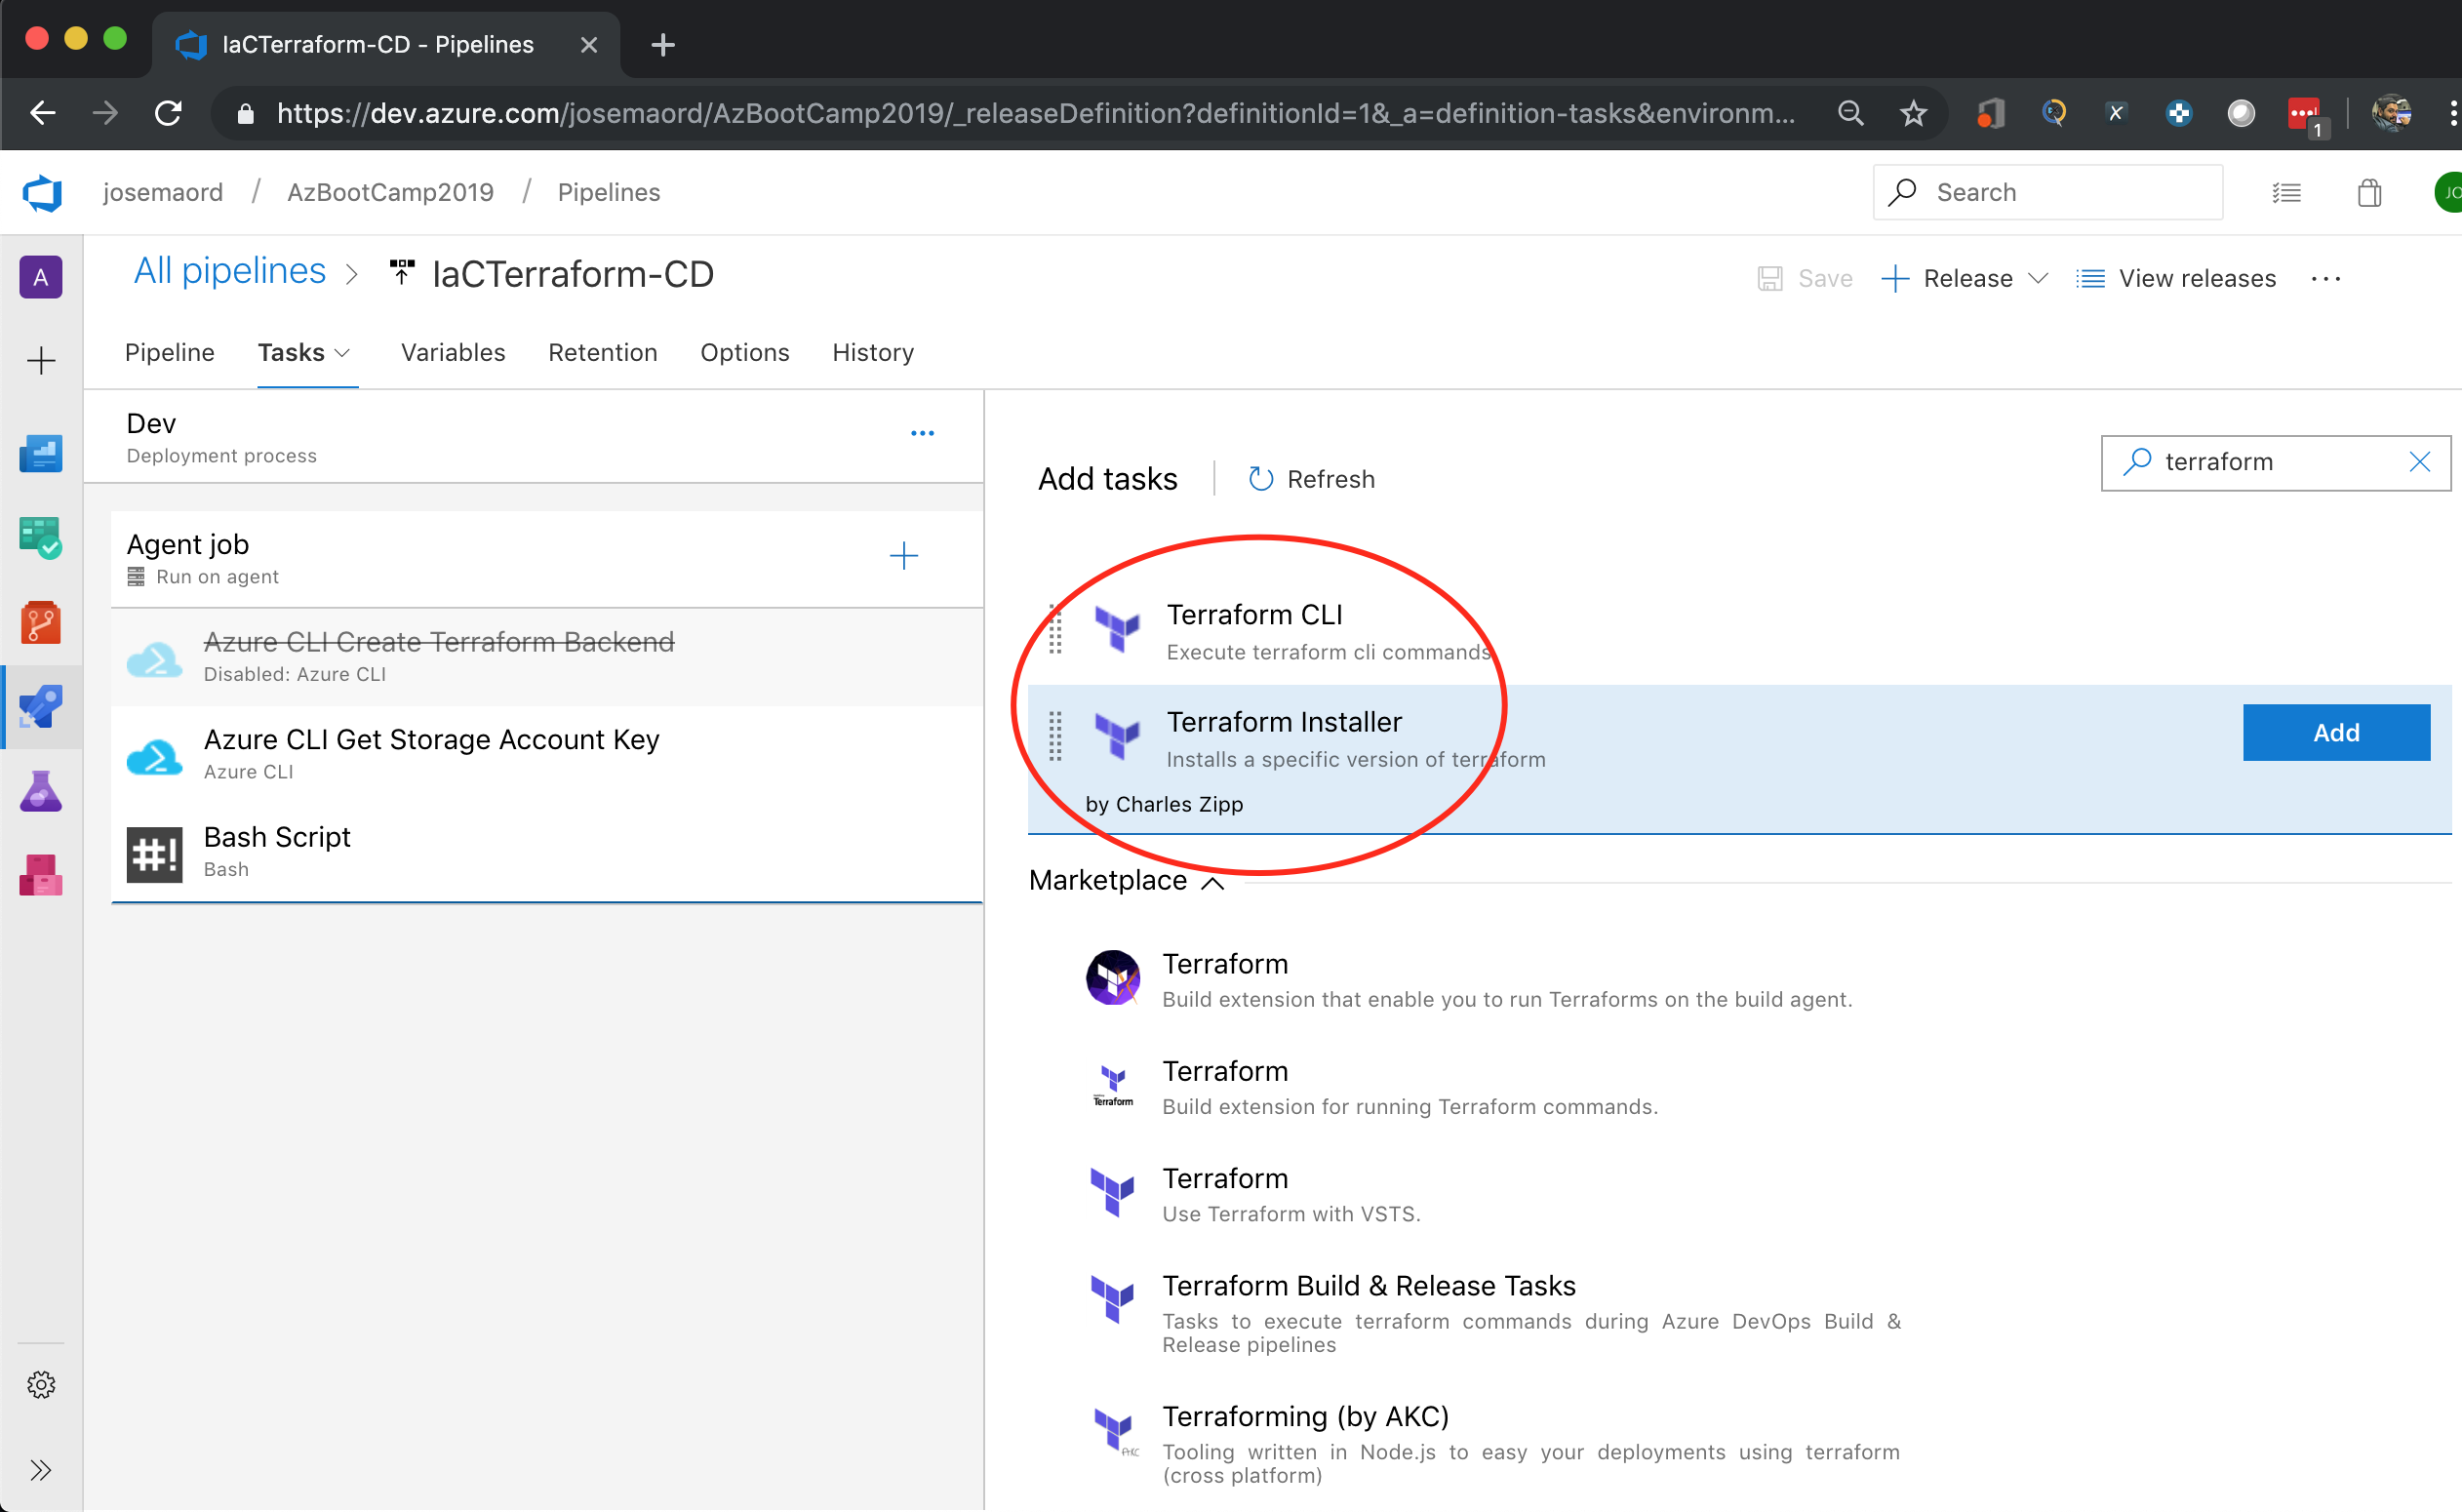
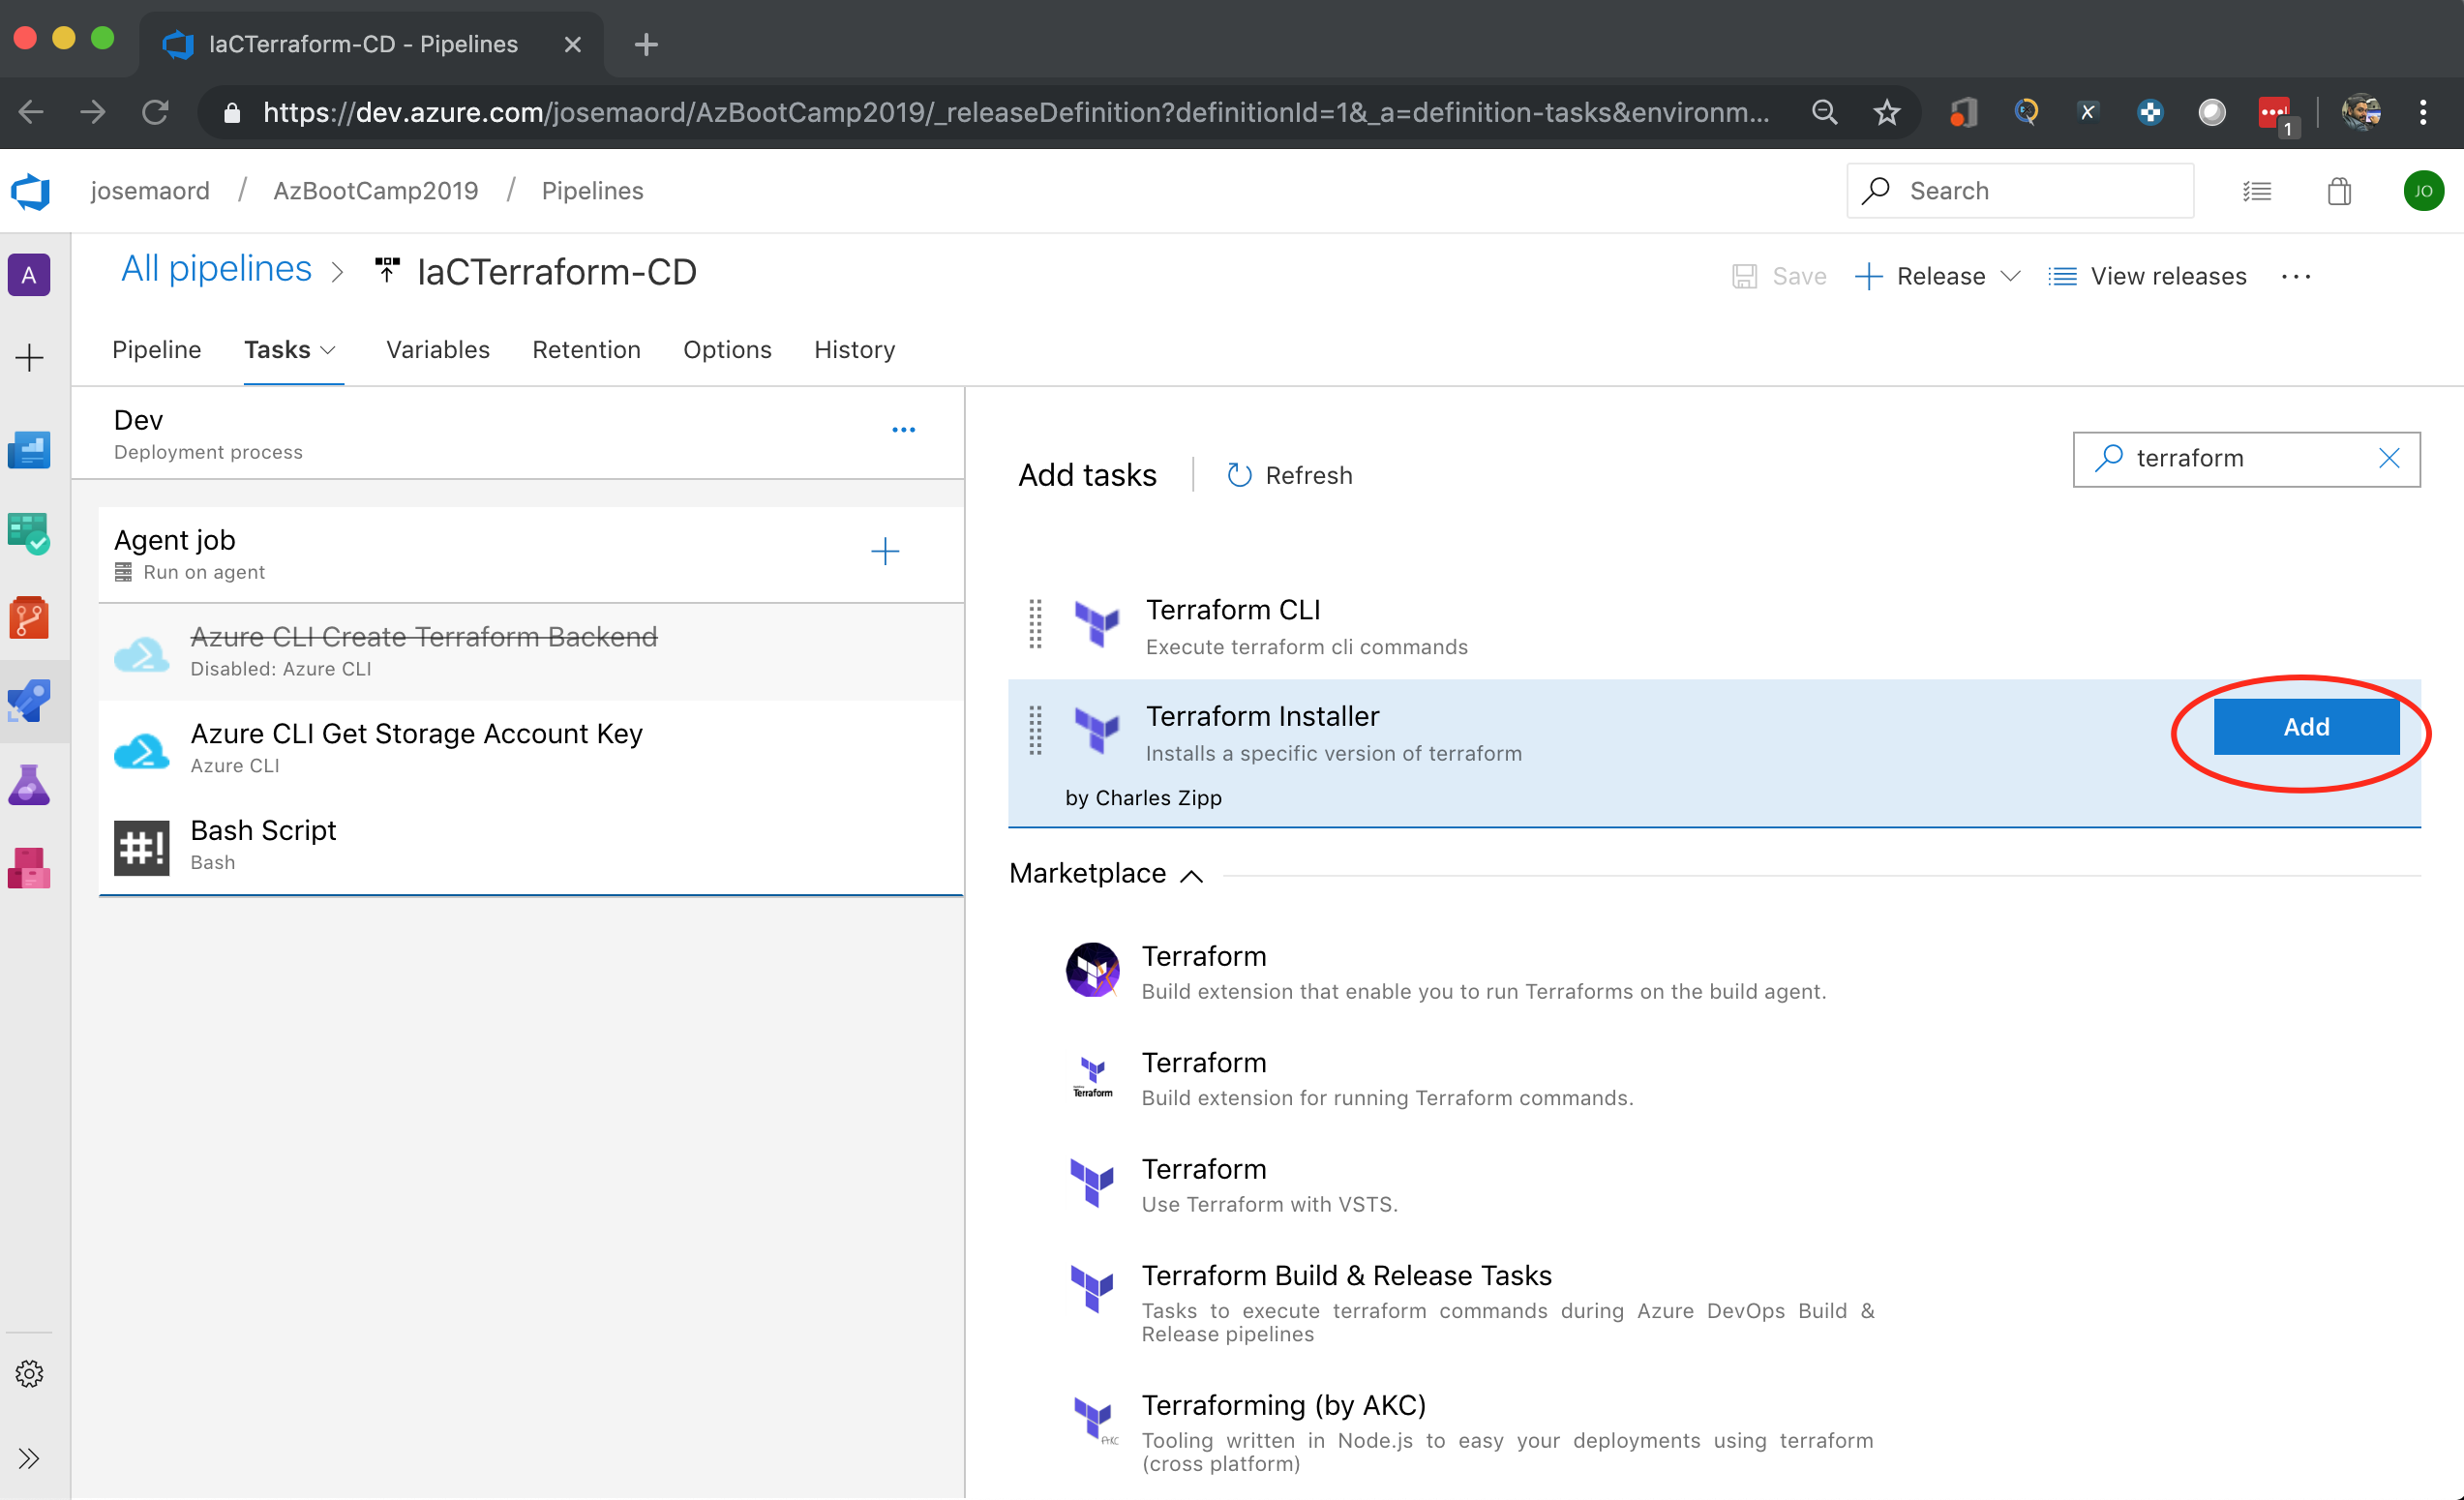
Once the extension is installed in your Azure DevOps you can add the task for Terraform Install, this task will guarantee that the agent that runs the command has Terraform installed.

Add Terraform CLI task to perform the Init Stage, you should select the command “Init” and for the Configuration directory you should point to the artifact configured before (repo and folder that contains the terraform files). 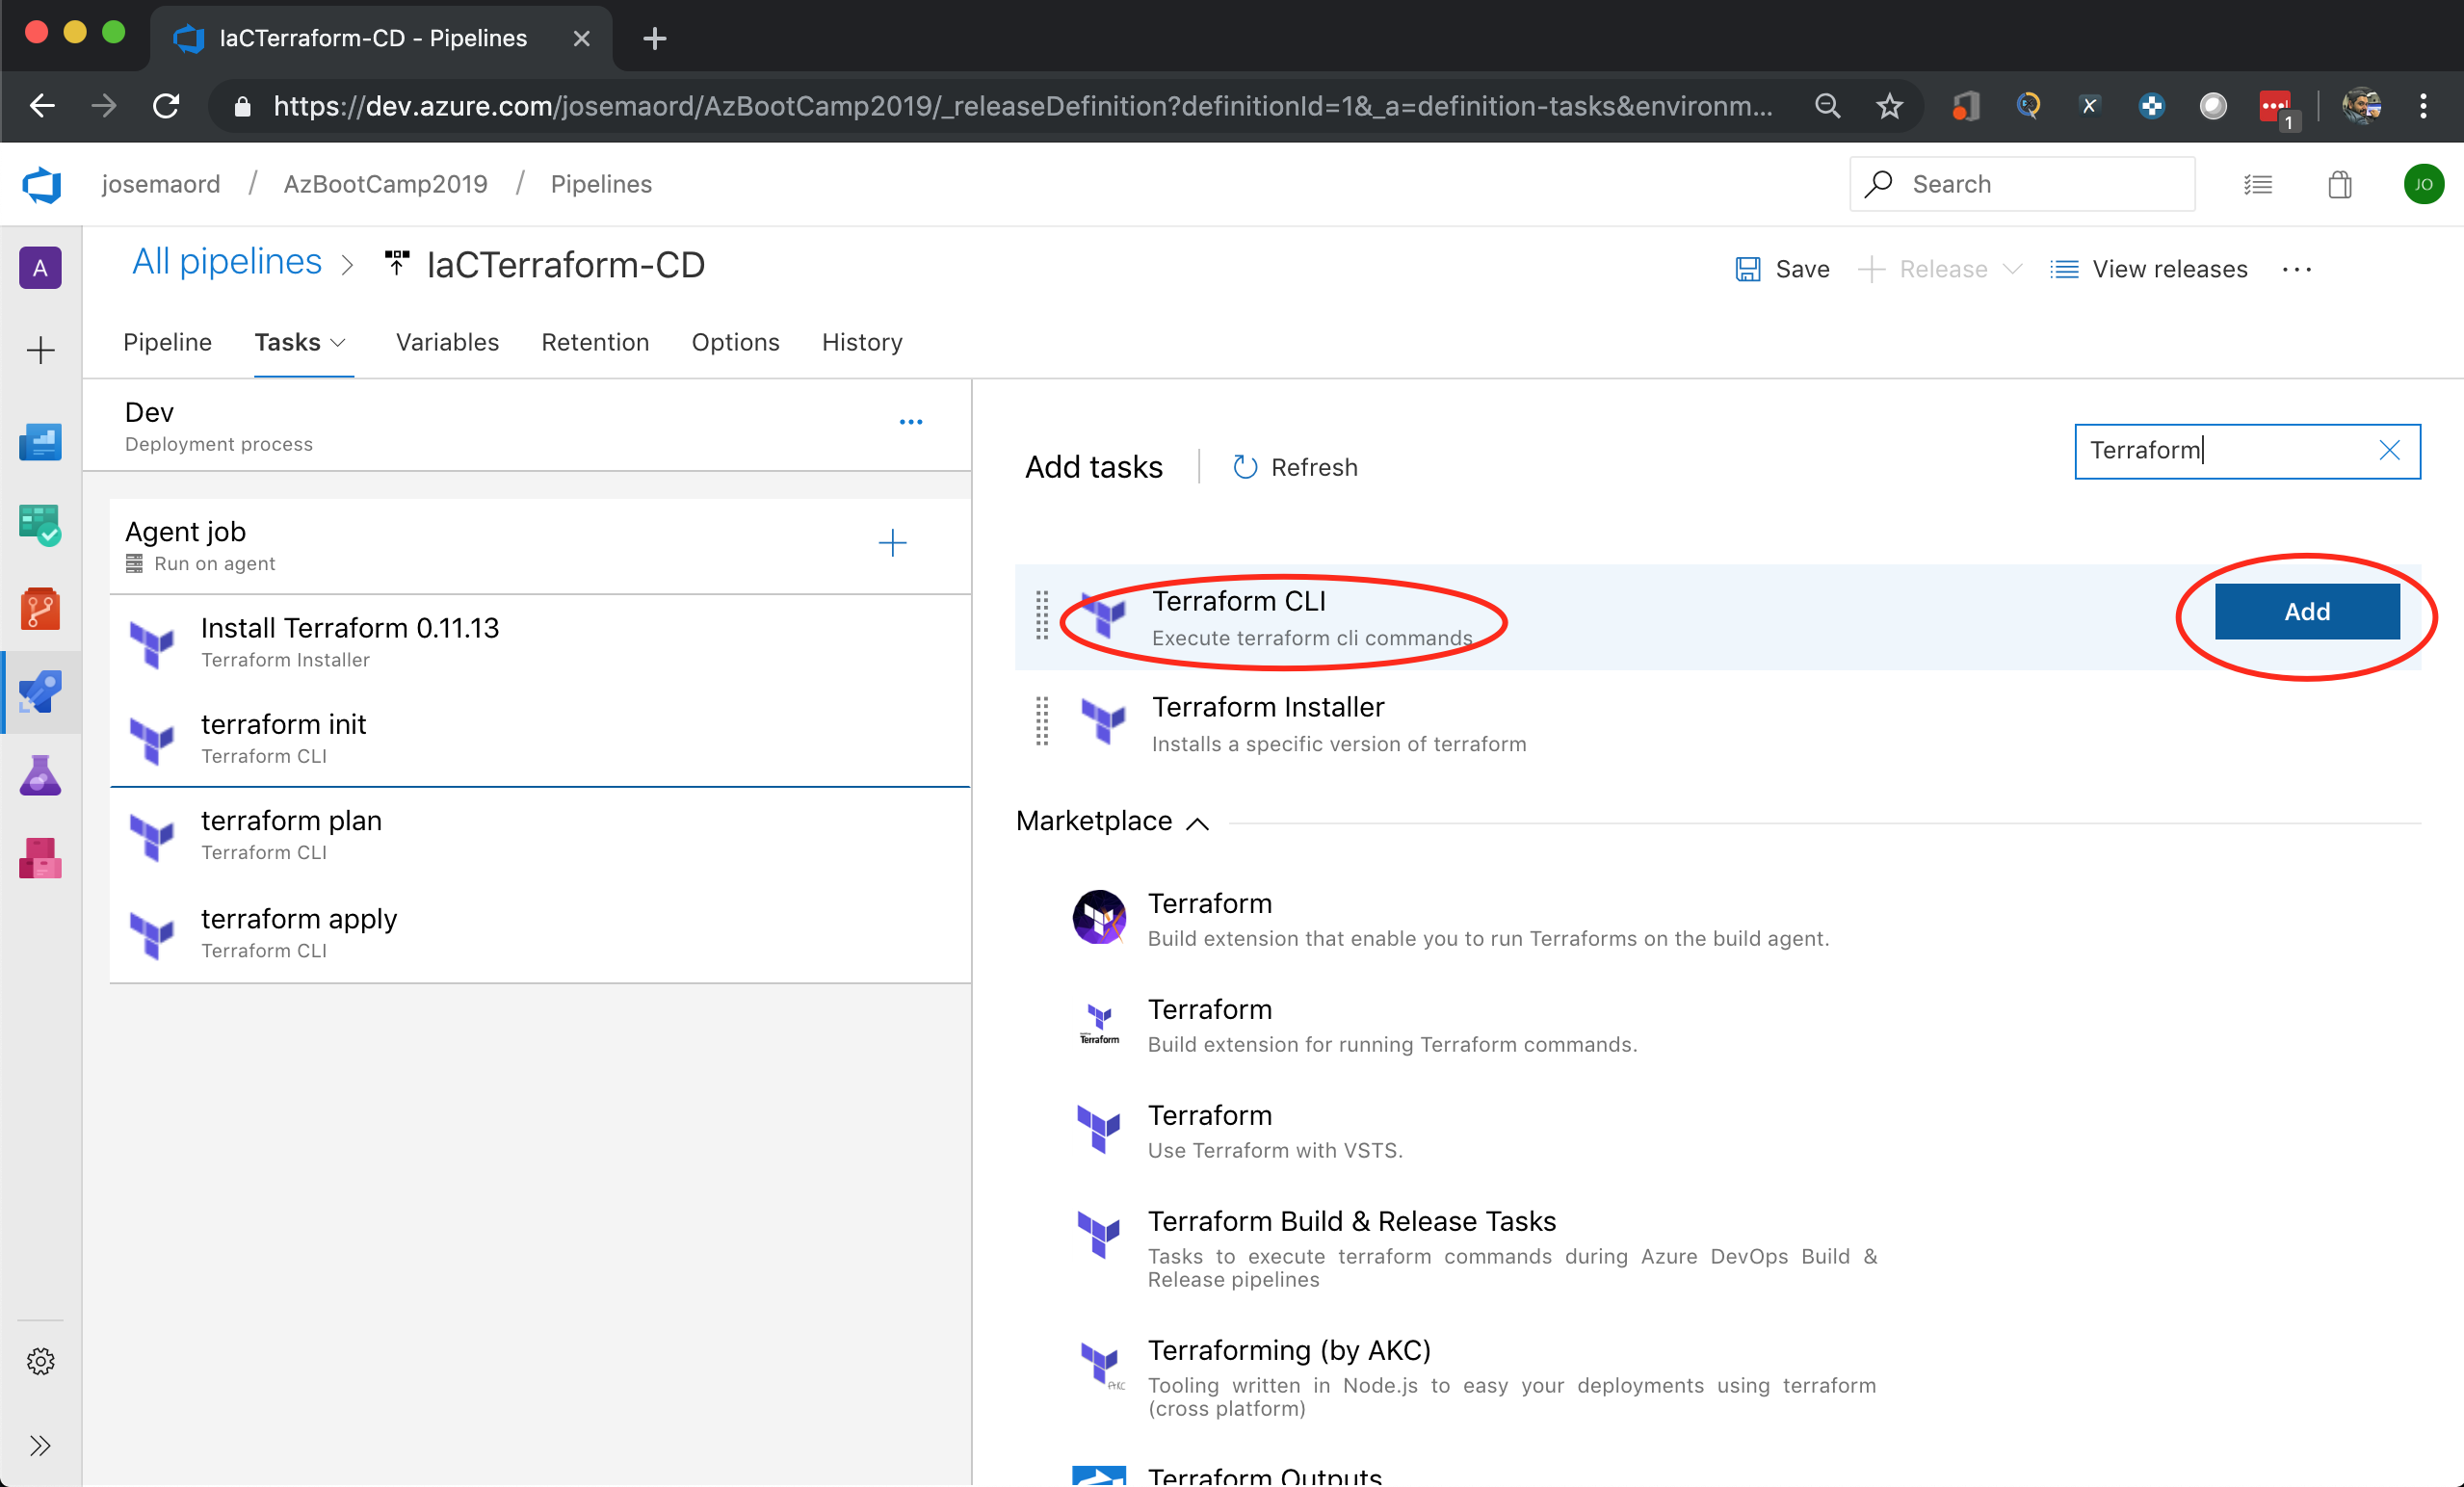
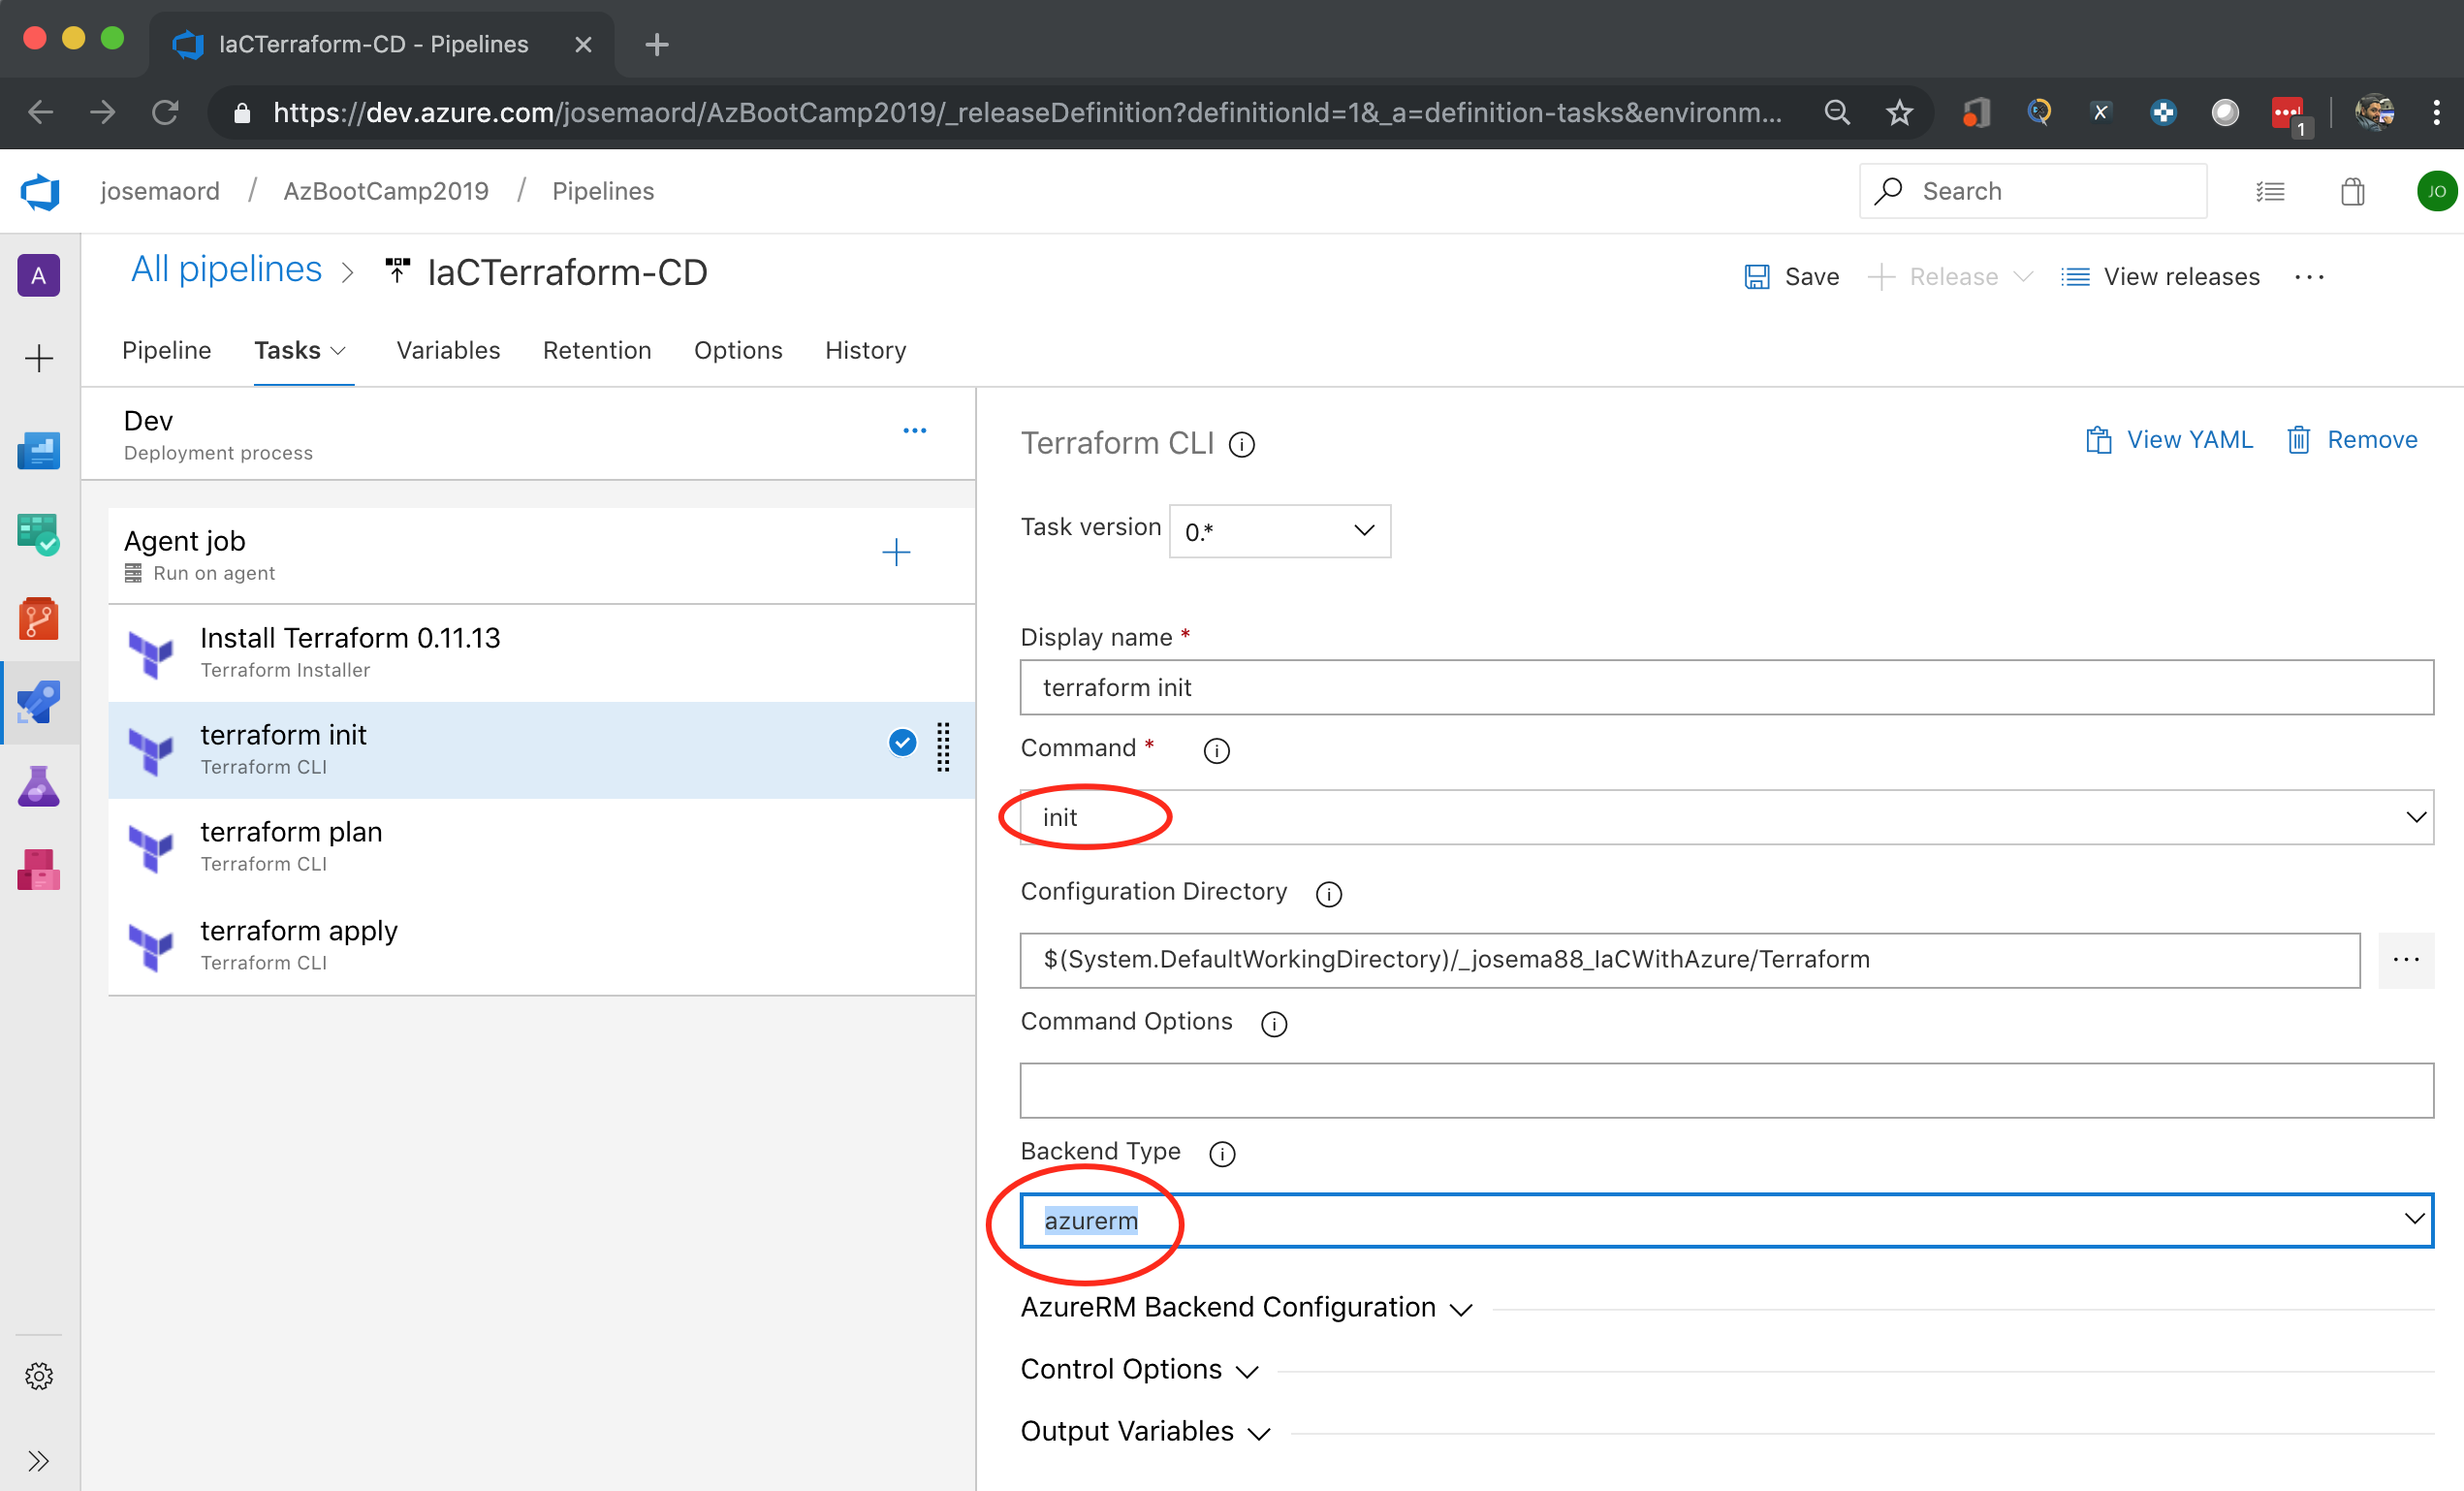
Configure the Azure Resource Manager section in order to set the Terraform Backend that will be located in azure, we should use the Pipeline variables configured previously.
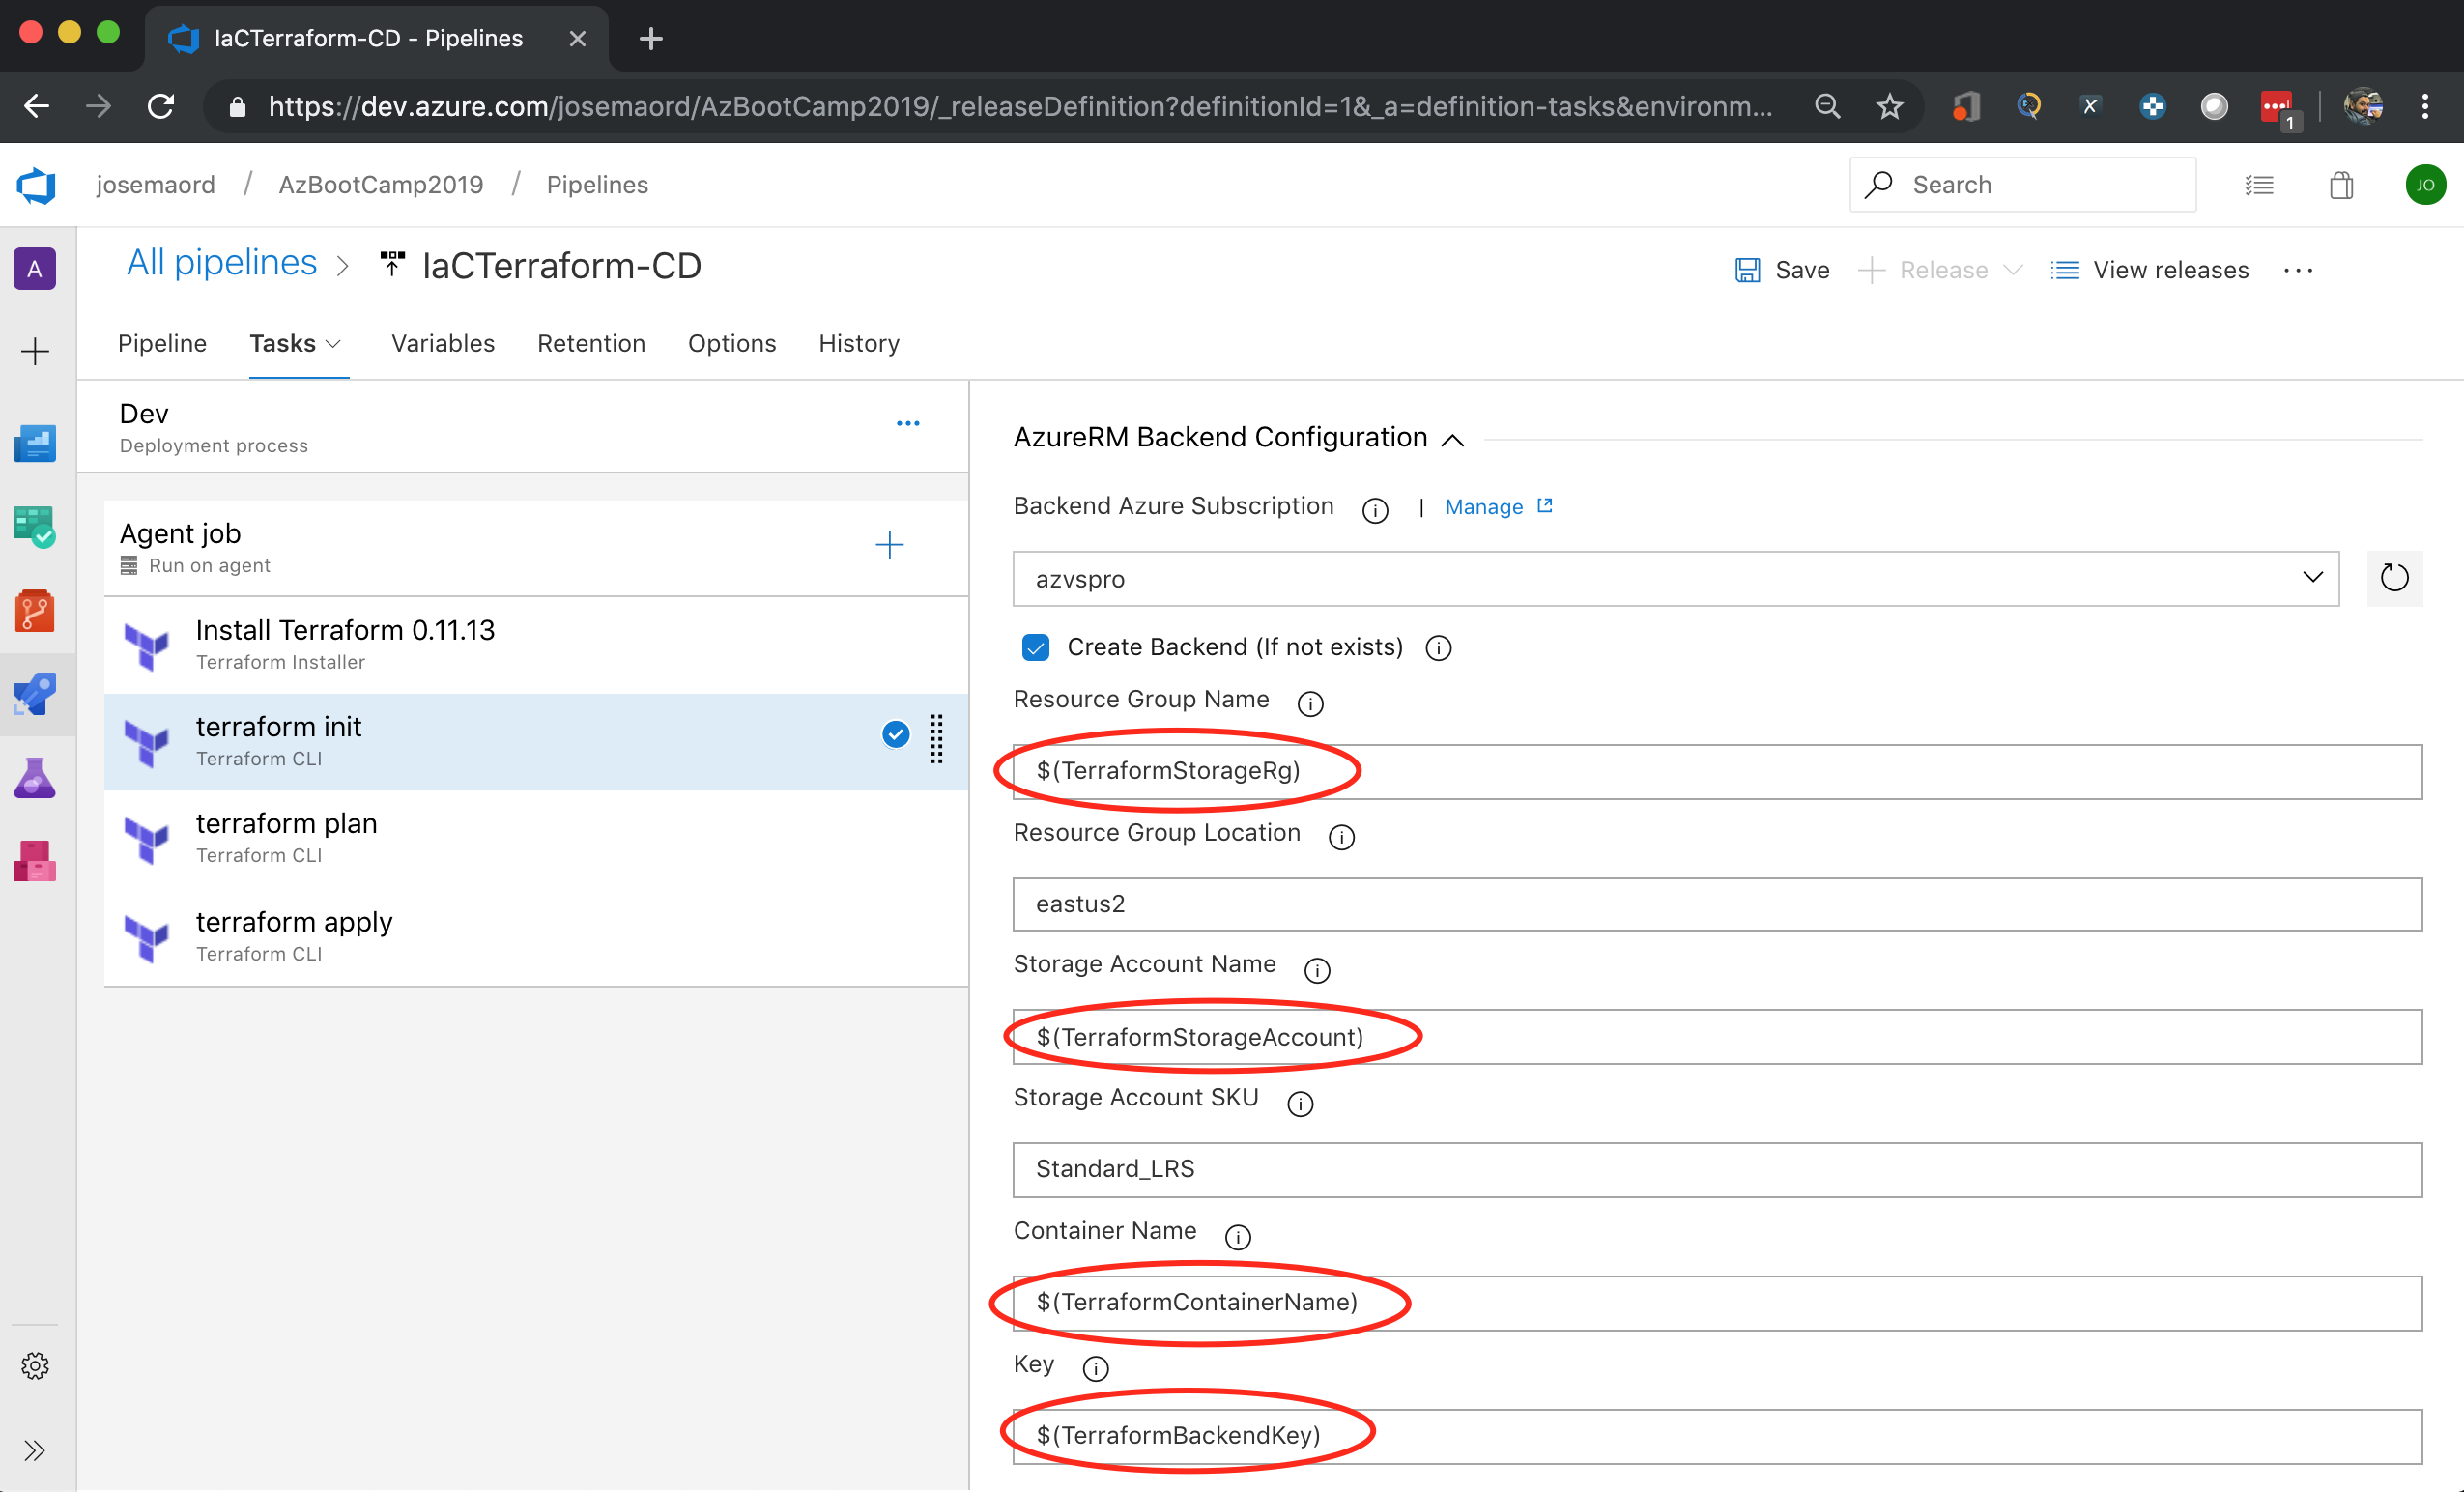
This task runs terraform init command. The terraform init command looks through all of the *.tf files in the current working directory and automatically downloads any of the providers required for them. In this example, it will download Azure provider as we are going to deploy Azure resources. For more information about terraform init command click here.
Add Task - Terraform Plan
Add Terraform CLI task like the init task, but for this one you should select the command “Plan”. You should set the Configuration Directory like the previous task. Also set the “Environment Azure Subscription” that should point to your Azure service connection configured before, you should authorize the connection if necessary. 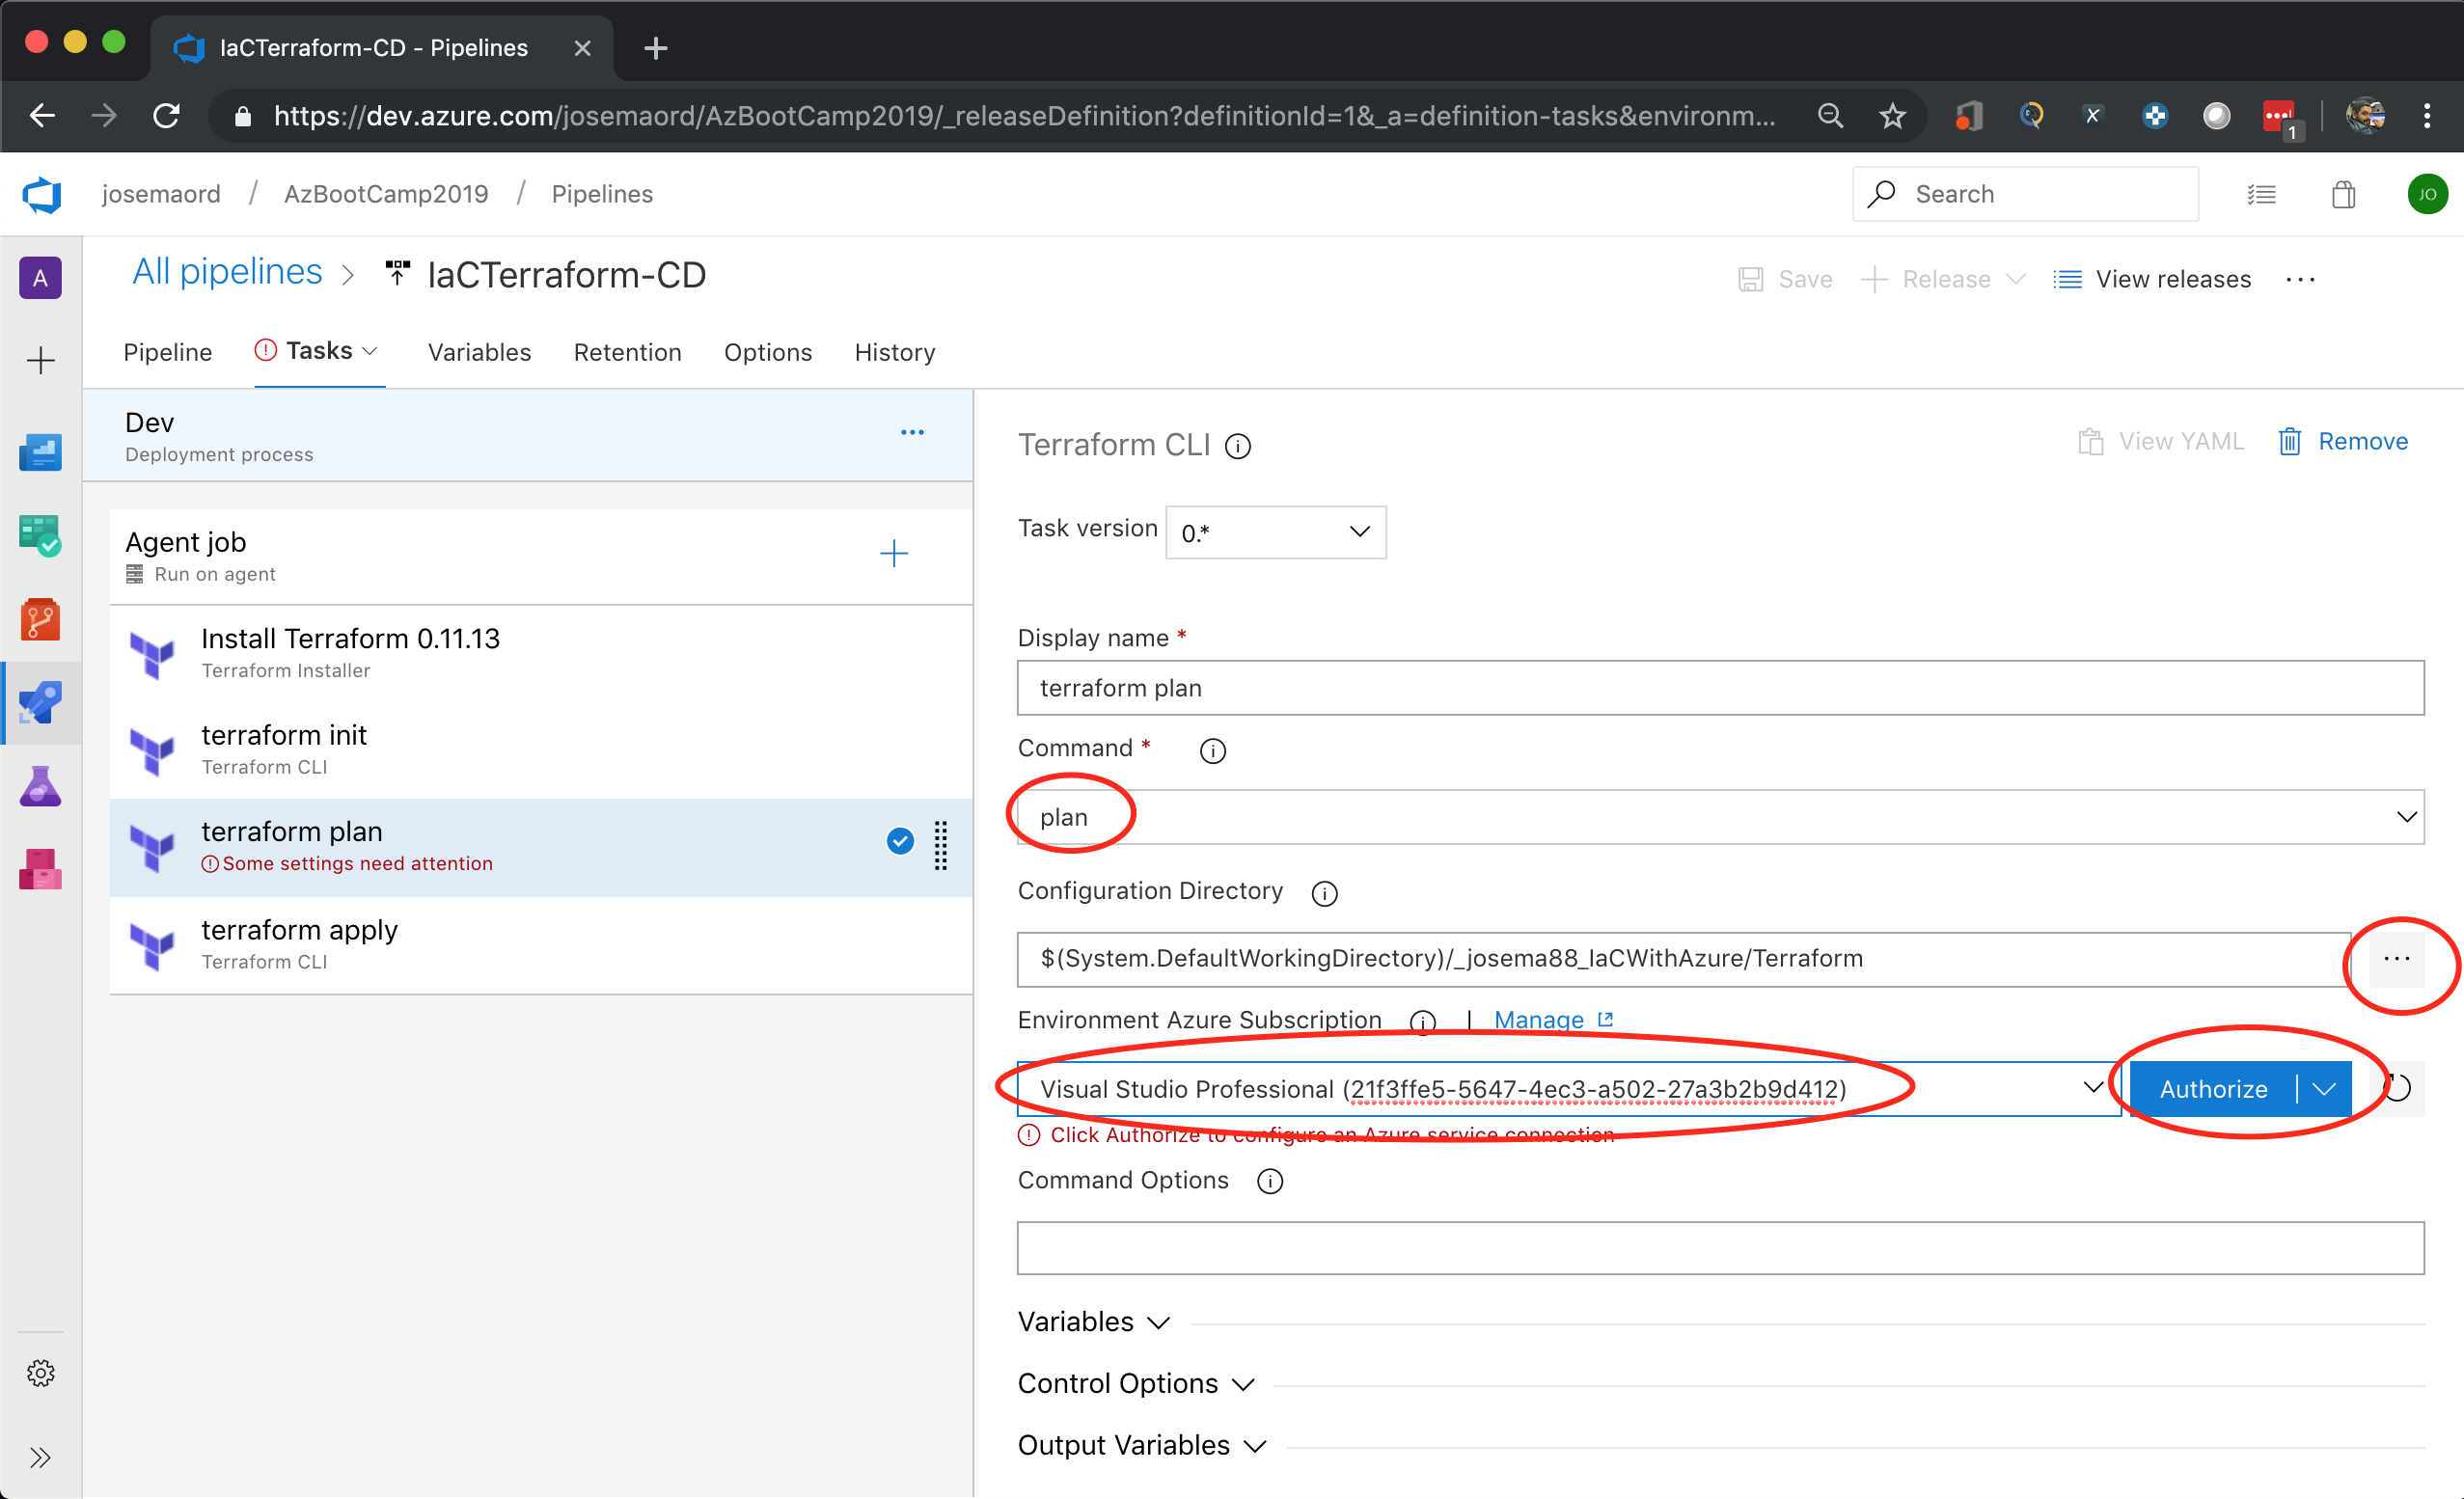
The terraform plan command is used to create an execution plan. Terraform determines what actions are necessary to achieve the desired state specified in the configuration files. This is a dry run and shows which actions will be made. For more information about terraform plan command click here.
Add Task - Terraform Apply
Add Terraform CLI task like previous tasks, but for this one you should select the command “Apply”. You should set the Configuration Directory like the previous task. Also set the “Environment Azure Subscription” that should point to your Azure service connection configured before. 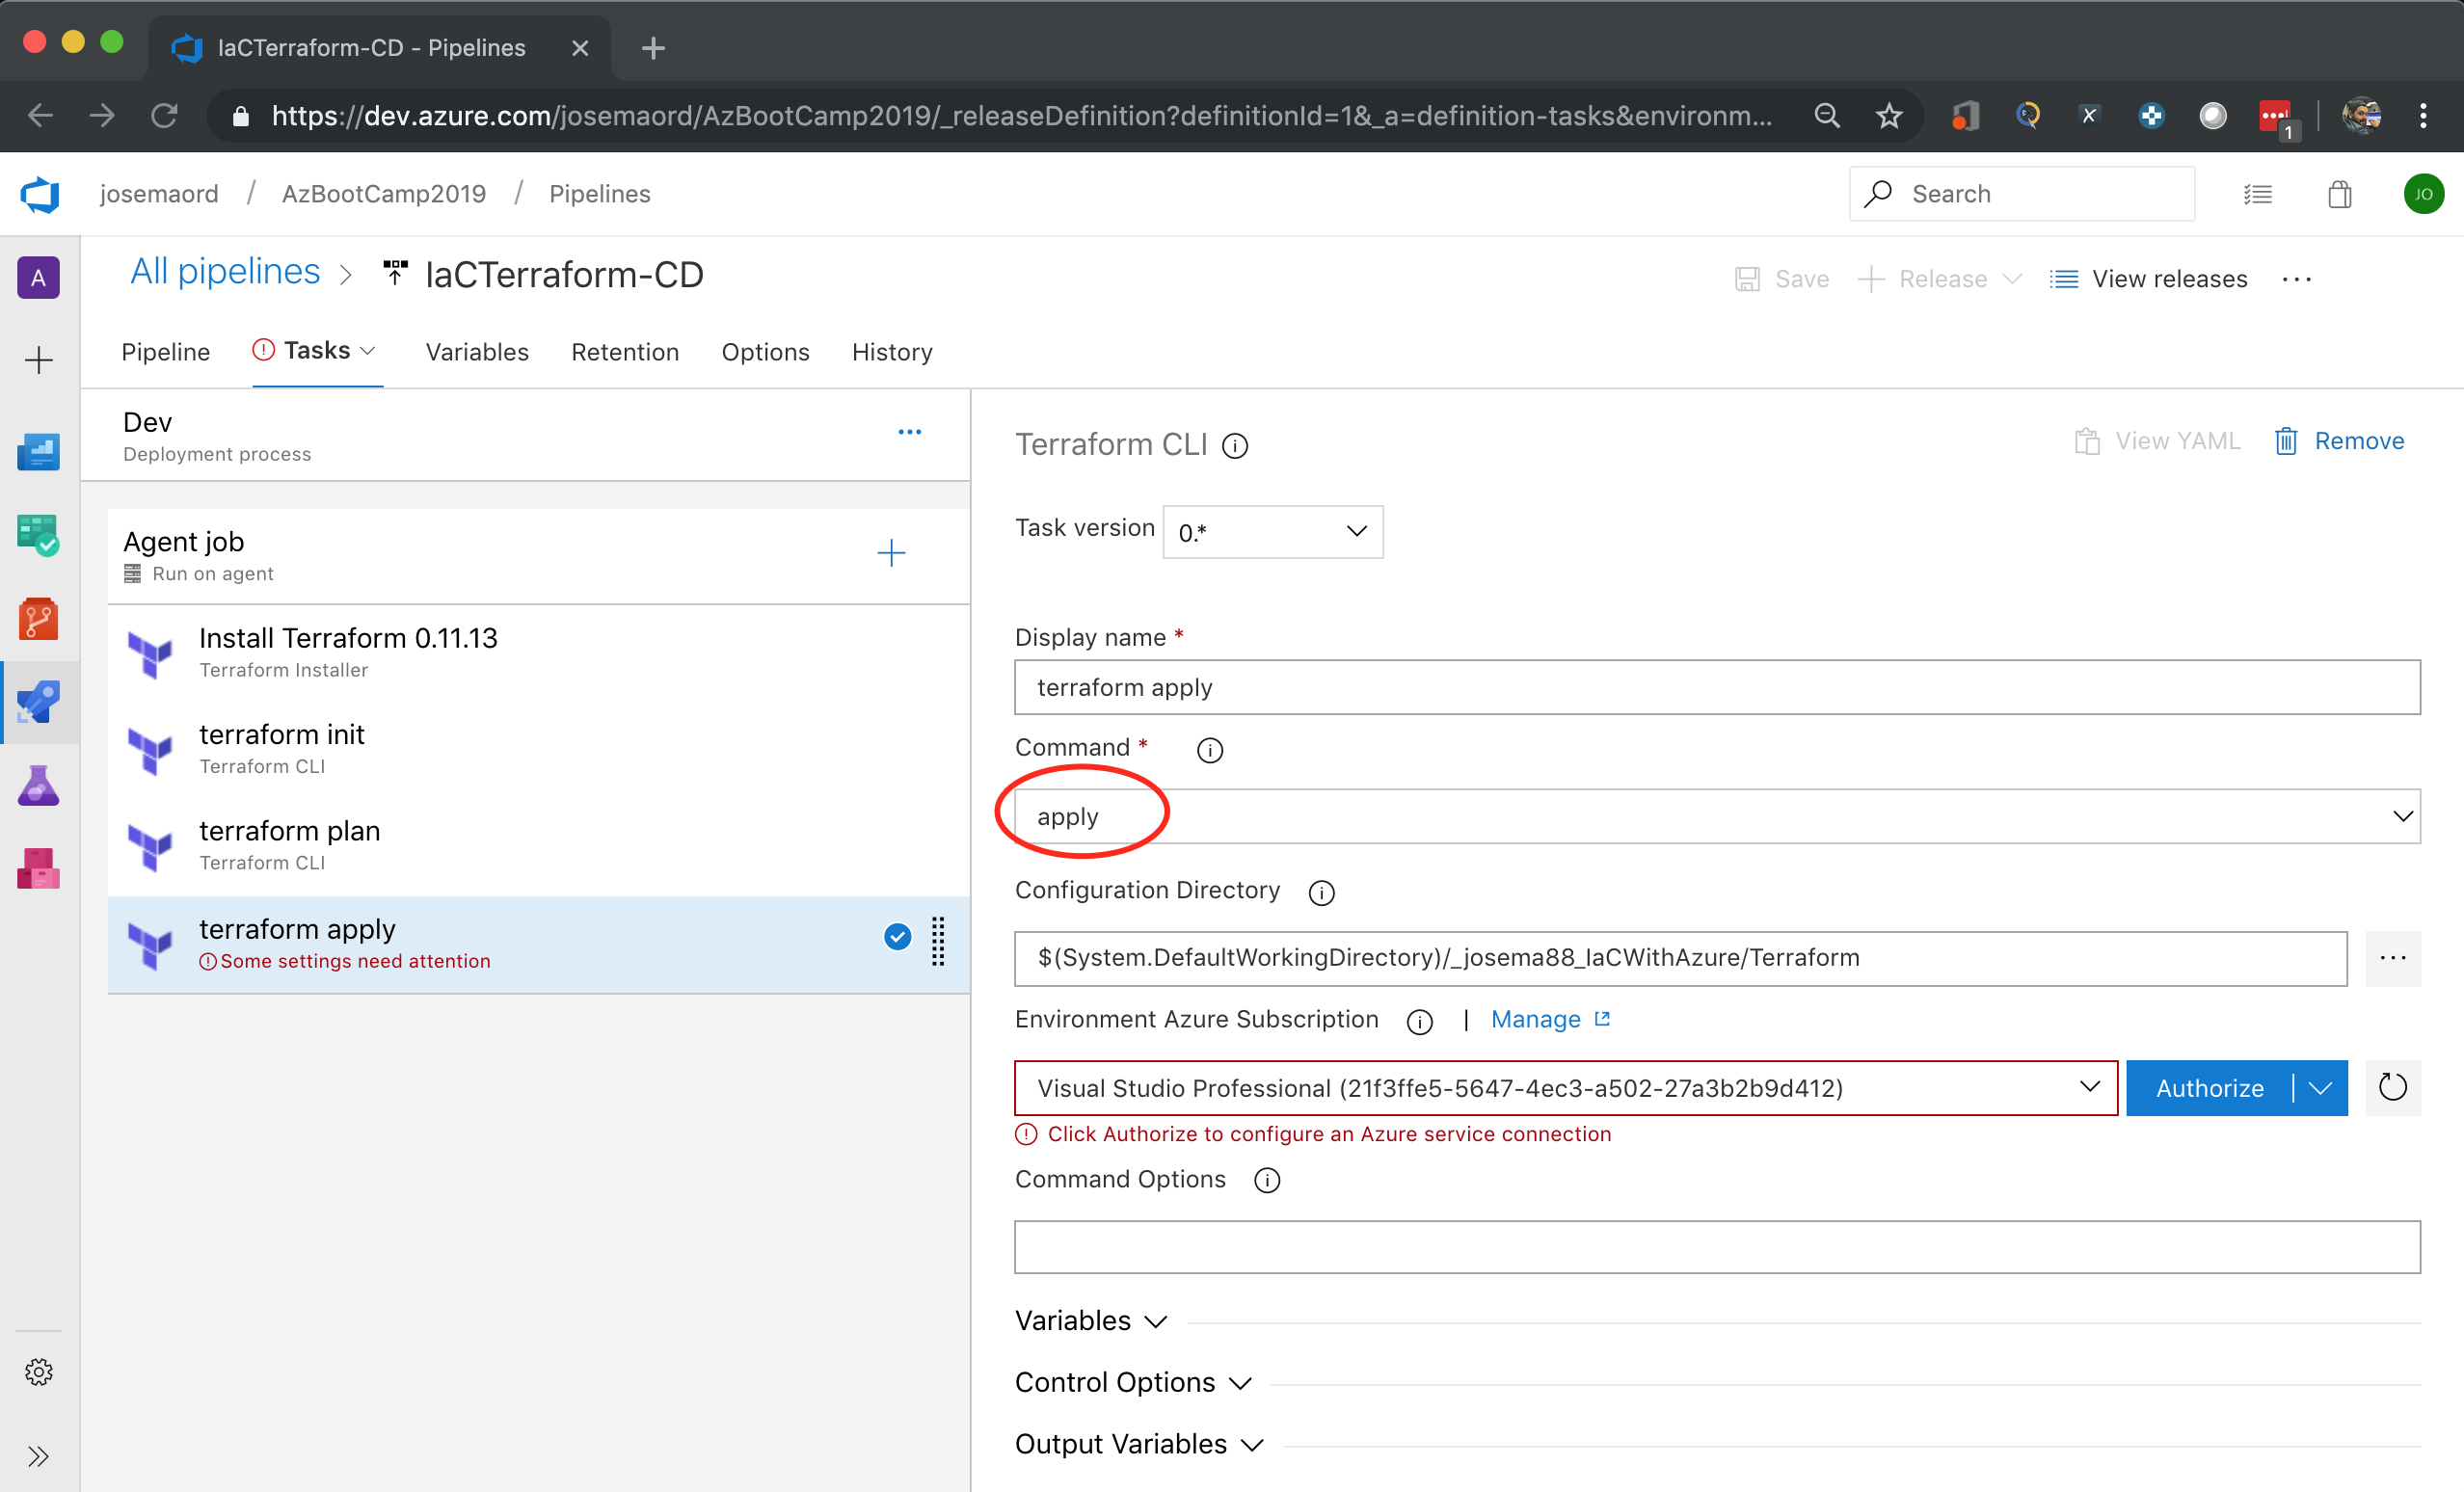
This task will run the terraform apply command to deploy the resources to Azure Cloud.
Save your Pipeline
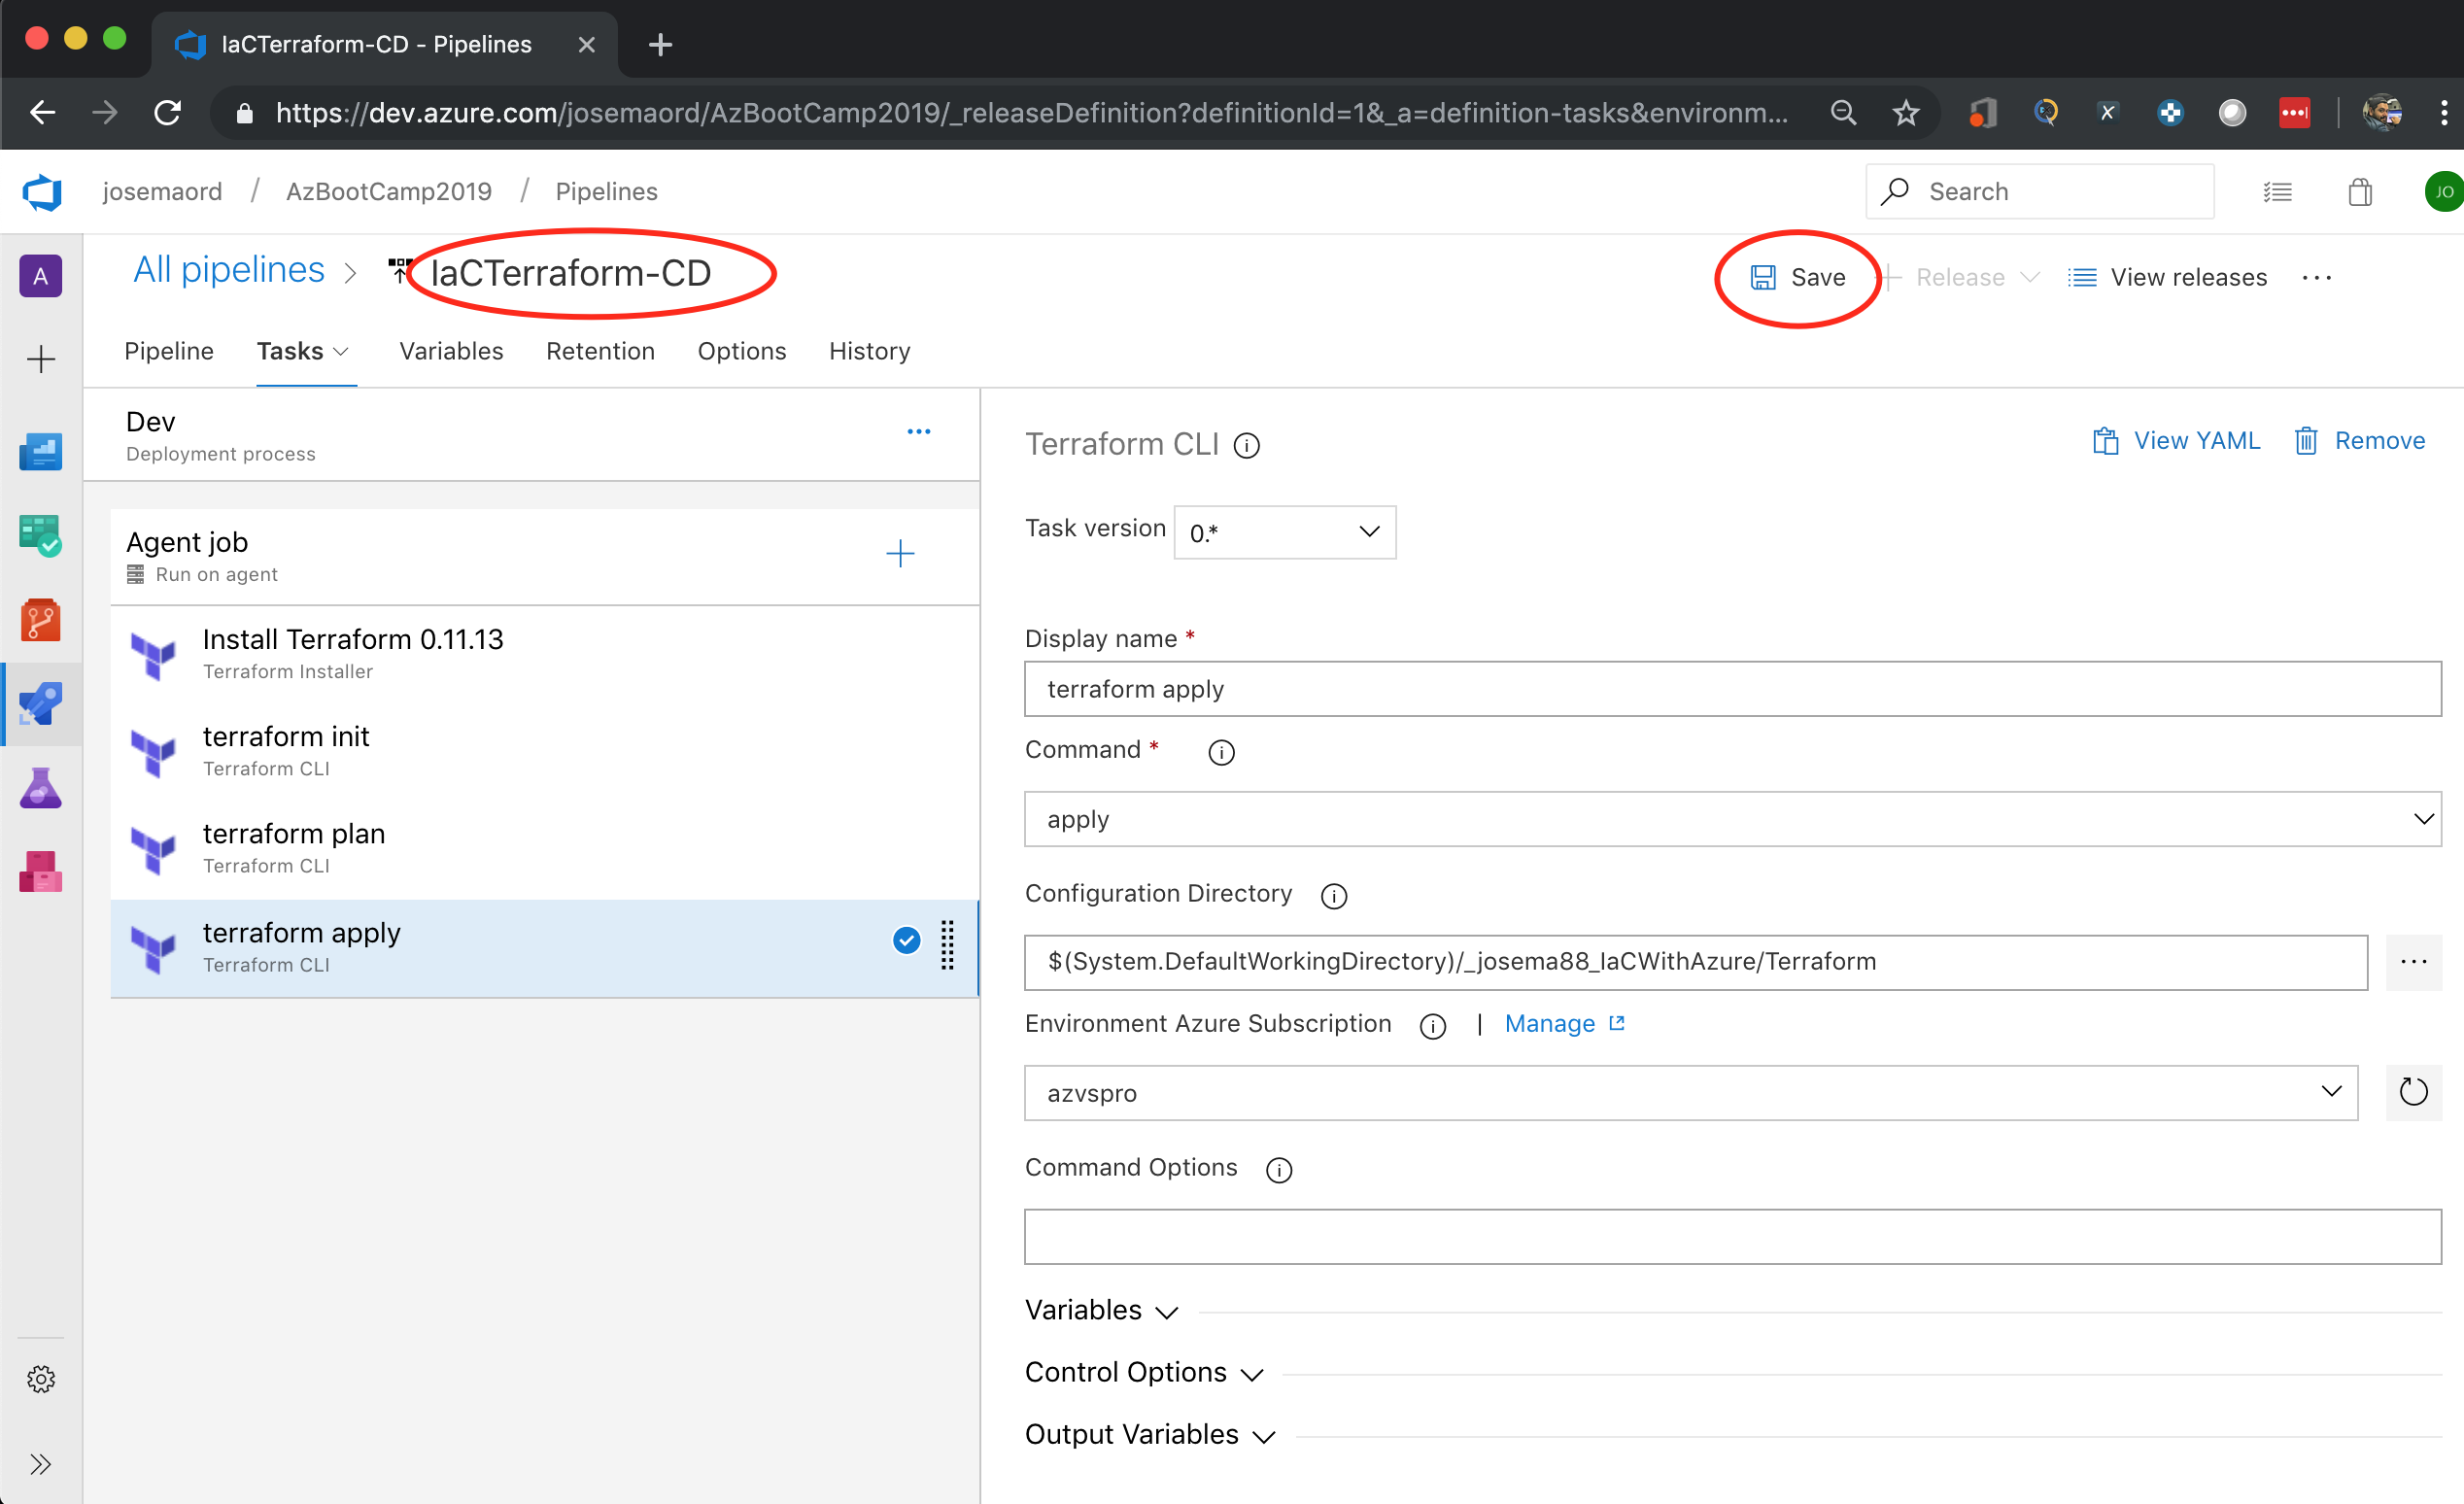
Once the pipeline configuration is completed set a Name on it and save changes.
Launch your Pipeline
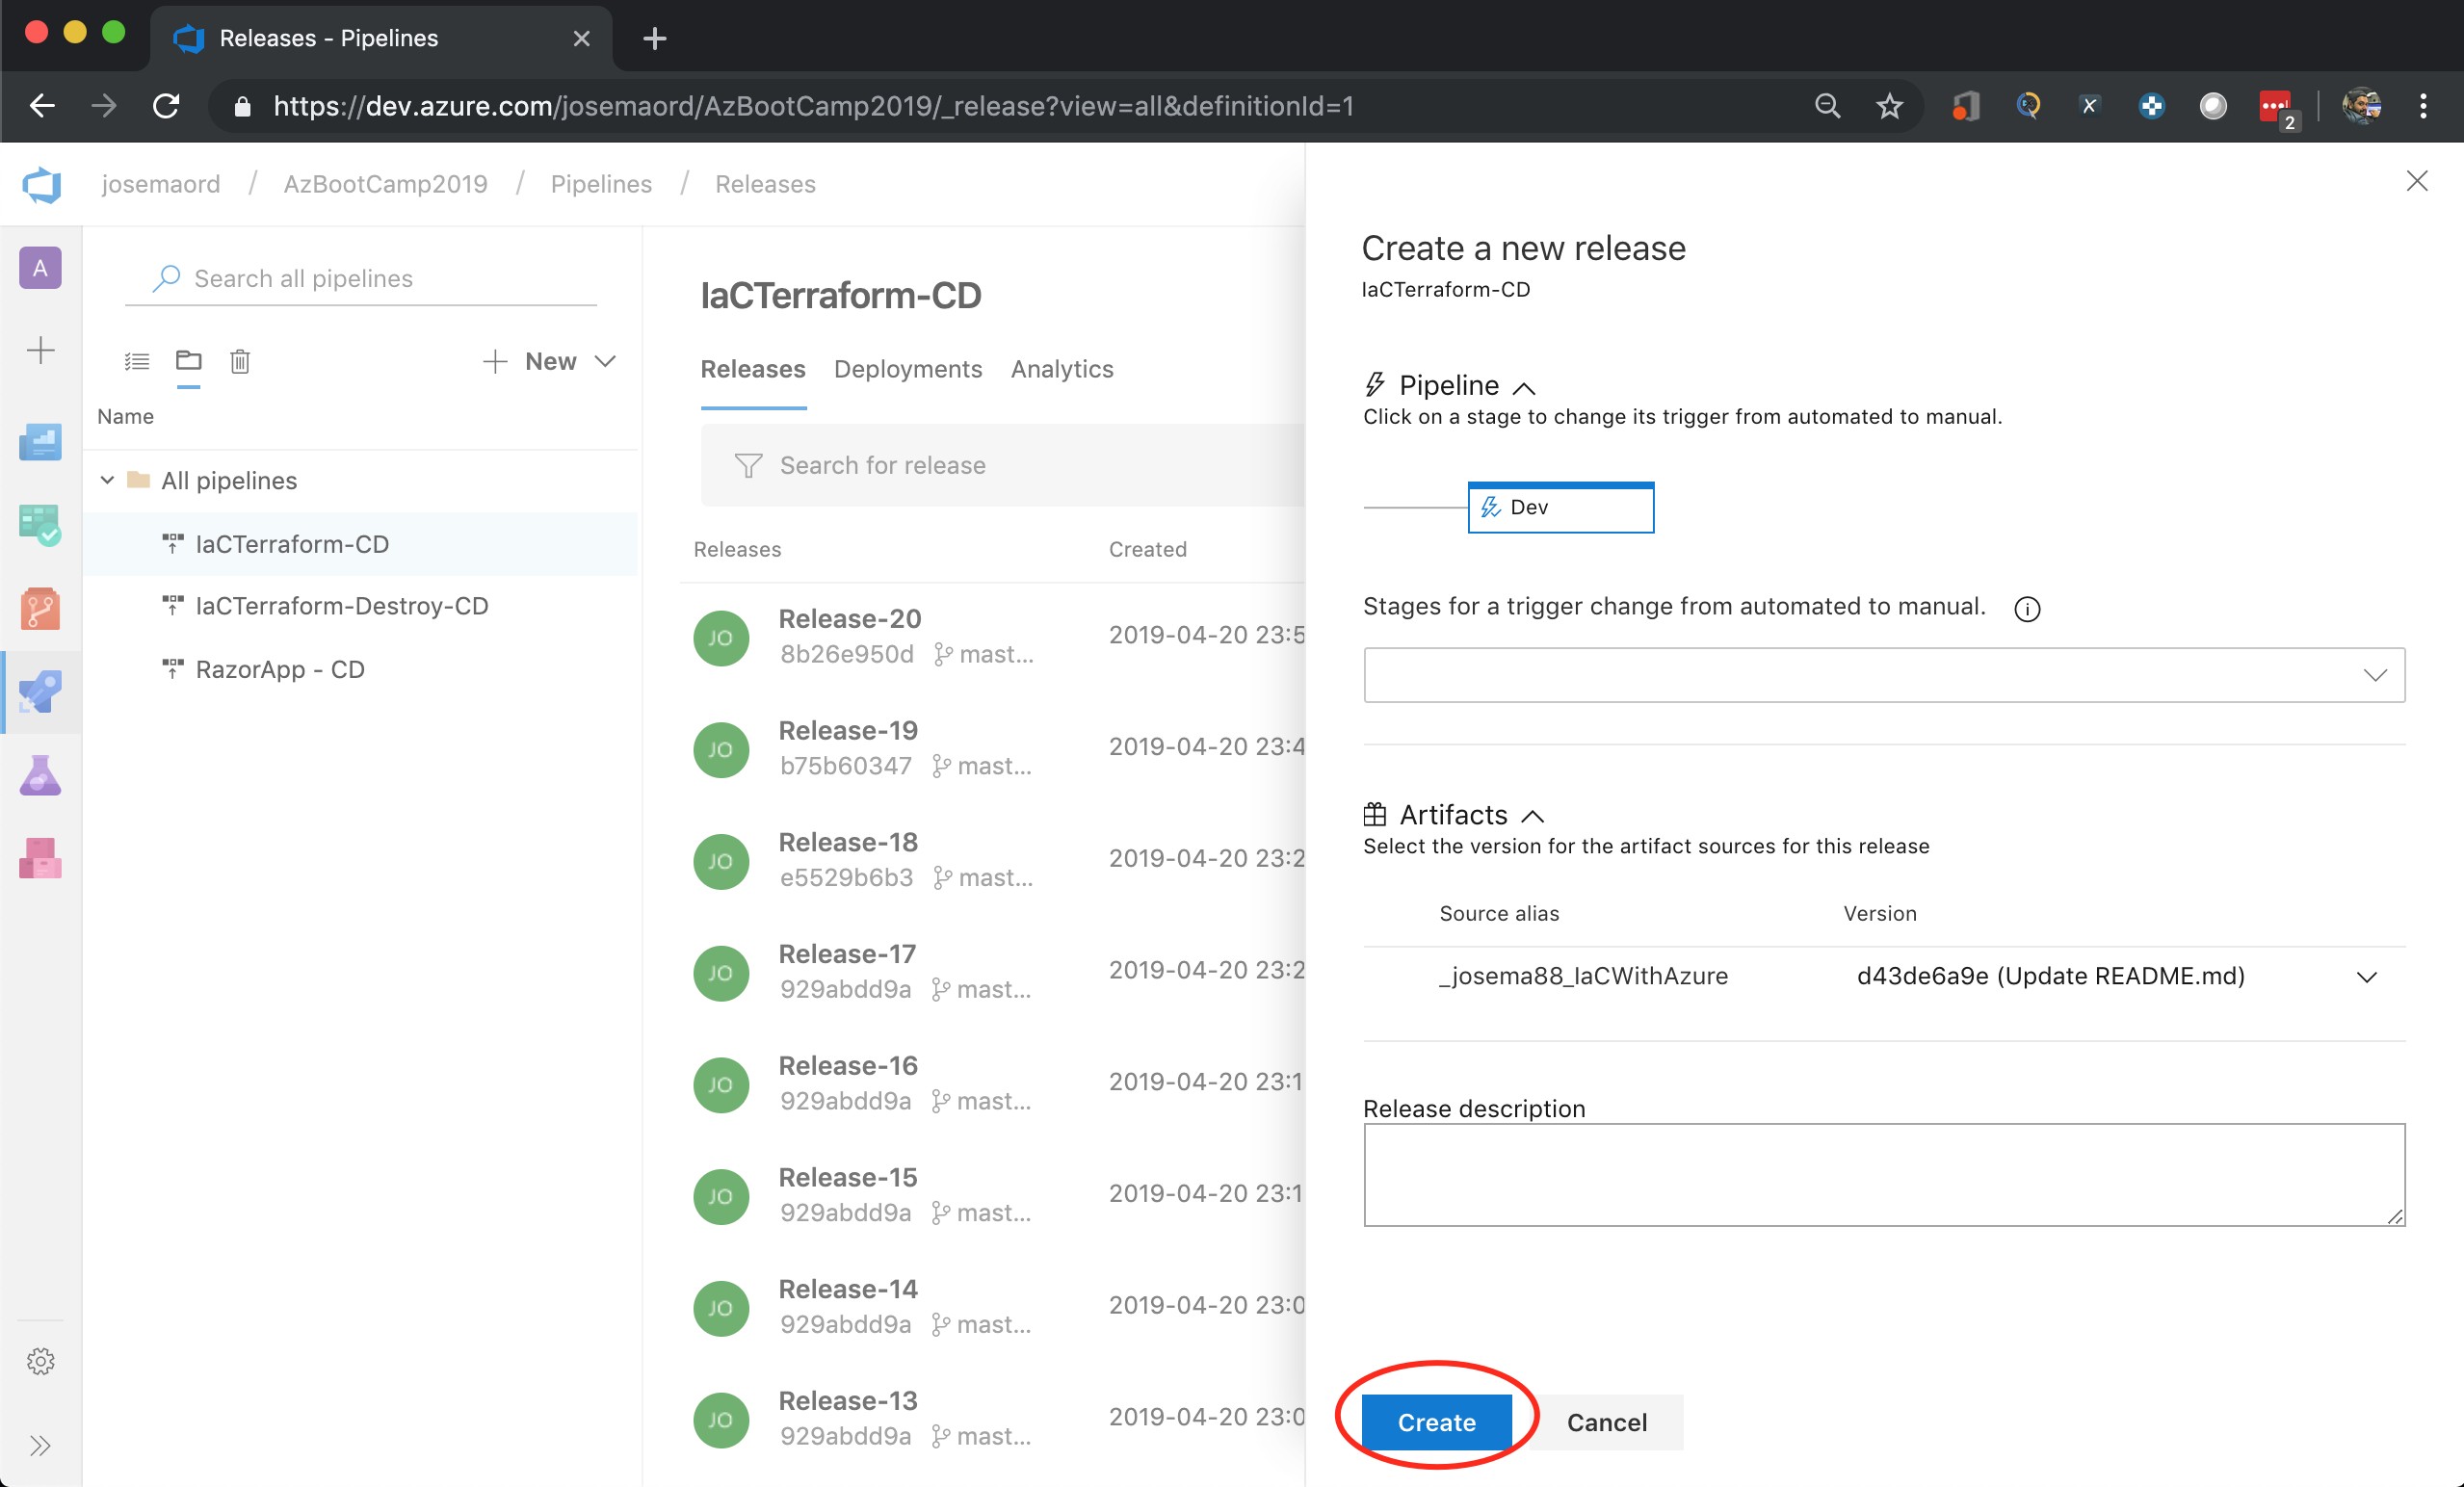
Here we go, the Pipeline is now available! So now we can Create a Release, this action will start the execution of the pipeline and its tasks. 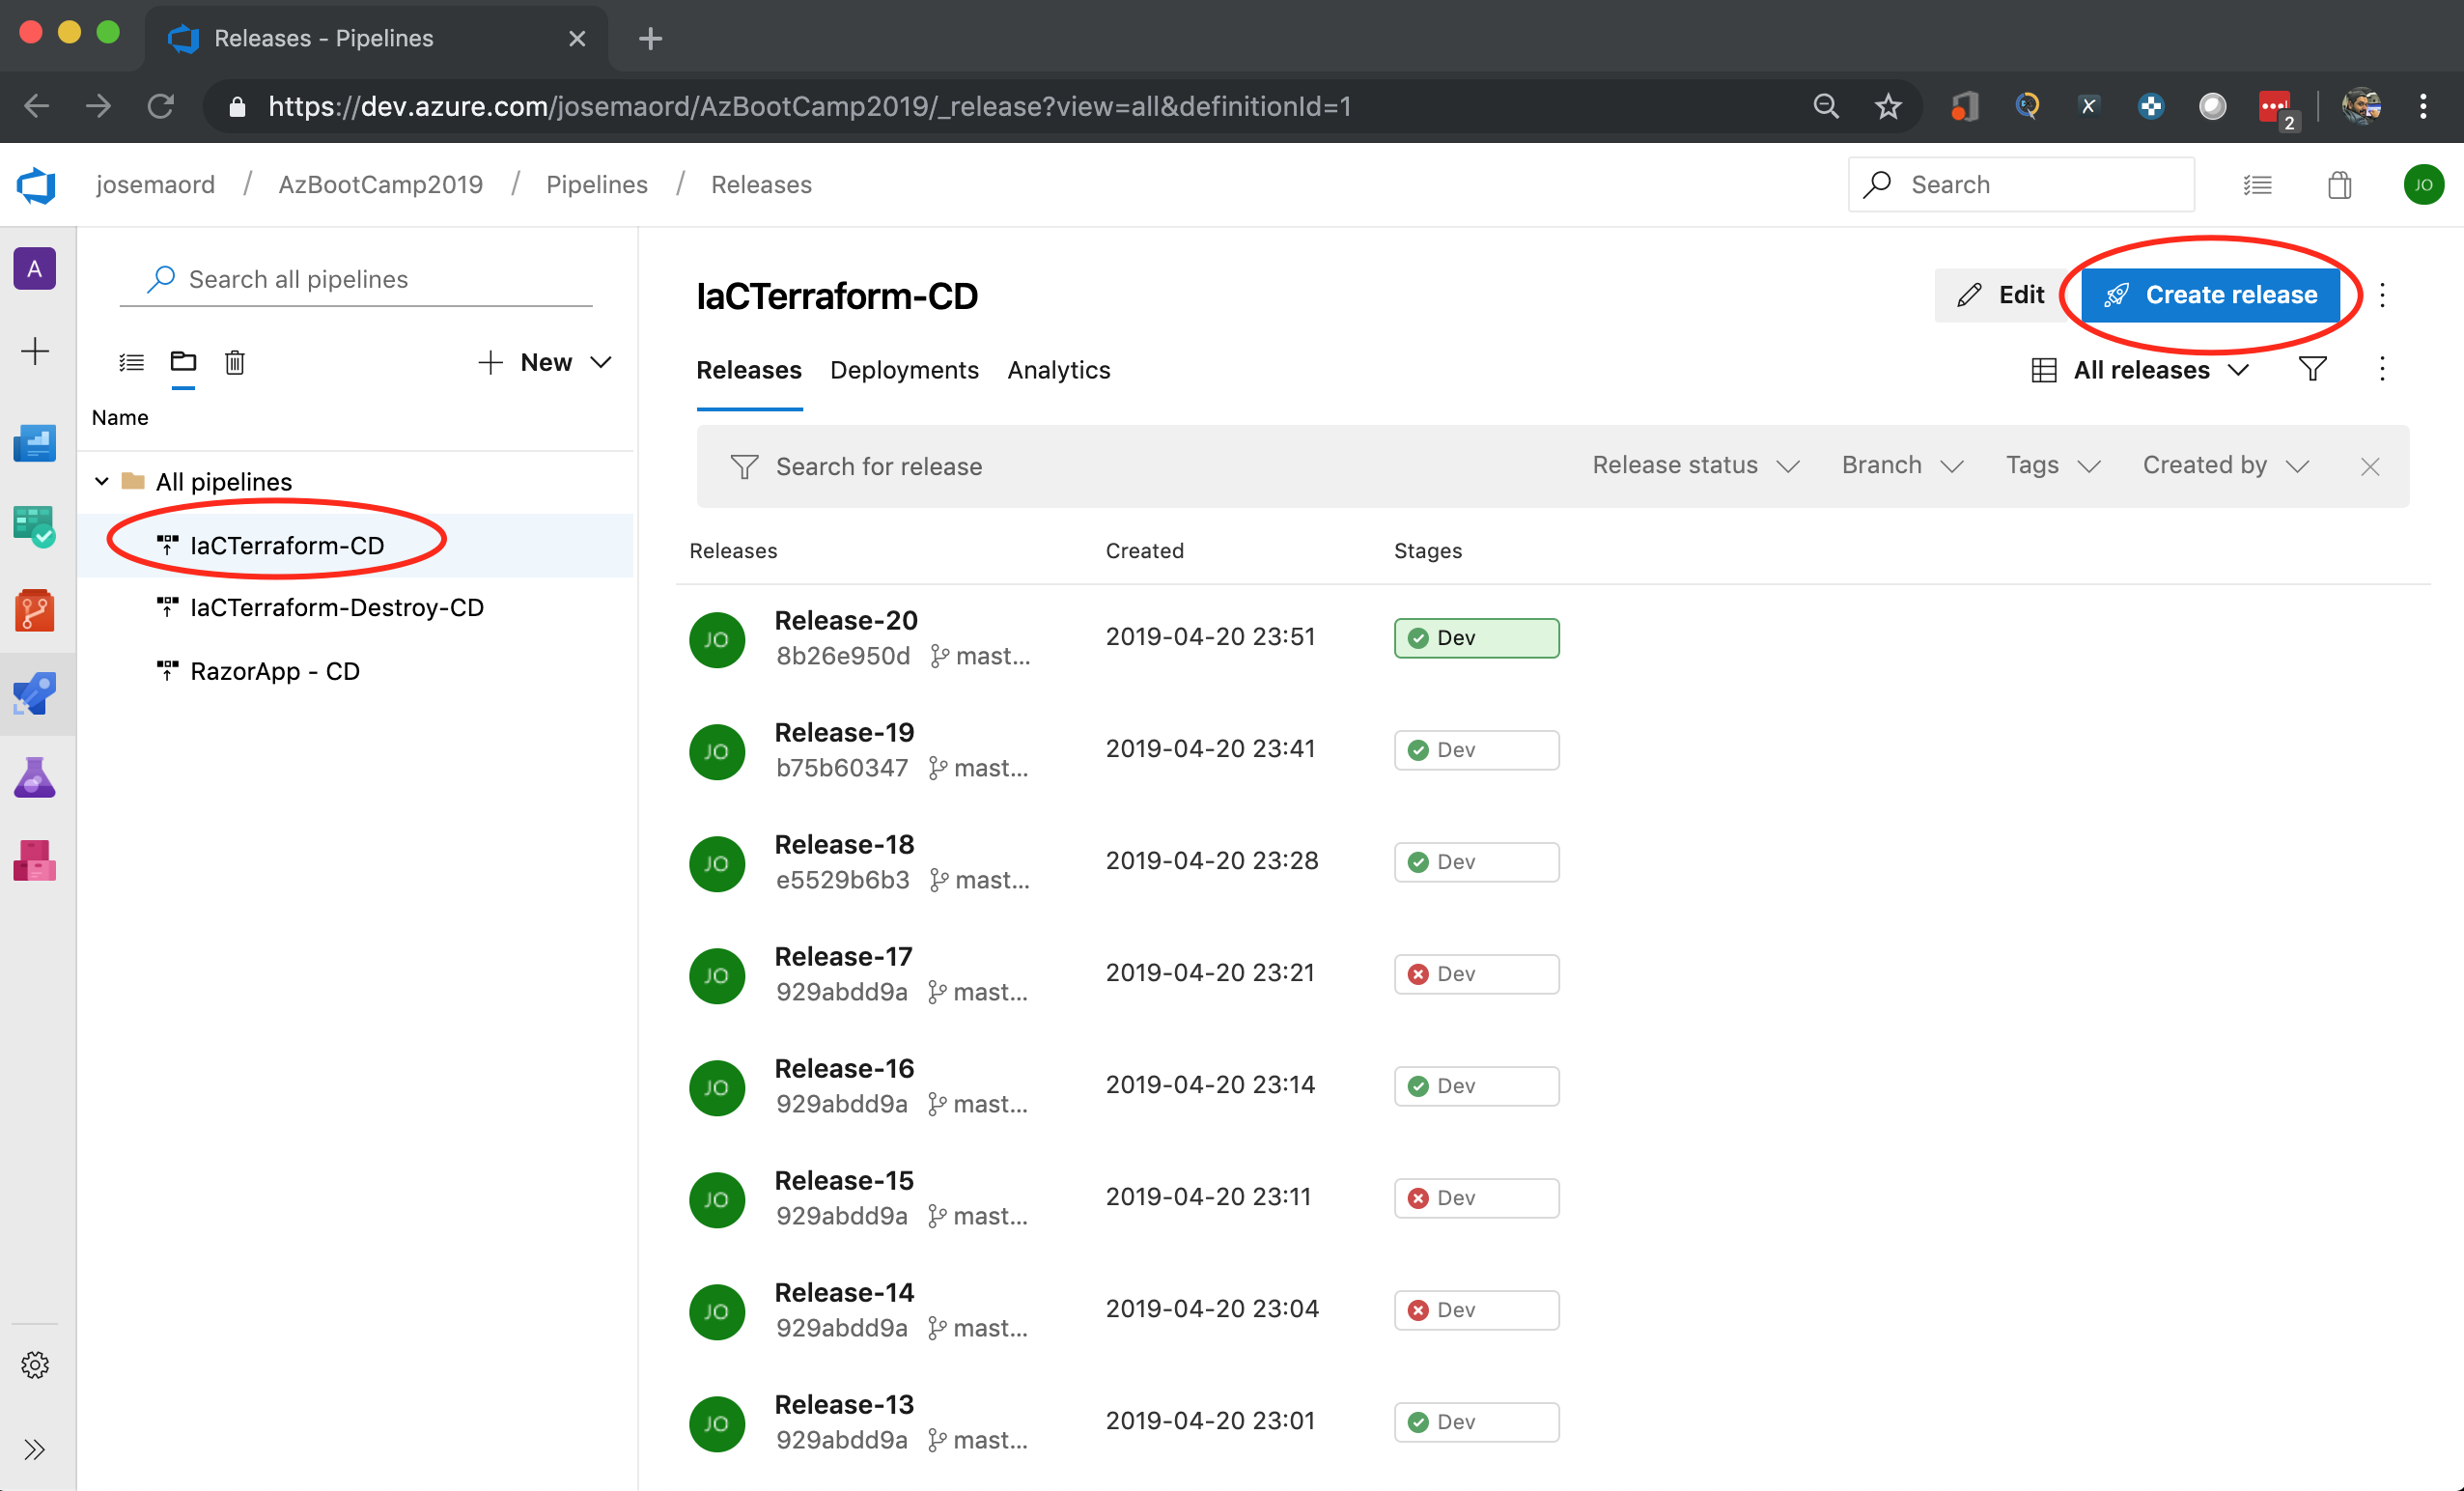

When the pipeline’s execution is completed you will be able the see the new infraestructure created in Azure. 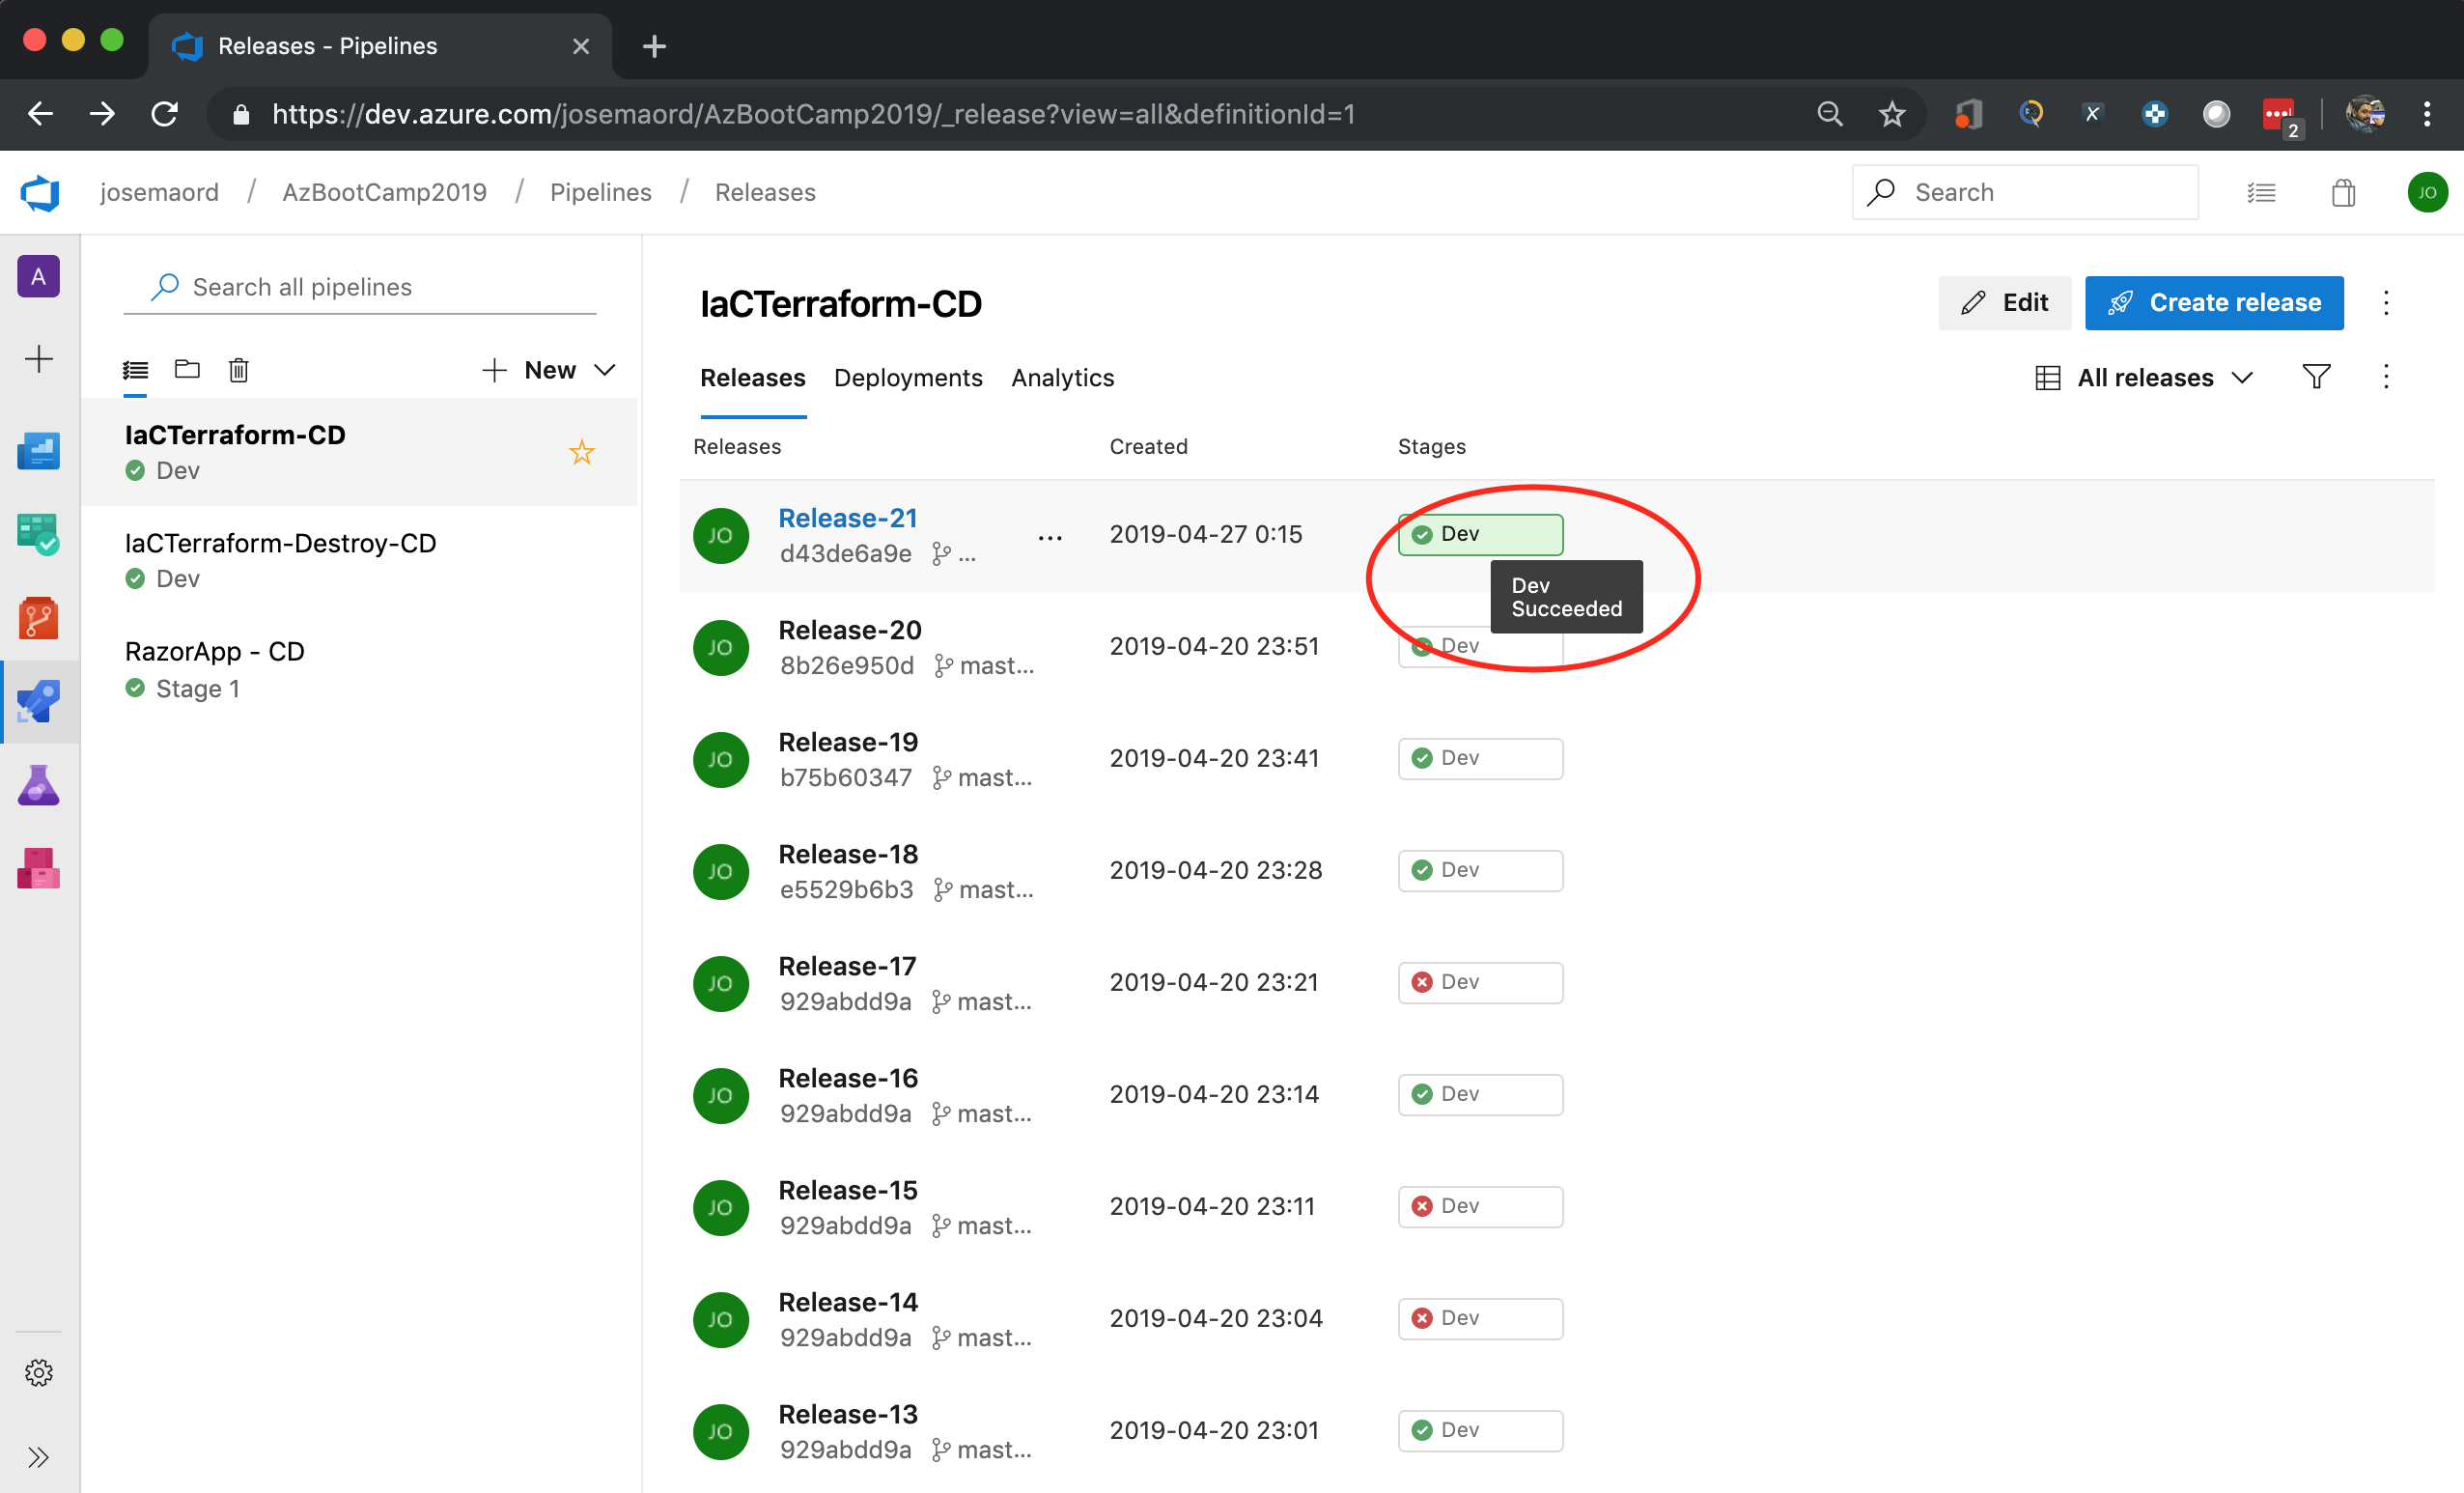
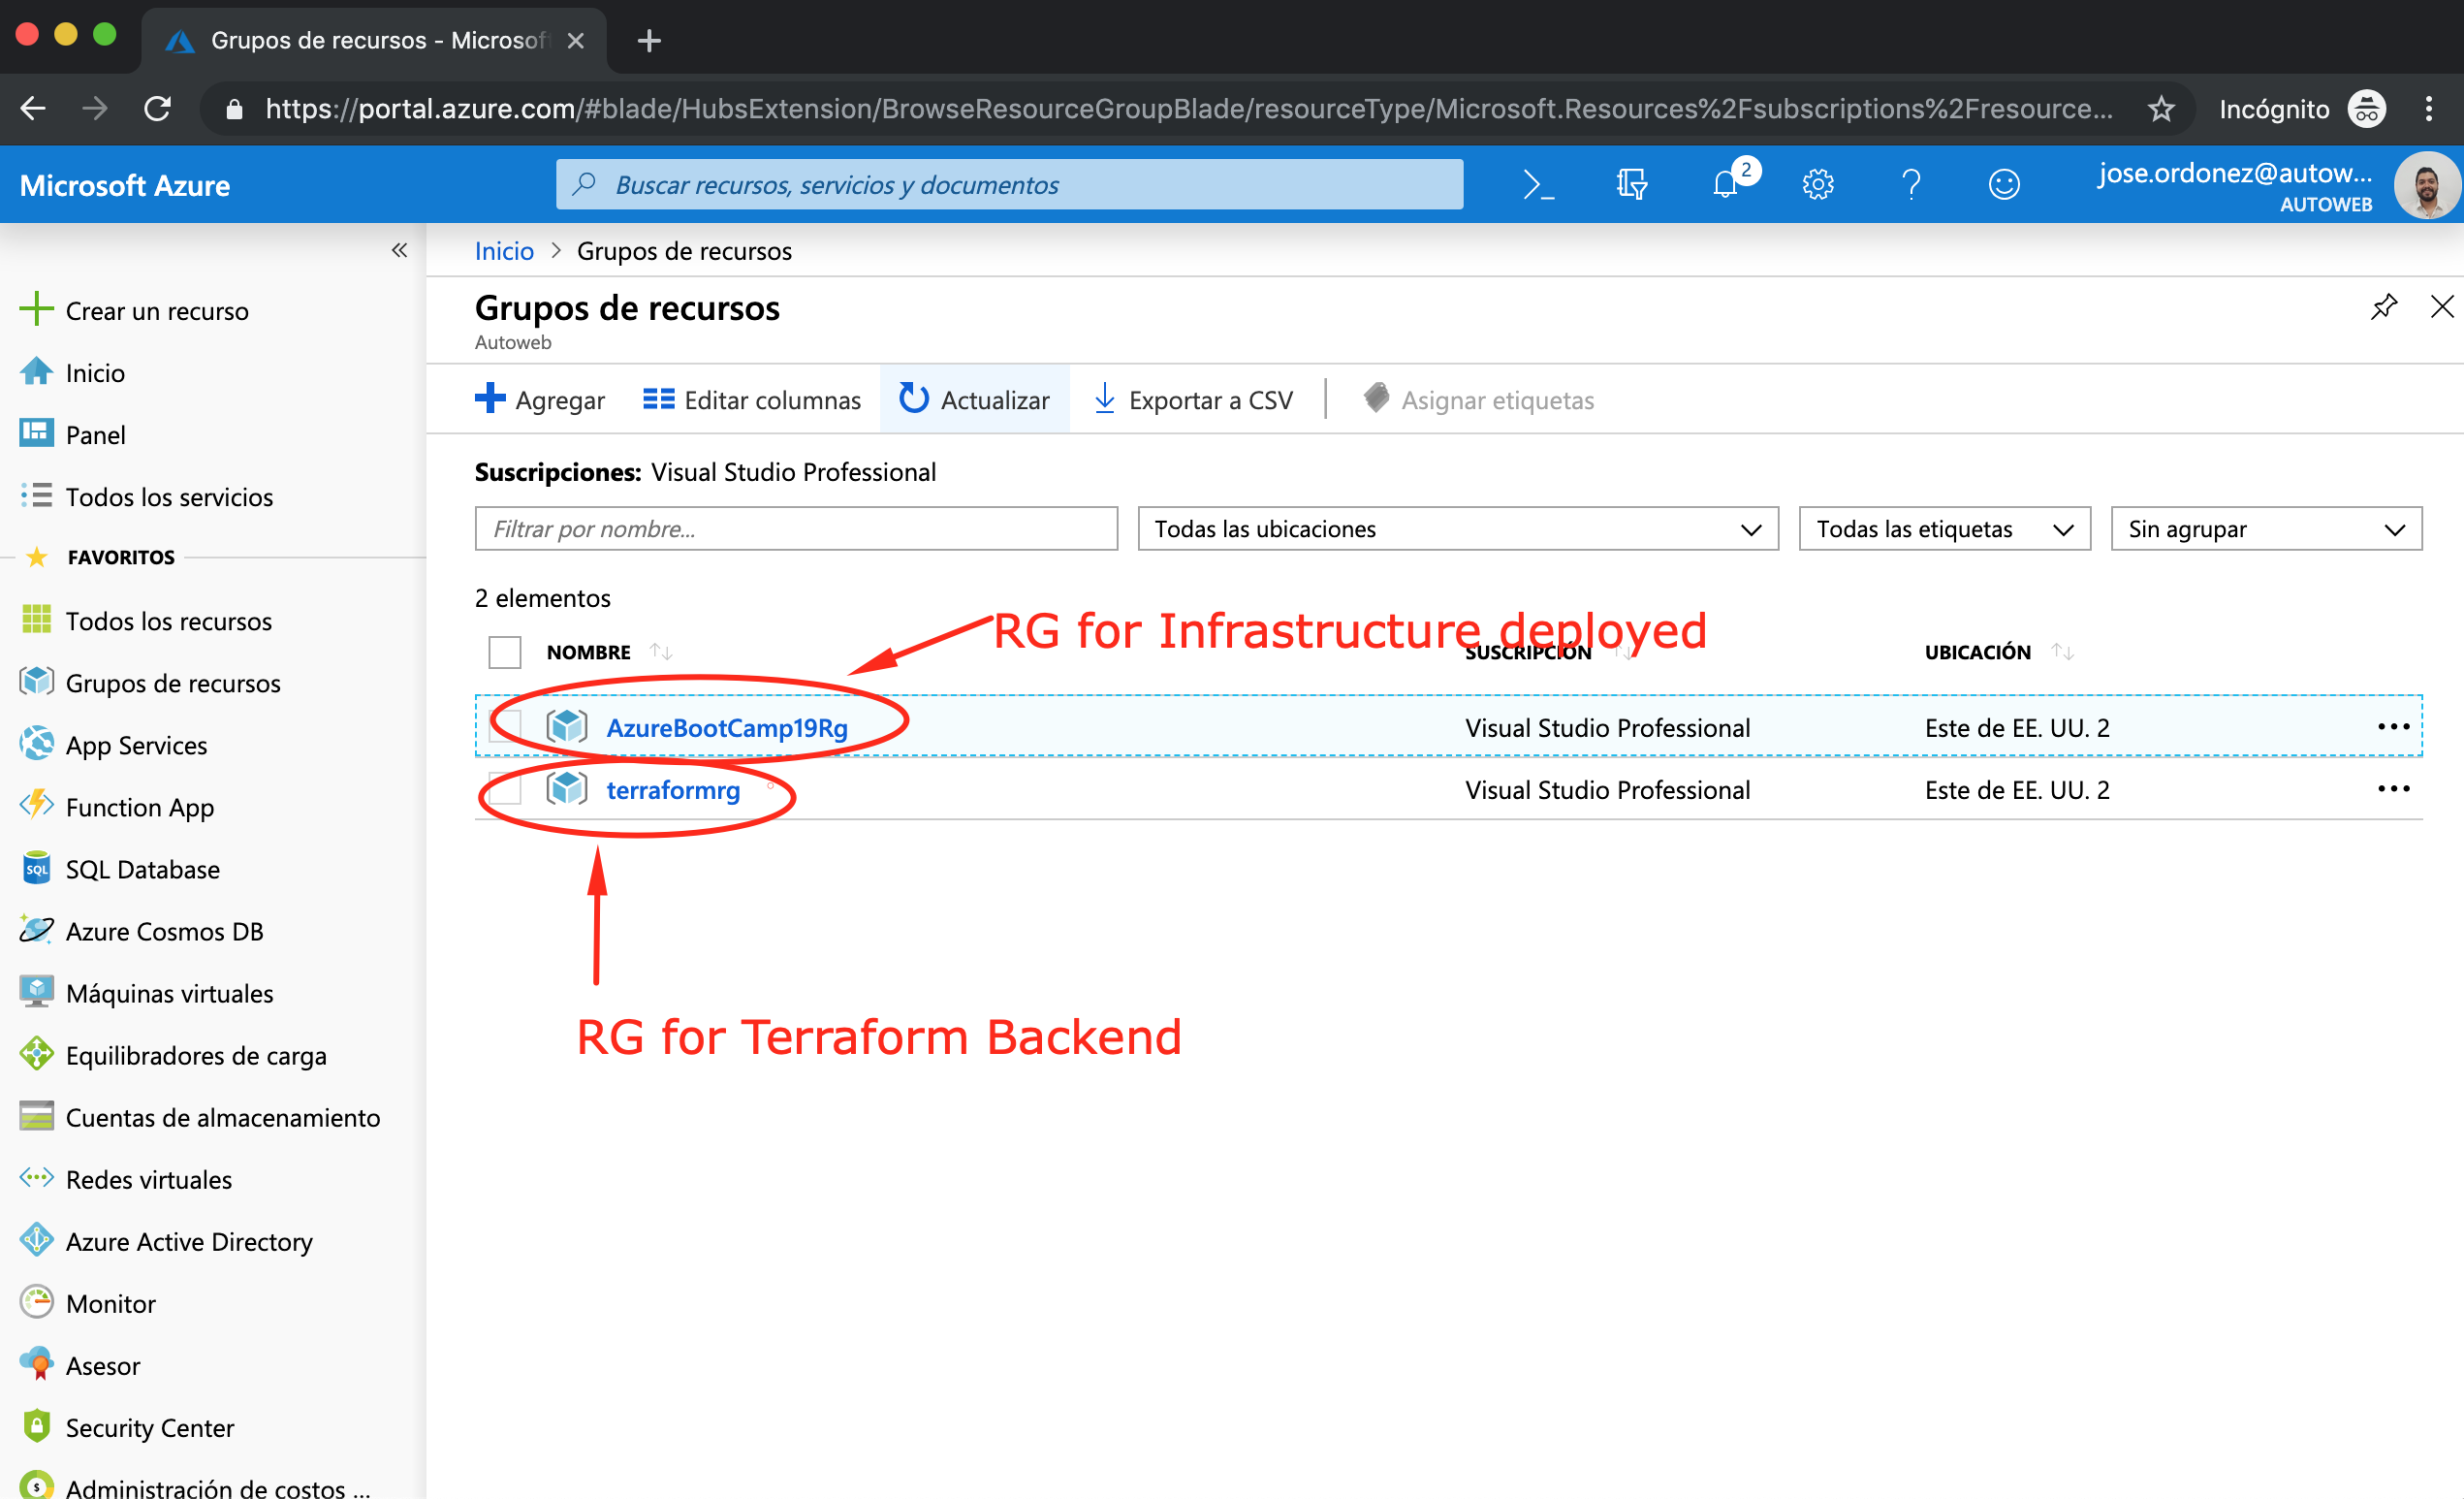
Within the RG for the App Service you will see the new infrastructure.
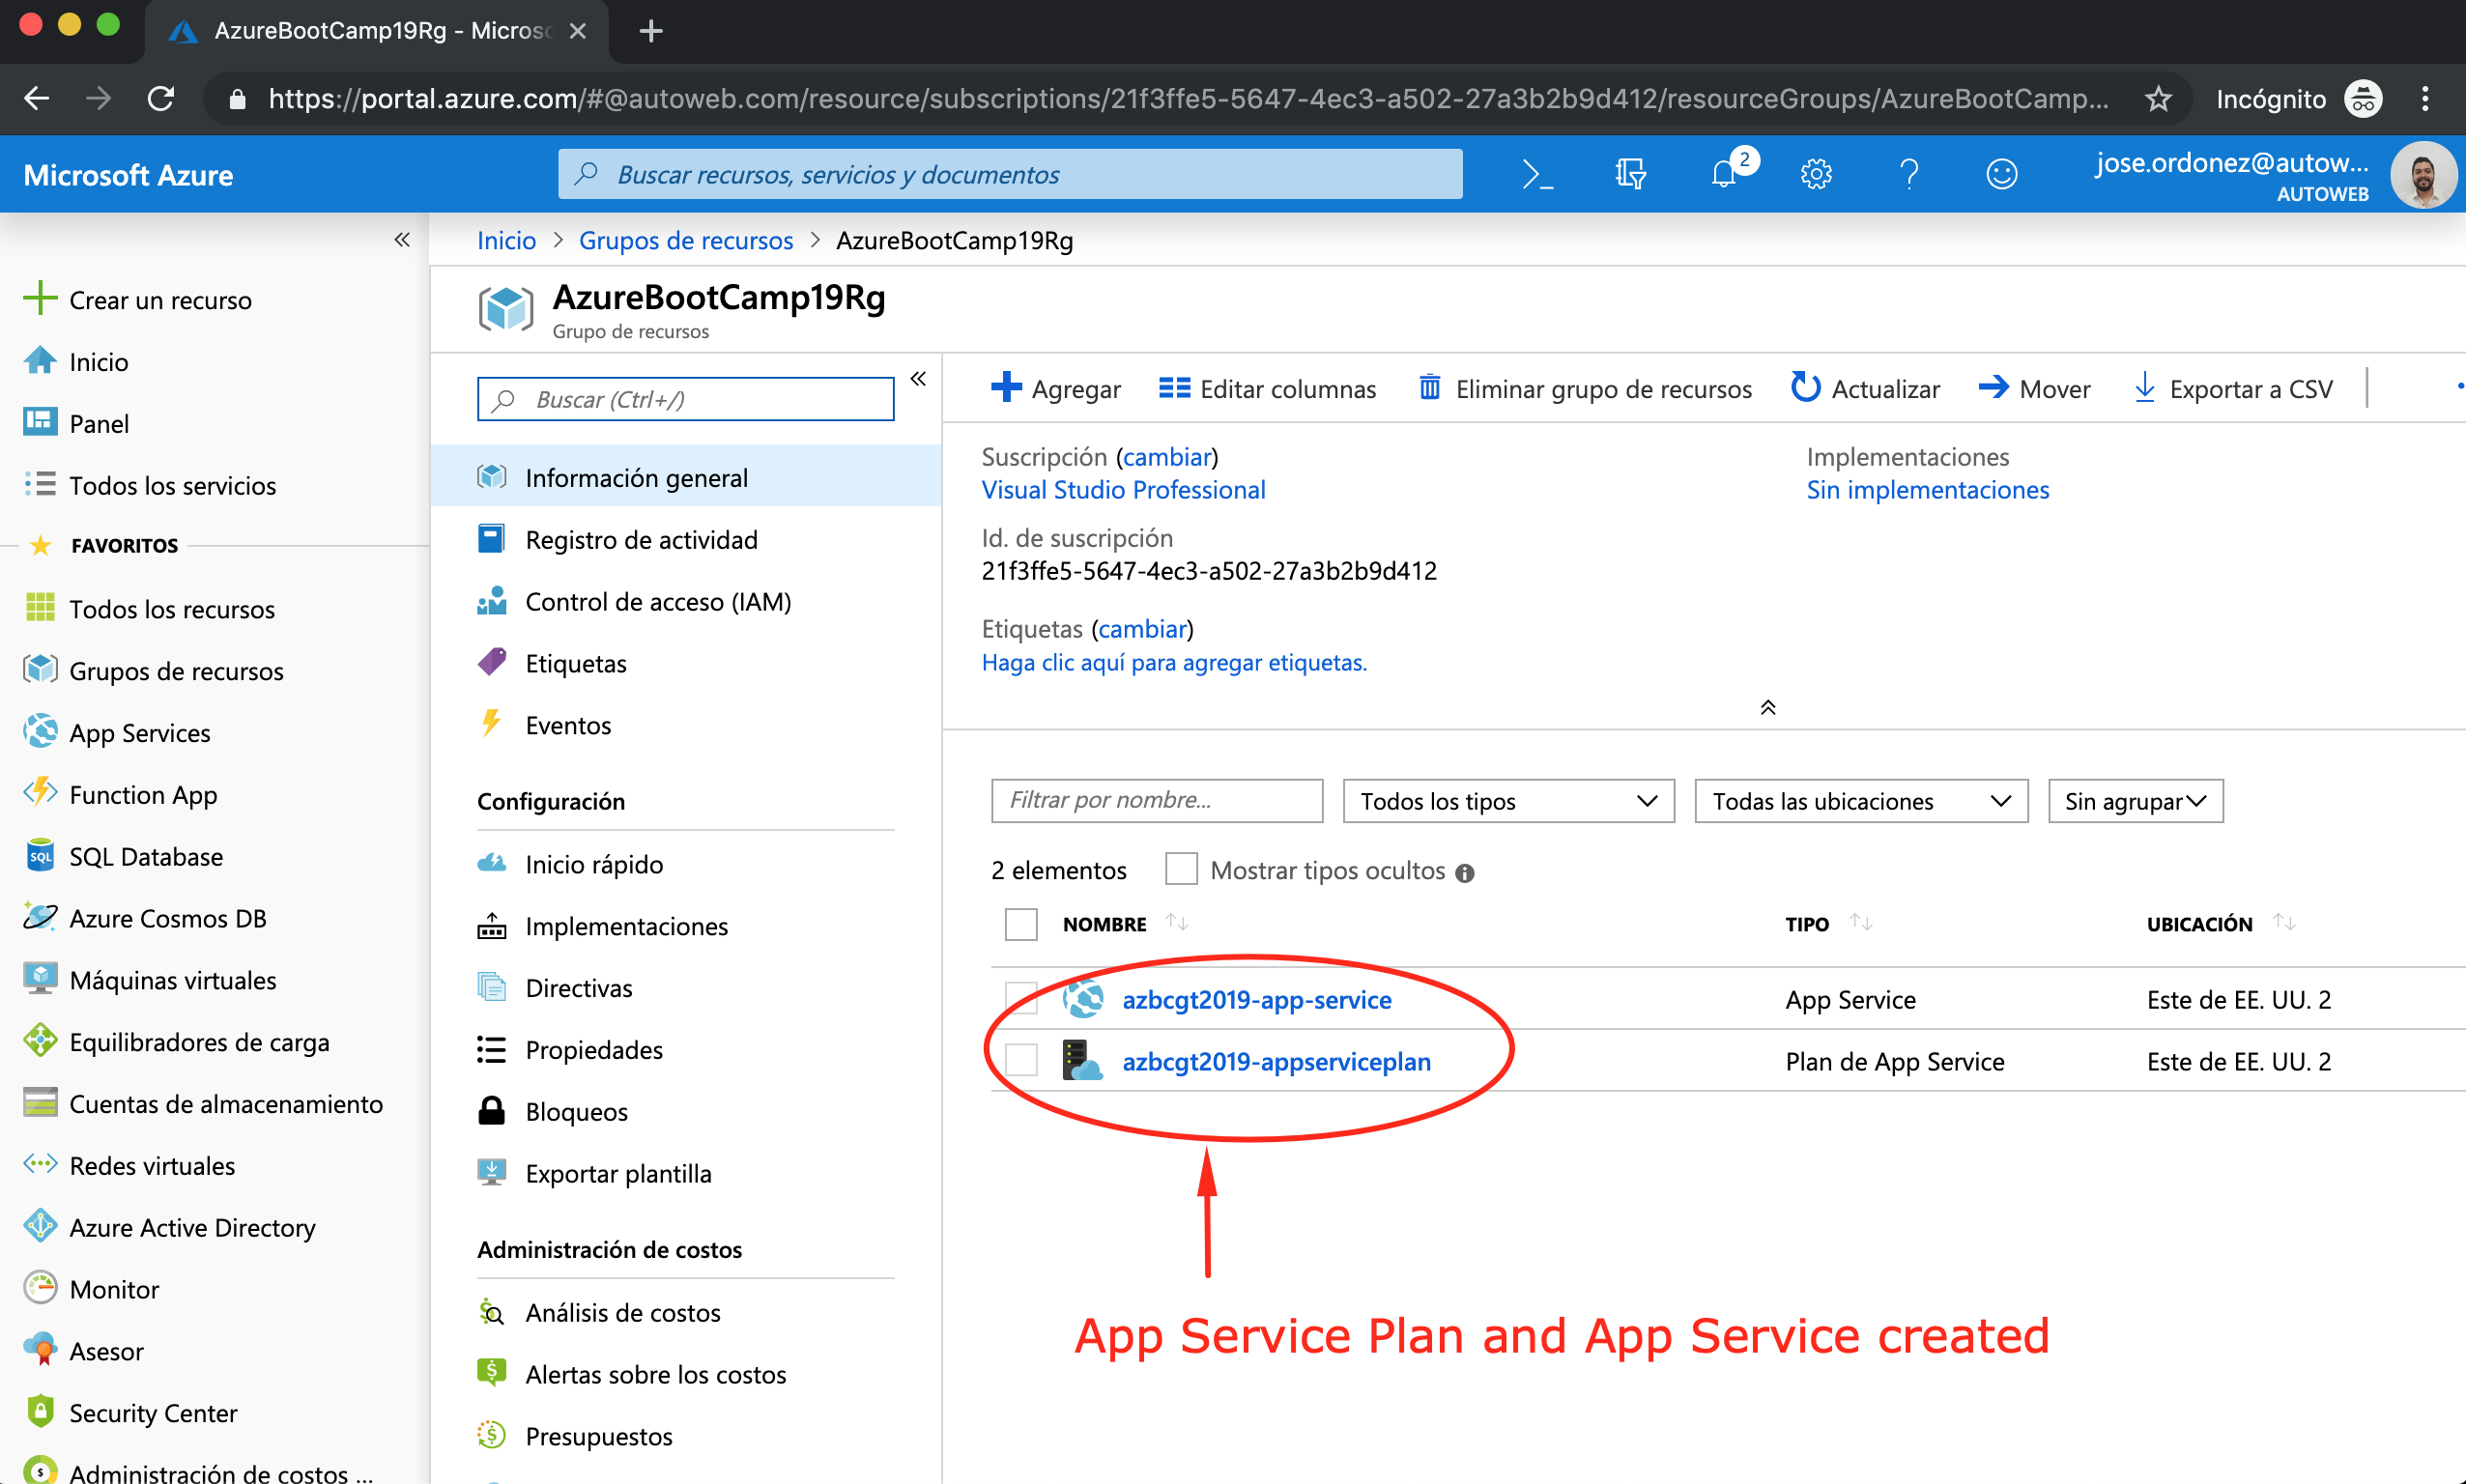
So we have an Azure App Service created that can be able to host a web app (.net for this tutorial). If you want to deploy an App Service with more compute capacity or different Runtime (maybe Docker) you can easily do that changing your infrastructure definitions on the .tf file.
Thanks for reading!